
Introduction
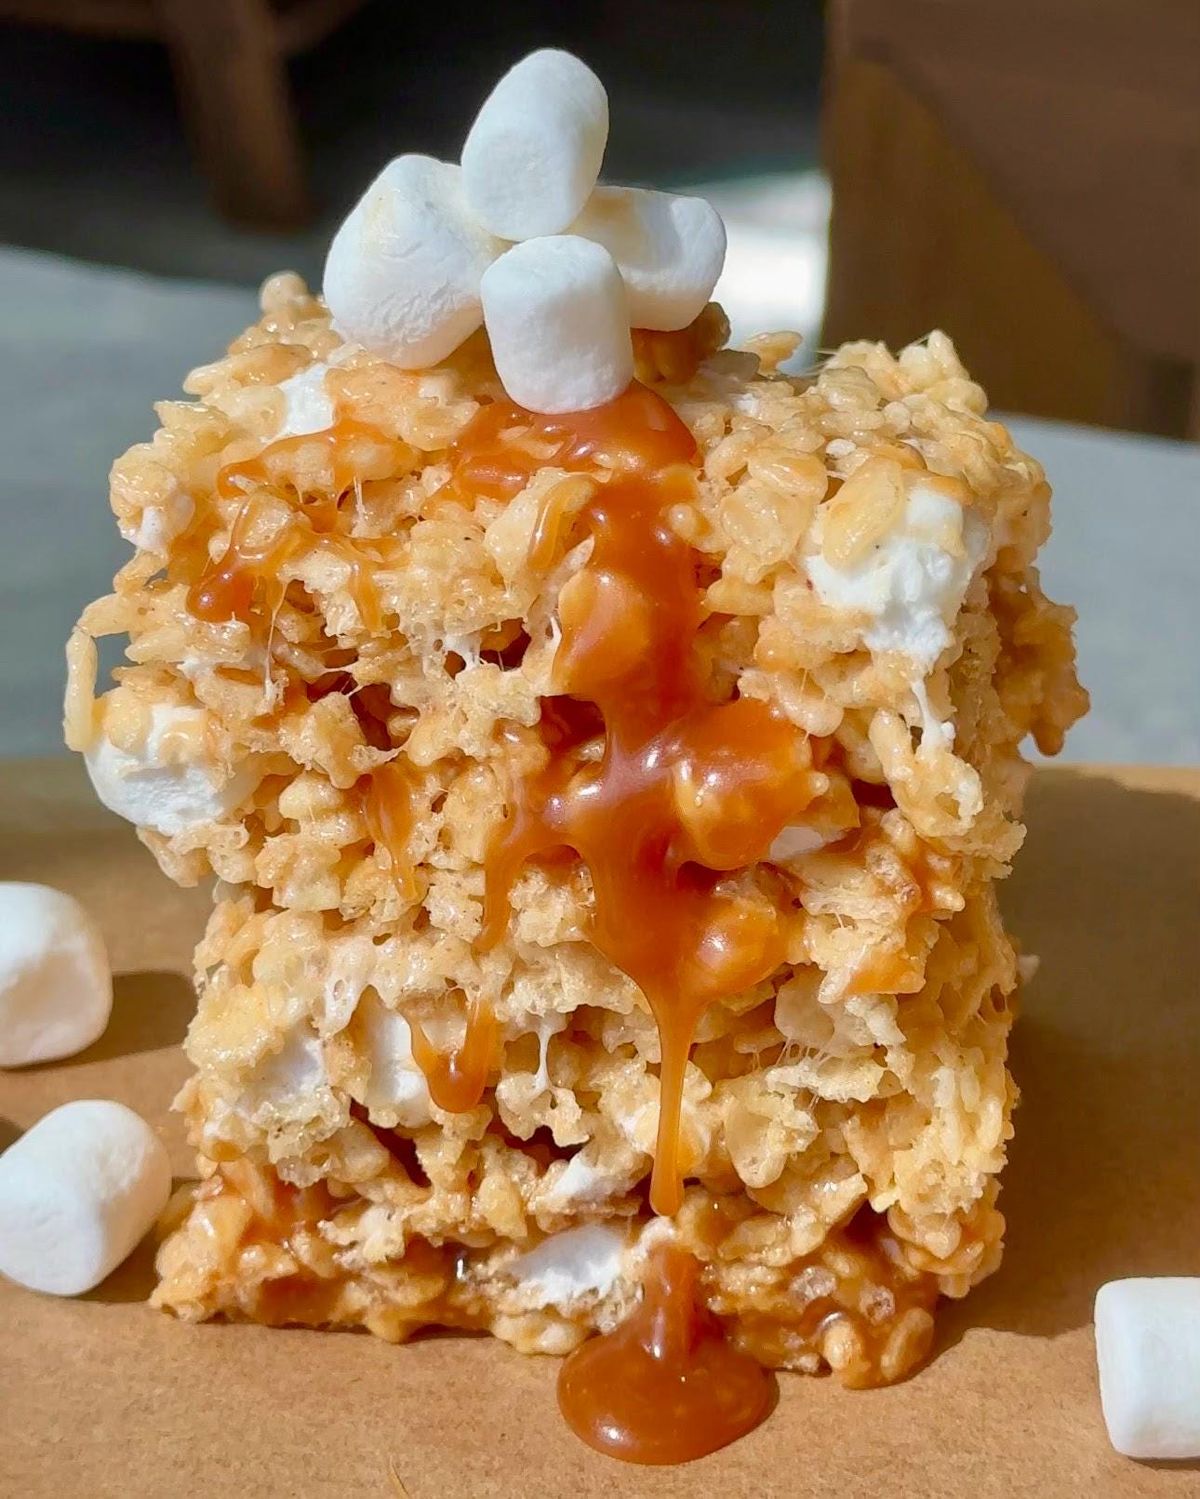
Get ready to rediscover a classic with a gourmet twist! Today, we’re taking the humble Rice Krispie Treat and elevating it to an irresistible dessert experience. Imagine chewy, crispy squares infused with the rich, nutty notes of brown butter, a delicate sprinkle of flaky sea salt, and a luxurious drizzle of creamy peanut butter. It’s a symphony of flavors and textures that will make your taste buds sing.
The best part? This incredible dessert is shockingly easy and quick to make. You don’t need any fancy equipment or advanced baking skills. In just a few simple steps, you’ll transform everyday ingredients into a show-stopping treat that tastes like it came from a high-end bakery. It’s perfect for last-minute cravings, potlucks, or just a delightful afternoon snack.
So, clear your counter, gather your ingredients, and prepare to be amazed. This recipe is more than just a sweet treat; it’s an experience. Trust me, once you try these Brown Butter Sea Salt Rice Krispie Treats with Peanut Butter Drizzle, you’ll never go back to the plain version again. Let’s get cooking!
Cooking Time & Prep Time
- Prep Time: 15 minutes
- Cooking Time: 5 minutes
- Total Time: 20 minutes (plus 30-60 minutes chilling time)
Small tip: Gather all your ingredients and equipment before you start cooking. This will make the process much smoother and quicker!
Ingredients
Makes 12-16 squares
For the Brown Butter Rice Krispie Treats:
- 8 tablespoons (113g) unsalted butter
- 10 ounces (about 40 large or 6 cups mini) marshmallows
- 1 teaspoon vanilla extract
- 6 cups Rice Krispies cereal
- ½ teaspoon flaky sea salt, plus more for sprinkling
For the Peanut Butter Drizzle:
- ½ cup creamy peanut butter
- 2 tablespoons unsalted butter
- 2 tablespoons powdered sugar
- 1-2 tablespoons milk (or plant-based milk), as needed for consistency
Step-by-Step Instructions
-
Step 1: Prepare Your Pan
Lightly grease a 9×13 inch baking pan with butter or non-stick cooking spray. You can also line it with parchment paper, leaving an overhang on the sides. This will make it super easy to lift the treats out later.
Small tip: The parchment paper overhang is a game-changer for clean removal and cutting!
-
Step 2: Brown the Butter
In a large pot or Dutch oven, melt 8 tablespoons of unsalted butter over medium heat. Continue to cook, stirring occasionally, until the butter turns a rich golden-brown color and smells nutty. You’ll see tiny brown bits form at the bottom of the pan. This usually takes about 5-7 minutes.
Small tip: Watch the butter carefully as it browns; it can go from perfect to burnt very quickly! Remove it from the heat as soon as you see those lovely brown bits.
-
Step 3: Melt the Marshmallows
Remove the pot from the heat immediately after browning the butter. Add the marshmallows to the hot brown butter and stir continuously until they are completely melted and smooth. The residual heat will do most of the work.
Small tip: If your marshmallows aren’t melting easily, you can return the pot to very low heat for just a moment, stirring constantly.
-
Step 4: Add Vanilla and Cereal
Once the marshmallows are fully melted, stir in the vanilla extract. Then, add the Rice Krispies cereal to the pot. Gently fold the cereal into the marshmallow mixture until every piece is evenly coated. Work quickly but gently to avoid crushing the cereal.
Small tip: Use a large rubber spatula for mixing; it helps prevent the mixture from sticking too much.
-
Step 5: Press into Pan
Transfer the mixture into your prepared 9×13 inch baking pan. Using a buttered spatula, a piece of parchment paper, or even damp hands, gently press the mixture evenly into the pan. Don’t press too hard, or your treats will become dense and hard.
Small tip: Lightly buttering your spatula or hands prevents the sticky marshmallow mixture from clinging.
-
Step 6: Sprinkle with Sea Salt
Immediately sprinkle ½ teaspoon of flaky sea salt evenly over the top of the pressed treats. The salt will adhere nicely to the warm, sticky surface. This adds a wonderful contrast to the sweetness.
-
Step 7: Prepare the Peanut Butter Drizzle
In a small microwave-safe bowl, combine the peanut butter, 2 tablespoons of unsalted butter, and powdered sugar. Microwave in 15-second intervals, stirring well after each, until the mixture is smooth and melted. Stir in milk, one tablespoon at a time, until you reach a pourable, drizzly consistency.
Small tip: Adjust the milk quantity slowly. You want a drizzle, not a watery sauce.
-
Step 8: Drizzle and Chill
Once the peanut butter drizzle is ready, use a spoon or a piping bag to generously drizzle it back and forth over the Rice Krispie Treats in the pan. Let the treats cool completely at room temperature for at least 30-60 minutes, or chill in the refrigerator for 15-20 minutes, until set.
-
Step 9: Cut and Serve
Once the treats are firm, use the parchment paper overhang to lift them out of the pan. Place them on a cutting board and cut into squares or rectangles using a sharp, buttered knife. Enjoy your elevated Rice Krispie Treats!
Small tip: For cleaner cuts, wipe your knife with a damp cloth or butter it between cuts.
Tips & Variations
- Gluten-Free Option: Simply ensure you use certified gluten-free Rice Krispies cereal. Most other ingredients are naturally gluten-free, but always check labels for cross-contamination.
- Vegan Option: Replace unsalted butter with a high-quality plant-based butter (like Miyoko’s Kitchen or Earth Balance sticks). Use vegan marshmallows (Dandies are a great brand) and ensure your peanut butter and milk are plant-based.
- Add More Protein: Stir in a handful of chopped roasted peanuts or almonds along with the Rice Krispies cereal for extra crunch and protein. You could also mix a tablespoon of protein powder (vanilla or unflavored) into the peanut butter drizzle, adjusting milk as needed.
- Spicy Kick: For a unique twist, add a tiny pinch (⅛ teaspoon) of cayenne pepper to the peanut butter drizzle mixture. It adds a subtle warmth that complements the sweetness beautifully.
- Chocolate Lover’s Delight: After pressing the treats into the pan, sprinkle ½ cup of chocolate chips (milk, dark, or semi-sweet) over the warm treats before the sea salt. The residual heat will slightly melt them, creating pockets of chocolatey goodness.
- Different Drizzles: Instead of peanut butter, try a melted dark chocolate drizzle, a caramel sauce, or even a white chocolate drizzle with a few sprinkles for a festive touch.
Nutritional Information
Approximate values per serving (based on 12 servings):
- Calories: 290
- Protein: 5g
- Carbohydrates: 38g
- Fat: 14g
Note: Nutritional values are approximate and may vary depending on specific brands and quantities of ingredients used.
Health Benefits
While these treats are undeniably a delicious indulgence, some of their key ingredients do offer a few nutritional perks:
- Peanut Butter Power: Peanut butter is a good source of plant-based protein, which is essential for muscle repair and growth. It also provides healthy monounsaturated and polyunsaturated fats, which can contribute to heart health. You’ll also find a dose of fiber, Vitamin E, B vitamins, magnesium, and potassium in each spoonful.
- Fortified Cereals: Many Rice Krispies cereals are fortified with essential vitamins and minerals, including B vitamins (like folic acid, niacin, and thiamin) and iron. These play crucial roles in energy production and red blood cell formation.
- Sea Salt Minerals: While used in small amounts, flaky sea salt contains trace minerals like magnesium, calcium, and potassium. These minerals are vital for various bodily functions, including nerve and muscle function.
- Mindful Indulgence: Sometimes, the greatest health benefit comes from enjoying a treat mindfully. Allowing yourself to savor a delicious dessert can contribute to overall well-being and happiness, reducing feelings of deprivation.
Serving Suggestions
- Coffee Break Bliss: These treats are the perfect companion to your morning coffee or afternoon tea.
- Dessert Platter Star: Cut them into smaller squares and arrange them on a dessert platter with fresh berries or other small cookies for a delightful spread.
- Kids’ Party Favorite: A guaranteed hit at birthday parties or playdates. They’re easy for little hands to hold and enjoy!
- Movie Night Snack: Elevate your cozy movie night with these upgraded treats alongside popcorn and your favorite beverage.
Storage Tips
Store leftover Rice Krispie Treats in an airtight container at room temperature for up to 3-4 days. While they can be refrigerated, they might become a bit harder, so allow them to come to room temperature before serving for the best texture. Freezing is generally not recommended for Rice Krispie Treats as it can significantly alter their texture, making them too hard and sometimes crumbly upon thawing. There’s no need to reheat them; they are best enjoyed at room temperature.
Conclusion
And there you have it – a truly extraordinary take on a childhood favorite! These Brown Butter Sea Salt Rice Krispie Treats with Peanut Butter Drizzle are more than just a dessert; they’re a testament to how a few simple additions can transform something familiar into an unforgettable culinary delight. The nutty richness of brown butter, the delicate crunch of sea salt, and the creamy sweetness of peanut butter create a symphony of flavors that will leave everyone asking for the recipe.
Don’t be intimidated by the “gourmet” tag; this recipe remains incredibly easy and quick to whip up. It’s the perfect project for a rainy afternoon, a quick treat for unexpected guests, or simply a way to spoil yourself and your loved ones. The minimal effort yields maximum reward, I promise!
So, go ahead, give this recipe a try. You’ll be amazed at how simple it is to create something so incredibly delicious. Share these elevated treats with family and friends, and watch their faces light up with every delightful bite. Happy baking, and happy eating!


