
Introduction
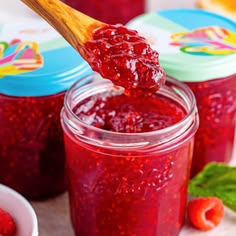
There’s nothing quite like a jar of homemade raspberry jam. It’s bursting with bright, sweet-tart flavor. Each spoonful brings a taste of summer, no matter the season. This jam is truly special because it’s made with simple, fresh ingredients, offering a pure fruit taste that store-bought versions often lack.
You might think making jam is complicated, but it’s surprisingly easy. Our recipe uses just a few basic ingredients and a straightforward process. You don’t even need any special equipment beyond a good pot and some jars. It’s a rewarding kitchen project that yields delicious results with minimal fuss.
So, get ready to fill your kitchen with the sweet aroma of fresh raspberries. This recipe will guide you step-by-step to create your very own batch of beautiful, vibrant jam. We promise, once you try it, you’ll want to make it again and again!
Cooking Time & Prep Time
- Prep Time: 20 minutes
- Cooking Time: 30-35 minutes
- Total Time: 50-55 minutes
Small tip: Start sterilizing your jars and lids while you prepare the raspberries. This makes the whole process smoother and more efficient.
Ingredients
This recipe makes approximately 4-5 half-pint (8 oz) jars of delicious raspberry jam.
- 4 cups (about 20 oz or 560g) fresh or frozen raspberries
- 4 cups (about 800g) granulated sugar
- 2 tablespoons fresh lemon juice (from about 1 medium lemon)
- ½ teaspoon unsalted butter (optional, to reduce foam)
- 4-5 half-pint (8 oz) canning jars with new lids and rings
Step-by-Step Instructions
Step 1: Sterilize Jars and Lids
First, you need to prepare your canning jars. Wash the jars, lids, and rings thoroughly with hot, soapy water. Rinse them well. Place the clean jars in a large pot and cover them with water by at least one inch. Bring the water to a boil and boil for 10 minutes to sterilize. Keep the jars in the hot water until you are ready to fill them.
Small tip: You can also sterilize jars in a dishwasher on a hot cycle, or in an oven at 225°F (107°C) for 20 minutes. Just make sure they stay warm until filling.
Step 2: Prepare the Raspberries
If using fresh raspberries, gently rinse them under cool water. Pat them dry with a paper towel. If using frozen raspberries, there’s no need to thaw them first. Simply place them directly into your large, heavy-bottomed pot. Gently crush a few of the raspberries with a potato masher or fork to help release their juices.
Small tip: Don’t over-mash the raspberries if you prefer a jam with more whole fruit pieces. A light crush is usually enough.
Step 3: Combine Ingredients
Add the granulated sugar and fresh lemon juice to the pot with the raspberries. Stir everything together gently to combine. If you are using butter, add it now. The butter helps to reduce the amount of foam that forms on top of the jam as it cooks.
Small tip: Lemon juice is crucial! It not only adds brightness but also helps the jam set due to its natural pectin.
Step 4: Bring to a Boil
Place the pot over medium-high heat. Stir constantly until the sugar dissolves completely. Once the sugar has dissolved, bring the mixture to a full, rolling boil that cannot be stirred down. This means the bubbles are vigorous and continuous. This stage is very important for proper setting.
Small tip: A full, rolling boil ensures that the jam reaches the correct temperature for setting. Don’t rush this step.
Step 5: Simmer and Thicken
Once at a rolling boil, maintain the heat and continue to boil for about 25-35 minutes. Stir frequently to prevent sticking and scorching. As it cooks, the jam will thicken. Skim off any foam that rises to the surface with a spoon, especially if you didn’t use butter.
Small tip: Keep a close eye on the jam during this stage. It can go from perfect to overcooked quickly.
Step 6: Test for Doneness
To check if your jam is ready, place a small plate in the freezer for a few minutes before you start cooking. When you think the jam is done, spoon a small amount onto the cold plate. Let it sit for 30 seconds, then push it with your finger. If it wrinkles, it’s ready! If not, continue cooking for a few more minutes and test again.
Small tip: You can also use a candy thermometer; the jam is ready when it reaches 220°F (104°C) at sea level. Adjust for higher altitudes.
Step 7: Ladle into Jars
Carefully remove the sterilized jars from the hot water. Ladle the hot jam into the warm jars, leaving about ¼ inch of headspace from the rim. Wipe the rims of the jars clean with a damp cloth. Place the lids on top and screw on the rings until they are fingertip tight.
Small tip: Use a canning funnel to help keep the jar rims clean. Any jam on the rim can prevent a proper seal.
Step 8: Process Jars (Water Bath Canning)
Place the filled jars back into the large pot, ensuring they are covered with at least one inch of water. Bring the water to a boil and process the jars for 10 minutes. This step creates a vacuum seal, making the jam shelf-stable. After 10 minutes, turn off the heat and let the jars sit in the hot water for another 5 minutes before removing them.
Small tip: Use a jar lifter to safely place and remove hot jars from the boiling water.
Step 9: Cool and Store
Carefully remove the jars from the pot and place them on a wire rack or a towel-lined counter. Do not disturb them for 12-24 hours. As they cool, you should hear a “pop” sound as the lids seal. Check for a proper seal by pressing the center of each lid; it should not flex. Store properly sealed jars in a cool, dark place. Any unsealed jars should be refrigerated and consumed within 3-4 weeks.
Small tip: Properly sealed jars can be stored in your pantry for up to one year!
Tips & Variations
- Gluten-Free Option: This homemade raspberry jam is naturally gluten-free! All ingredients are typically free from gluten.
- Vegan/Vegetarian Option: This recipe is also naturally vegan and vegetarian. No animal products are used.
- Adding More Fruit or Flavor: For a twist, try adding a handful of blueberries or blackberries along with the raspberries. You could also infuse the jam with a sprig of fresh mint or a few basil leaves during the last 5 minutes of cooking, removing them before jarring.
- Spicy Version: For a surprising kick, add a tiny pinch of red pepper flakes or a teaspoon of finely minced jalapeño (seeds removed for less heat) to the jam while it simmers. Start small and taste carefully!
- Reduced Sugar Option: If you prefer less sweetness, you can reduce the sugar to 3 cups. However, be aware that this might affect the jam’s setting consistency and shelf life if not processed correctly. You may need to add a low-sugar pectin if reducing sugar significantly.
- Mixed Citrus Flavor: Instead of just lemon juice, try a mix of lemon and lime juice, or even a splash of orange juice for a different citrusy note.
Nutritional Information
Approximate values per serving (based on 5 servings, for one 8 oz jar):
- Calories: 720 kcal
- Protein: 2g
- Carbohydrates: 180g
- Fat: 1g
Please note: These values are approximate and may vary depending on the exact ingredients used and specific preparation methods.
Health Benefits
Homemade raspberry jam, especially when made with fresh fruit, offers some wonderful health benefits. Raspberries are little powerhouses of nutrition. They are packed with antioxidants, which help protect your body’s cells from damage. These antioxidants contribute to overall well-being and can help reduce inflammation.
Raspberries are also an excellent source of dietary fiber. Fiber is essential for a healthy digestive system, aiding in regularity and promoting gut health. It can also help you feel full longer, which is a nice bonus.
Furthermore, raspberries provide a good amount of Vitamin C. This vitamin is crucial for a strong immune system, helping your body fight off illness. They also contain manganese, which plays a role in bone health and metabolism, and Vitamin K, important for blood clotting.
While this jam does contain sugar, the vibrant fruit base ensures you’re getting a dose of beneficial vitamins, minerals, and fiber. Enjoying it in moderation allows you to savor the taste and still benefit from the fruit’s goodness.
Serving Suggestions
- Classic Toast Topper: Spread generously on warm toast, English muffins, or fresh scones for a delightful breakfast or snack.
- Yogurt & Oatmeal Mix-in: Stir a spoonful into your morning yogurt or bowl of oatmeal for a burst of fruity flavor.
- Dessert Delight: Drizzle over vanilla ice cream, use as a filling for thumbprint cookies, or swirl into cheesecake batter.
- Savory Pairing: It makes a fantastic glaze for roasted chicken or pork. The sweet-tart notes complement savory meats beautifully.
- Cheese Board Addition: Serve alongside soft cheeses like brie or goat cheese on a charcuterie board.
Storage Tips
Properly water-bath canned jars of raspberry jam will keep for up to 1 year in a cool, dark pantry. Once a jar is opened, or if it wasn’t processed via water bath, it must be stored in the refrigerator. In the fridge, it will last for 3-4 weeks. Freezing is an option for unsealed jam; transfer it to freezer-safe containers, leaving headspace, and it can be stored for up to 6 months. There’s no need to reheat jam; it’s best enjoyed at room temperature or slightly chilled.
Conclusion
And there you have it – your very own homemade raspberry jam! This recipe proves that making something so delicious can also be incredibly simple and satisfying. The vibrant color, the fresh taste, and the pure joy of knowing you made it yourself are truly unmatched. It’s a wonderful way to capture the essence of summer in a


