
Introduction
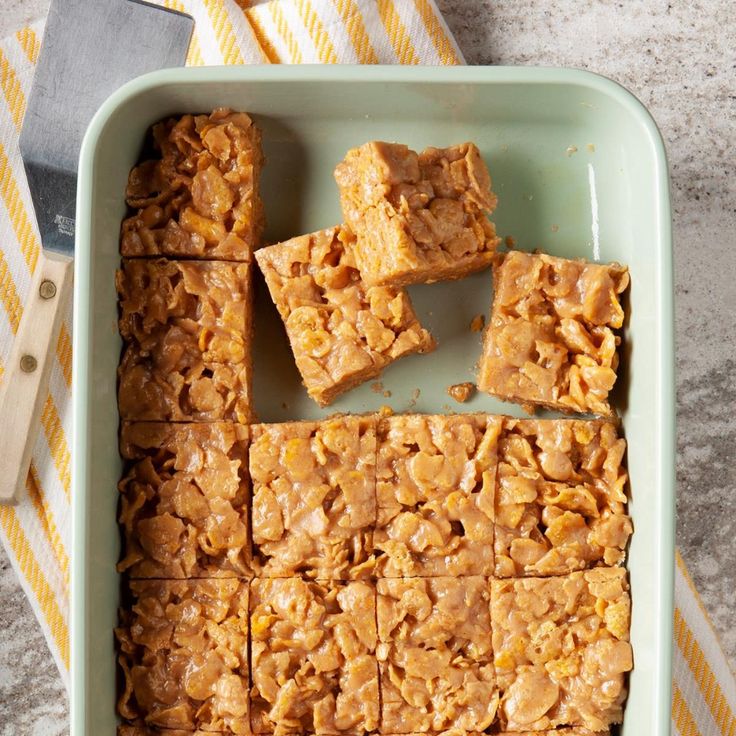
Get ready to discover your new favorite no-bake treat! These Peanut Butter Cornflake Bars are an absolute dream. They are wonderfully crunchy, delightfully chewy, and packed with that irresistible sweet and salty peanut butter flavor we all adore. They’re a nostalgic classic for a reason, bringing smiles with every bite!
The best part? These bars are incredibly easy and quick to make. You don’t even need to turn on your oven! With just a few simple ingredients and a single saucepan, you can whip up a batch in minutes. It’s the perfect recipe for when you need a delicious dessert or snack without a lot of fuss.
So, whether you’re looking for a quick after-school snack, a simple potluck dessert, or just a sweet craving satisfier, these Peanut Butter Cornflake Bars are here to save the day. Trust me, once you try them, they’ll become a regular in your kitchen. Let’s get cooking!
Cooking Time & Prep Time
- Prep Time: 15 minutes
- Chilling Time: 60 minutes (minimum)
- Total Time: 75 minutes
Small tip: For faster chilling, you can place the bars in the freezer for about 30 minutes instead of the fridge.
Ingredients
This recipe makes approximately 16 servings.
- 1 cup (2 sticks) unsalted butter
- 1 cup granulated sugar
- 1 cup light corn syrup (or honey for a slightly different flavor)
- 1 ½ cups creamy peanut butter
- 1 teaspoon pure vanilla extract
- 10 cups cornflakes cereal
Step-by-Step Instructions
-
Step 1: Prepare Your Pan
First, get your baking pan ready. Line a 9×13 inch baking pan with parchment paper. Make sure to leave an overhang on the sides. This will make lifting the finished bars out super easy.
Small tip: You can also lightly grease the parchment paper for extra insurance against sticking, though it’s usually not necessary.
-
Step 2: Melt the Wet Ingredients
In a large saucepan, combine the butter, granulated sugar, and light corn syrup. Place the saucepan over medium heat. Stir continuously until the butter is completely melted and the sugar has dissolved. Bring the mixture to a gentle boil.
-
Step 3: Add Peanut Butter and Vanilla
Once the mixture reaches a gentle boil, remove the saucepan from the heat immediately. Stir in the creamy peanut butter until it is fully melted and smooth. Then, add the pure vanilla extract and mix until well combined.
Small tip: Don’t overcook the mixture after it boils, as this can make the bars too hard. Just a gentle boil is perfect!
-
Step 4: Combine with Cornflakes
Now it’s time for the cornflakes! Pour the 10 cups of cornflakes into the large saucepan with the peanut butter mixture. Gently fold the cornflakes into the warm mixture using a large spoon or spatula. Make sure all the cornflakes are evenly coated.
Small tip: Be gentle when mixing to avoid crushing the cornflakes too much. You want those lovely crunchy bits!
-
Step 5: Press into the Pan
Transfer the coated cornflake mixture into your prepared 9×13 inch baking pan. Use the back of a spoon, a spatula, or even your clean hands (lightly buttered to prevent sticking) to press the mixture down firmly and evenly into the pan. Make sure it’s packed tightly from edge to edge.
-
Step 6: Chill and Set
Once pressed, place the pan in the refrigerator. Let the Peanut Butter Cornflake Bars chill for at least 1 hour, or until they are completely firm. This chilling time is crucial for them to set properly and be easy to cut.
-
Step 7: Cut and Serve
Once firm, use the parchment paper overhang to lift the entire slab of bars out of the pan. Place it on a cutting board. Use a sharp knife to cut the slab into squares or rectangles of your desired size. Serve immediately and enjoy!
Tips & Variations
- Gluten-Free Option: Most cornflakes are naturally gluten-free, but always check the label to ensure they are certified gluten-free if you have a sensitivity or allergy.
- Vegan Option: To make these bars vegan, simply swap the butter for a plant-based vegan butter alternative. For the corn syrup, use maple syrup or agave nectar. Also, ensure your peanut butter is vegan-friendly (most are, but always check).
- Add More Protein/Healthy Fats: For an extra boost, stir in a ½ cup of chopped roasted peanuts, almonds, or even chia seeds along with the cornflakes. You could also gently fold in a scoop of unflavored or vanilla protein powder with the peanut butter.
- Spicy Kick: If you love a little heat, add a tiny pinch (¼ teaspoon) of cayenne pepper or chili powder to the melted butter mixture. It creates a surprising and delicious sweet-spicy contrast!
- Chocolate Drizzle: For an extra decadent touch, melt ½ cup of chocolate chips (milk, dark, or white) with a teaspoon of coconut oil. Drizzle this over the chilled bars before cutting. Let the chocolate set, then slice.
- Other Cereal Fun: Don’t limit yourself to cornflakes! Try this recipe with Rice Krispies, Cheerios, or even a mix of cereals for a different texture and flavor profile.
Nutritional Information
Approximate values per serving (based on 16 servings):
- Calories: 350-400 kcal
- Protein: 7-9g
- Carbohydrates: 40-50g
- Fat: 18-22g
Please note that these values are approximate and may vary depending on the specific brands and exact amounts of ingredients used.
Health Benefits
While these bars are a treat, some of their key ingredients offer notable health benefits!
Peanut Butter Power: Peanut butter is a fantastic source of plant-based protein, which is essential for muscle repair and growth. It also provides healthy monounsaturated and polyunsaturated fats, which are good for heart health when consumed in moderation. You’ll also find a good dose of magnesium, potassium, and Vitamin E in your favorite spread.
Cornflake Contributions: Many cornflake brands are fortified with essential vitamins and minerals. This often includes B vitamins (like niacin, B6, and B12) which are crucial for energy metabolism. They can also be a source of iron, important for oxygen transport in the blood, and some fiber, which aids digestion.
Energy Boost: The combination of carbohydrates from the cornflakes and sugars, along with protein and fats from the peanut butter, provides a sustained energy release. This makes these bars a great option for a quick energy pick-me-up or a post-workout snack.
Mindful Indulgence: Enjoying a delicious treat like these bars can also contribute to your overall well-being by satisfying cravings and providing a moment of pleasure. Everything in moderation is key to a balanced diet and a happy life!
Serving Suggestions
- Perfect Snack: These bars are ideal as an afternoon snack to curb hunger between meals.
- Lunchbox Treat: Pack a square in school or work lunchboxes for a delightful surprise.
- Quick Breakfast: Grab a bar on the go for a fast, energizing breakfast when you’re in a rush.
- Dessert Delight: Serve them as a simple, satisfying dessert after dinner, perhaps with a scoop of vanilla ice cream.
- Party Pleaser: Cut them into smaller squares and arrange them on a platter for potlucks, parties, or family gatherings.
Storage Tips
Store your Peanut Butter Cornflake Bars in an airtight container. They will keep well at room temperature for up to 3-4 days, or in the refrigerator for up to a week. If you want to keep them longer, these bars freeze beautifully! Wrap individual bars tightly in plastic wrap, then place them in a freezer-safe bag or container. They can be frozen for up to 2-3 months. To reheat, simply let them thaw at room temperature for about 30 minutes, or enjoy them straight from the freezer for a chewy, cold treat!
Conclusion
And there you have it – a recipe for pure joy in bar form! These Peanut Butter Cornflake Bars are truly a testament to how simple ingredients can create something incredibly delicious and satisfying. They’re crunchy, sweet, salty, and utterly irresistible, making them a hit with kids and adults alike.
Whether you’re a seasoned baker or just starting out, this no-bake recipe is foolproof and fun. It’s the perfect project for a rainy afternoon or when you need a quick dessert in a pinch. Plus, the minimal cleanup is an added bonus that everyone appreciates!
So go ahead, gather your ingredients and whip up a batch today. Share these delightful bars with your family and friends, or keep them all to yourself – we won’t tell! Happy snacking!


