
Introduction
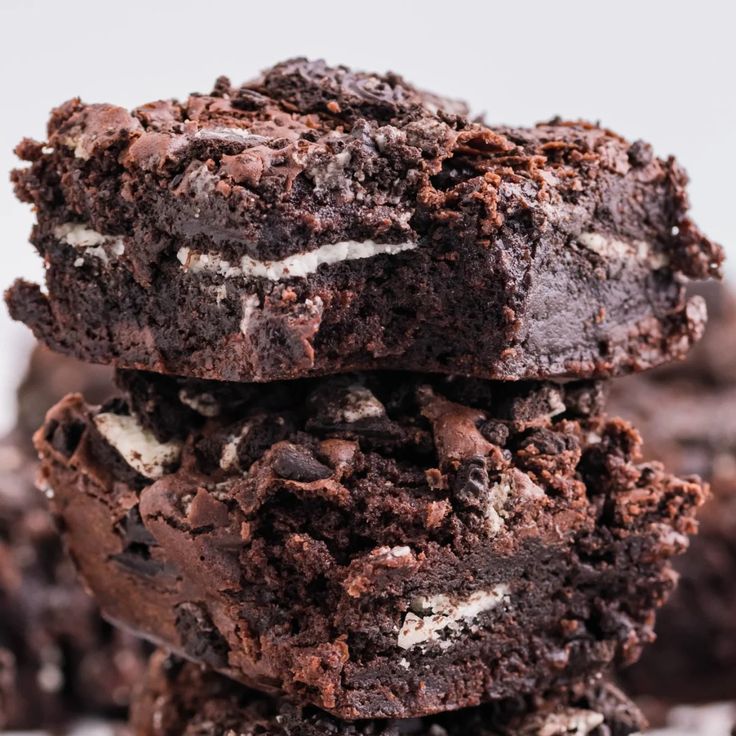
Get ready to experience pure bliss with our incredible Oreo Brownie Cookies! Imagine the fudgy, rich taste of a brownie combined with the delightful chewiness of a cookie, all studded with irresistible chunks of America’s favorite cookie – the Oreo. These aren’t just cookies; they’re a decadent dream come true, offering a double dose of chocolatey goodness in every single bite. They are truly special, delivering a texture and flavor explosion that will leave you wanting more.
The best part? These amazing treats are surprisingly easy and quick to whip up. You don’t need any fancy equipment or advanced baking skills. With simple ingredients and straightforward steps, you’ll have a batch of these glorious cookies ready in no time. It’s the perfect recipe for a last-minute dessert craving or when you want to impress without the stress.
So, why wait? Indulge yourself and your loved ones in this irresistible delight. These Oreo Brownie Cookies are perfect for parties, cozy nights in, or just because you deserve a little extra sweetness. Follow along, and let’s bake some magic together!
Cooking Time & Prep Time
- Prep Time: 15 minutes
- Cooking Time: 10-12 minutes
- Total Time: 25-27 minutes
Small tip: Gather all your ingredients before you start mixing. This makes the whole process much smoother and quicker!
Ingredients
This recipe makes approximately 24 delicious cookies.
For the Brownie Cookie Dough:
- ½ cup (113g) unsalted butter, melted
- 1 cup (200g) granulated sugar
- ½ cup (100g) packed light brown sugar
- 2 large eggs
- 1 teaspoon vanilla extract
- ¾ cup (68g) unsweetened cocoa powder (Dutch-processed for a darker color)
- 1 cup (120g) all-purpose flour
- ½ teaspoon baking powder
- ¼ teaspoon salt
For the Oreo Chunks:
- 15-20 Oreo cookies, roughly chopped
Step-by-Step Instructions
-
Step 1: Preheat Oven and Prepare Baking Sheets
Start by preheating your oven to 350°F (175°C). Line two large baking sheets with parchment paper. This prevents sticking and makes cleanup a breeze.
Small tip: Parchment paper is your best friend for cookies, ensuring they lift off cleanly every time.
-
Step 2: Melt Butter and Combine Sugars
In a large mixing bowl, melt the unsalted butter. You can do this in the microwave in 30-second intervals or on the stovetop. Once melted, add the granulated sugar and light brown sugar to the warm butter. Whisk them together until well combined and smooth.
-
Step 3: Add Eggs and Vanilla
Crack the two large eggs into the sugar-butter mixture, one at a time, whisking well after each addition. Stir in the vanilla extract. Continue whisking until the mixture is lightened in color and slightly fluffy, about 1-2 minutes.
Small tip: Whisking thoroughly at this stage incorporates air, contributing to a fudgier texture.
-
Step 4: Incorporate Dry Ingredients
In a separate medium bowl, whisk together the cocoa powder, all-purpose flour, baking powder, and salt. Make sure there are no lumps of cocoa powder. Gradually add these dry ingredients to the wet mixture, mixing with a spatula or wooden spoon until just combined. Be careful not to overmix the dough.
Small tip: Overmixing flour can lead to tough cookies, so stop as soon as the flour streaks disappear.
-
Step 5: Fold in Oreo Chunks
Gently fold in the roughly chopped Oreo cookies into the brownie cookie dough. Distribute them evenly throughout the dough. Reserve a few extra chopped Oreos if you want to press some on top of the cookies before baking for extra visual appeal.
-
Step 6: Scoop the Dough
Using a medium cookie scoop (about 1.5 tablespoons) or two spoons, drop rounded balls of dough onto the prepared baking sheets. Leave about 2 inches of space between each cookie, as they will spread slightly during baking. If desired, lightly press a few extra Oreo pieces onto the tops of the dough balls.
Small tip: For perfectly round cookies, roll the scooped dough into balls with your hands before placing them on the baking sheet.
-
Step 7: Bake the Cookies
Bake the cookies for 10-12 minutes. The edges should be set, but the centers will still look a little soft and gooey. This is exactly what you want for a fudgy brownie cookie!
Small tip: Do not overbake! A slightly underbaked cookie will be much chewier and fudgier.
-
Step 8: Cool and Enjoy
Once baked, remove the baking sheets from the oven and let the cookies cool on the sheets for 5 minutes. This allows them to set up properly. After 5 minutes, transfer the cookies to a wire rack to cool completely. Enjoy them warm or at room temperature!
Tips & Variations
- Gluten-Free Option: Easily make these cookies gluten-free by substituting the all-purpose flour with a 1:1 gluten-free baking flour blend. Ensure your chosen blend contains xanthan gum for the best texture.
- Vegan/Vegetarian Option: To make these vegan, replace the butter with a plant-based butter alternative and the eggs with flax eggs (1 tbsp ground flaxseed + 3 tbsp water per egg, let sit for 5 minutes). Use vegan-friendly Oreo cookies (many brands are accidentally vegan!).
- Boosted Treat: While it’s a dessert, you can add a small amount of finely grated zucchini (about ¼ cup, squeezed dry) to the batter for a virtually undetectable moisture boost and a tiny hidden veggie. For a protein boost, serve alongside a glass of milk or a protein smoothie.
- Spicy Kick: For an adventurous twist, add ¼ to ½ teaspoon of cayenne pepper or chili powder to the dry ingredients. The subtle heat beautifully enhances the rich chocolate flavor, creating a sophisticated and surprising treat.
- Flavor Variations: Experiment with different types of Oreos, like mint or peanut butter Oreos, for unique flavor profiles. You can also add a handful of chocolate chips (milk, dark, or white) or chopped nuts (pecans, walnuts) to the dough for extra texture and flavor.
Nutritional Information
Approximate values per serving (based on 24 servings):
- Calories: 180 kcal
- Protein: 2g
- Carbohydrates: 25g
- Fat: 9g
Please note: These values are approximate and may vary depending on the specific brands and ingredients used.
Health Benefits
While these are an indulgent treat, some of their core ingredients do offer benefits when consumed in moderation.
Cocoa Powder: The unsweetened cocoa powder in these cookies is rich in antioxidants called flavonoids. These compounds are known for their potential to help reduce inflammation and support heart health. Darker cocoa powder often contains higher concentrations of these beneficial antioxidants.
Eggs: Eggs are a fantastic source of high-quality protein, which is essential for muscle repair and growth. They also provide important vitamins and minerals like Vitamin B12, Vitamin D, and choline, which supports brain health and metabolism.
Butter (in moderation): While high in fat, butter provides fat-soluble vitamins like A, D, E, and K2. These vitamins play crucial roles in bone health, immune function, and vision. Enjoying butter in moderation as part of a balanced diet can contribute to overall nutrient intake.
Mental Well-being: Don’t underestimate the power of a delicious treat to boost your mood! Enjoying a homemade cookie can bring joy, comfort, and a sense of satisfaction. Sharing these cookies with loved ones can also foster connection and happiness, which are vital for mental and emotional health.
Serving Suggestions
- Classic Pairing: Serve these warm cookies with a tall glass of cold milk or a scoop of vanilla bean ice cream for an ultimate dessert experience.
- Coffee Break Treat: They pair wonderfully with a hot cup of coffee, espresso, or a comforting mug of hot chocolate.
- Dessert Platter: Arrange them on a platter with other small treats like fresh berries, chocolate-dipped strawberries, or mini cheesecakes for a delightful spread.
- Gourmet Touch: Drizzle with a little warm caramel sauce or a sprinkle of flaky sea salt right before serving to elevate the flavors.
- Meal Prep Idea: Bake a batch on Sunday and pack them individually for a special treat throughout the week in lunchboxes or as an afternoon pick-me-up.
Storage Tips
Store these Oreo Brownie Cookies in an airtight container at room temperature for up to 3-4 days. For longer storage, you can freeze them for up to 2-3 months. Place cooled cookies in a single layer on a baking sheet to freeze solid, then transfer them to a freezer-safe bag or container. To reheat, simply microwave a frozen cookie for 20-30 seconds or let it thaw at room temperature.
Conclusion
There you have it – a recipe for the most irresistibly fudgy, chewy, and utterly delicious Oreo Brownie Cookies! This delightful treat combines the best of both worlds, offering the rich intensity of a brownie with the satisfying texture of a cookie, all elevated by those iconic Oreo chunks. It’s a truly special dessert that’s guaranteed to put a smile on anyone’s face.
We’ve made it simple and straightforward, so even if you’re new to baking, you’ll find success with this recipe. The joy of creating something so delicious from scratch is incredibly rewarding. So, don’t hesitate! Gather your ingredients and get ready to bake some happiness.
Once you try these, they’re sure to become a new favorite. Bake a batch today and share the love with your family and friends. These cookies are perfect for any occasion, bringing a little extra sweetness and indulgence to your day. Happy baking!


