
Introduction
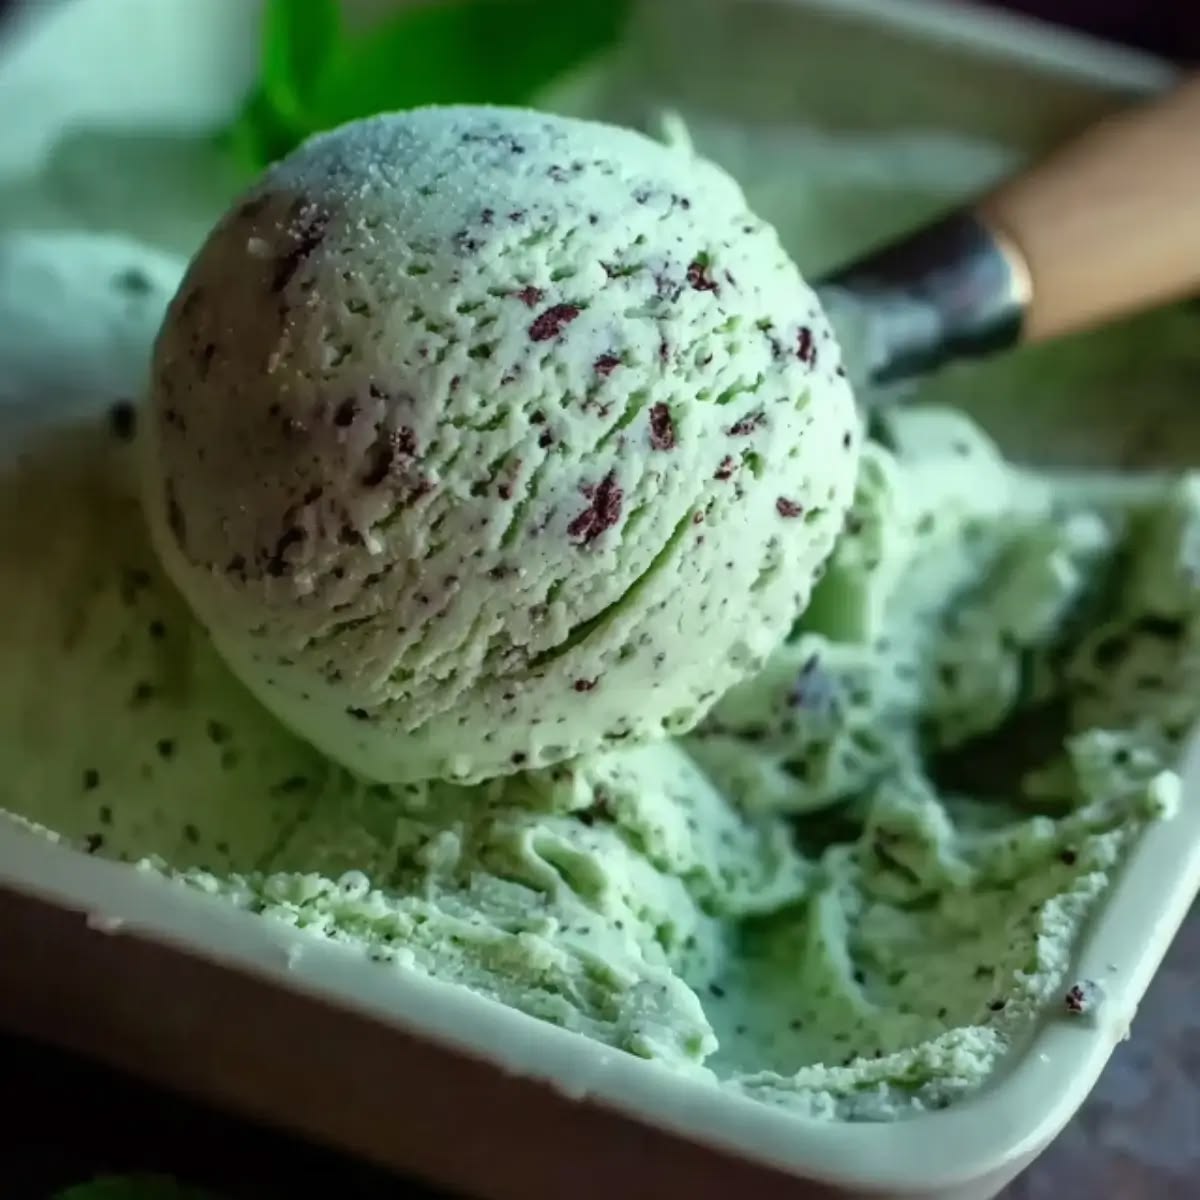
Imagine a scoop of vibrant green ice cream, studded with rich, dark chocolate chips, melting ever so slightly on your spoon. That’s the magic of homemade Mint Chocolate Chip Ice Cream! It’s a classic flavor that brings a delightful burst of cool mint with every bite, perfectly balanced by the sweetness of the cream and the satisfying crunch of chocolate.
You might think making ice cream at home is complicated, but it’s surprisingly simple. With just a few basic ingredients and a little patience for chilling, you can create a batch of this refreshing treat that tastes infinitely better than anything from the store. The active preparation time is quite quick, making it a perfect project for a lazy afternoon.
So, are you ready to embark on a delicious journey? Let’s dive into making this incredible Mint Chocolate Chip Ice Cream. Your taste buds will thank you, and your friends and family will be amazed by your culinary prowess!
Cooking Time & Prep Time
- Prep Time: 20 minutes
- Chilling Time: 4 hours (minimum) to overnight
- Churning Time: 20-30 minutes
- Freezing Time: 2-4 hours
- Total Time: Approximately 6-8 hours (mostly hands-off chilling and freezing)
Small tip: The chilling time for the base is crucial for the best texture. Don’t rush it! A well-chilled base churns into a smoother, creamier ice cream.
Ingredients
This recipe makes approximately 8-10 servings (about 1.5 quarts).
- For the Mint Ice Cream Base:
- 2 cups (480ml) heavy cream
- 1 cup (240ml) whole milk
- ¾ cup (150g) granulated sugar
- Pinch of salt
- 6 large egg yolks
- 1 teaspoon pure peppermint extract (or more, to taste)
- ½ teaspoon vanilla extract
- Green food coloring (optional, 2-3 drops for a vibrant color)
- For the Chocolate Chips:
- 1 cup (170g) dark chocolate chips or finely chopped dark chocolate (60-70% cacao recommended)
- 1 tablespoon coconut oil (optional, for easier chopping/mixing if using a block)
Step-by-Step Instructions
Step 1: Prepare the Cream Mixture
In a medium saucepan, combine the heavy cream, whole milk, granulated sugar, and a pinch of salt. Heat this mixture over medium heat, stirring occasionally, until the sugar dissolves and the mixture is hot but not boiling. You’ll see small bubbles forming around the edges.
Small tip: Keep the heat moderate to prevent scorching the cream. Stirring helps the sugar dissolve evenly.
Step 2: Temper the Egg Yolks
In a separate medium bowl, whisk the egg yolks until they are light yellow and slightly thickened. Slowly pour about half of the hot cream mixture into the whisked egg yolks, whisking constantly. This process is called tempering and prevents the eggs from scrambling.
Small tip: Whisk vigorously as you pour to ensure the eggs are properly tempered and become smooth.
Step 3: Cook the Custard Base
Pour the tempered egg yolk mixture back into the saucepan with the remaining hot cream. Cook over medium-low heat, stirring constantly with a wooden spoon or spatula, until the mixture thickens enough to coat the back of the spoon. It should reach about 170-175°F (77-79°C) on an instant-read thermometer.
Small tip: Do not let the mixture boil, as this can curdle the eggs. Low and slow is the key to a smooth custard.
Step 4: Add Flavor and Chill
Remove the saucepan from the heat. Stir in the peppermint extract, vanilla extract, and green food coloring (if using). Pour the custard base through a fine-mesh sieve into a clean bowl to remove any small bits of cooked egg. Cover the bowl with plastic wrap, pressing it directly onto the surface of the custard to prevent a skin from forming. Refrigerate for at least 4 hours, or preferably overnight, until thoroughly chilled.
Small tip: The sieve ensures a super smooth ice cream. Chilling completely is essential for the best texture when churning.
Step 5: Prepare Chocolate Chips (Optional)
If your chocolate chips are large, or if you’re using a chocolate bar, you might want to chop them into smaller, more uniform pieces. This ensures they distribute evenly throughout the ice cream and are easier to eat. If using a block, you can melt 1 tablespoon of coconut oil, mix it with the chopped chocolate, spread it thinly on parchment paper, and freeze it briefly before breaking it into small shards. This creates beautiful, thin chocolate flecks.
Small tip: Smaller chocolate pieces prevent them from becoming too hard and chunky when frozen, and give a better “chip” experience.
Step 6: Churn the Ice Cream
Once the base is thoroughly chilled, pour it into your ice cream maker’s frozen bowl. Churn according to the manufacturer’s instructions, usually for 20-30 minutes, until the ice cream is thick and resembles soft-serve consistency. The exact time will vary depending on your machine.
Small tip: Make sure your ice cream maker bowl is frozen solid for at least 24 hours before churning for optimal results.
Step 7: Add Chocolate Chips and Freeze
During the last 5 minutes of churning, or when the ice cream is nearly done, add the chocolate chips to the machine. Let it churn for another minute or two to distribute them evenly. Transfer the soft ice cream to a freezer-safe container, pressing plastic wrap directly onto the surface. Freeze for at least 2-4 hours, or until firm enough to scoop.
Small tip: For best results, use a shallow, wide container to help the ice cream freeze more quickly and evenly.
Tips & Variations
- Gluten-Free Option: This recipe is naturally gluten-free! Enjoy it without any modifications.
- Vegan/Vegetarian Option: For a delicious vegan version, substitute the heavy cream with full-fat canned coconut cream and the whole milk with a plant-based milk like almond or cashew milk. Omit the egg yolks and increase the sugar slightly (up to 1 cup) or add a thickener like cornstarch (1-2 tablespoons dissolved in a little plant milk) to the base while cooking to achieve a similar creamy texture.
- Healthier Additions: While ice cream is a treat, you can boost its nutritional profile slightly. Consider blending in a very ripe avocado for added healthy fats and an even creamier texture (it will also provide a natural green hue!). Or, for a protein boost, whisk in a scoop of unflavored or vanilla protein powder with the egg yolks before tempering.
- Spicy Version: For a surprising kick, add a tiny pinch of cayenne pepper or a few drops of chili extract to the chocolate chips before mixing them in. The heat will provide a delightful contrast to the cool mint.
- Other Flavor Tips: Experiment with different extracts! A touch of almond extract can complement the mint, or use a combination of dark and milk chocolate chips for varying levels of sweetness. You can also swirl in a homemade chocolate fudge sauce at the end of churning for a ripple effect instead of chips.
Nutritional Information
Approximate values per serving (based on 10 servings):
- Calories: 320
- Protein: 4g
- Carbohydrates: 28g
- Fat: 22g
Note: Nutritional values are estimates and may vary depending on the specific brands and amounts of ingredients used.
Health Benefits
While ice cream is certainly a treat, some of its ingredients do offer notable health benefits!
- Mint: Peppermint, the star of our ice cream, is known for its digestive benefits. It can help soothe an upset stomach and relieve indigestion. Mint also contains antioxidants and can help freshen breath.
- Dark Chocolate: The dark chocolate chips in this recipe are a good source of antioxidants, particularly flavonoids, which may help protect your cells from damage. Dark chocolate is also known to contain minerals like iron, magnesium, and zinc, and can even have mood-boosting properties.
- Dairy (Cream and Milk): Dairy products are excellent sources of calcium, which is vital for strong bones and teeth. They also provide protein, which is essential for muscle repair and growth, and various vitamins like Vitamin D (if fortified) and B vitamins.
- Eggs: Egg yolks contribute healthy fats, vitamins (like B12 and D), and choline, which is important for brain health.
Serving Suggestions
- Classic Scoop: Enjoy a generous scoop (or two!) on its own for a refreshing dessert.
- Dessert Pairing: Serve alongside warm brownies, chocolate lava cakes, or a simple plate of fresh berries for an elevated experience.
- Milkshake Delight: Blend a few scoops with a splash of milk for an irresistible mint chocolate chip milkshake.
- Cookie Sandwich: Sandwich a scoop between two homemade chocolate chip cookies for a delightful ice cream sandwich.
Storage Tips
Your homemade Mint Chocolate Chip Ice Cream will keep beautifully in an airtight freezer-safe container in the freezer for up to 2-3 weeks. Beyond that, the texture might start to become a bit icy, though it will still be edible. Since it is an ice cream, it is designed to be frozen! When you’re ready to enjoy it, simply remove it from the freezer about 5-10 minutes before serving to allow it to soften slightly, making it easier to scoop.
Conclusion
There you have it – a recipe for incredibly creamy, wonderfully minty, and perfectly chocolatey Mint Chocolate Chip Ice Cream! This homemade version truly outshines any store-bought alternative, offering a fresh, vibrant flavor that’s simply irresistible. It’s the perfect treat for a warm day, a special occasion, or just because you deserve something truly delicious.
Don’t be intimidated by the process; the steps are straightforward, and the result is absolutely worth every moment. Imagine the smiles when you present this beautiful, homemade dessert to your loved ones. It’s a culinary triumph that brings joy with every spoonful.
So go ahead, gather your ingredients, fire up your ice cream maker, and create some magic. Share this refreshing delight with family and friends, and watch their faces light up.


