
Introduction
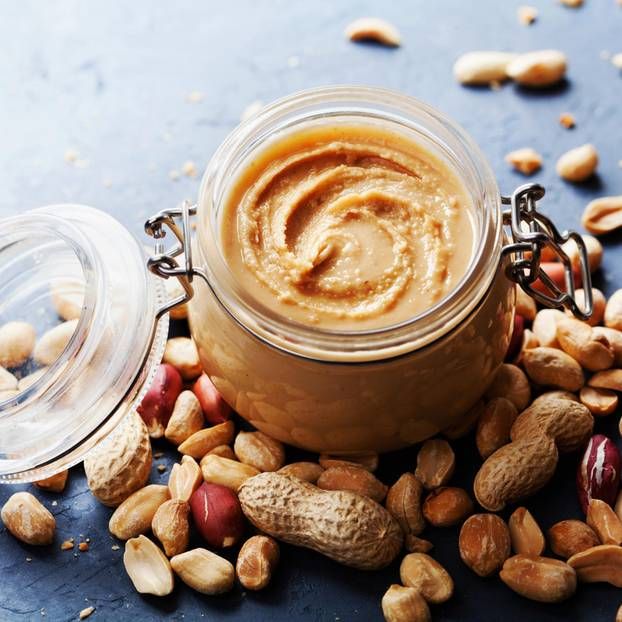
Get ready to make something truly special in your kitchen today: homemade peanut butter! This creamy, dreamy spread is a staple in so many homes. But making it yourself takes it to a whole new level of freshness and flavor. You’ll love the rich, nutty taste that store-bought versions just can’t match.
What makes homemade peanut butter so fantastic? It’s incredibly easy and quick to prepare. With just a few simple ingredients and a good food processor, you’re minutes away from a delicious, wholesome treat. No more worrying about added sugars or mystery oils; you control everything that goes into it.
So, are you ready to transform humble peanuts into golden, velvety goodness? This recipe is foolproof, fun, and so rewarding. Let’s dive in and create the best peanut butter you’ve ever tasted!
Cooking Time & Prep Time
- Prep Time: 5 minutes
- Cooking Time: 10-15 minutes (roasting peanuts)
- Total Time: 15-20 minutes
Small tip: Roasting your peanuts beforehand is key for depth of flavor, so don’t skip this step! It’s worth the extra few minutes.
Ingredients
This recipe makes approximately 1.5 cups (about 12 servings of 2 tablespoons each).
- 2 cups (about 300g) raw, shelled peanuts (blanched or unblanched, unsalted)
- 1-2 tablespoons neutral oil (like grapeseed, canola, or peanut oil, optional, for smoother texture)
- 1/2 teaspoon salt (or to taste)
- 1-2 tablespoons honey, maple syrup, or agave nectar (optional, for sweetness)
Step-by-Step Instructions
-
Step 1: Roast the Peanuts
Preheat your oven to 350°F (175°C). Spread the raw peanuts in a single layer on a baking sheet. Roast them for 10-15 minutes, stirring once halfway through, until they are lightly golden and fragrant. Watch them carefully to prevent burning.
Small tip: Roasting brings out the natural oils and deepens the nutty flavor, which is essential for amazing peanut butter.
-
Step 2: Cool the Peanuts
Once roasted, remove the peanuts from the oven and let them cool completely on the baking sheet. This cooling step helps them become nice and crisp, which is important for the blending process. It also prevents the food processor from overheating.
Small tip: If you use unblanched peanuts, you can gently rub them with a clean kitchen towel after cooling to remove some of the skins, though it’s not strictly necessary.
-
Step 3: Process the Peanuts
Transfer the cooled, roasted peanuts to a sturdy food processor. Begin processing them on high speed. At first, they will look like coarse crumbs, almost like sand.
Small tip: Use a good quality food processor with a strong motor. A blender might work, but a food processor is usually better for this task.
-
Step 4: Scrape and Continue Processing
As you process, the peanuts will go through several stages: from crumbs to a thicker, paste-like consistency, then a dry ball, and finally, a smooth, creamy liquid. Stop occasionally to scrape down the sides of the bowl with a spatula. This ensures everything is evenly processed.
Small tip: Be patient! This process can take 5-10 minutes, depending on your food processor. It might seem like it’s stuck, but it will eventually become smooth.
-
Step 5: Achieve Creaminess
Keep processing until the peanuts release their natural oils and turn into a wonderfully smooth, pourable butter. If your peanut butter is too thick or not blending smoothly after several minutes, add 1-2 tablespoons of neutral oil, one spoon at a time, and continue processing until desired consistency is reached.
Small tip: The longer you process, the smoother and runnier your peanut butter will become. If you prefer chunky peanut butter, remove about 1/4 cup of the crumbs before the final processing and stir them back in at the end.
-
Step 6: Add Flavorings
Now is the time to add your salt and any optional sweeteners like honey, maple syrup, or agave nectar. Add them to taste, starting with small amounts and adjusting as needed. Process for another 30 seconds to fully incorporate everything.
Small tip: Taste a small spoonful! Adjust the salt and sweetness until it’s perfect for your palate.
-
Step 7: Store Your Creation
Transfer your freshly made peanut butter to an airtight jar or container. It’s ready to enjoy immediately! The aroma and taste of fresh homemade peanut butter are absolutely incredible.
Small tip: Make sure your storage jar is clean and dry to ensure your peanut butter stays fresh longer.
Tips & Variations
- Gluten-Free Option: This recipe is naturally gluten-free! Just ensure any added ingredients like flavorings (e.g., honey) are also certified gluten-free if cross-contamination is a concern.
- Vegan/Vegetarian Option: This recipe is naturally vegan and vegetarian. If adding a sweetener, use maple syrup or agave nectar instead of honey to keep it strictly vegan.
- More Protein/Fiber: For an extra protein boost, you can blend in a scoop of unflavored protein powder (like pea or hemp protein) during the last minute of processing. For added fiber, use unblanched peanuts with their skins on.
- Spicy Version: Add 1/4 teaspoon of cayenne pepper or a pinch of red pepper flakes along with the salt. For a more complex heat, blend in a small amount of roasted chili oil.
- Flavor Variations: Experiment with different nuts! Try almonds, cashews, or a mix. You can also add a teaspoon of cinnamon, vanilla extract, or even a tablespoon of cocoa powder for a chocolate peanut butter treat.
Nutritional Information
Approximate values per serving (based on 12 servings):
- Calories: 190 kcal
- Protein: 8g
- Carbohydrates: 7g
- Fat: 16g
Note: These values are approximate and may vary depending on the exact ingredients used and portion size.
Health Benefits
Peanut butter, especially homemade with minimal additives, offers a fantastic array of health benefits.
Peanuts are an excellent source of plant-based protein, which is crucial for building and repairing tissues, and keeping you feeling full and satisfied. This makes homemade peanut butter a great choice for a quick energy boost or a filling snack.
They are also packed with healthy monounsaturated and polyunsaturated fats. These “good” fats are known to support heart health by helping to lower bad cholesterol levels. They also play a role in nutrient absorption and overall well-being.
Beyond protein and fats, peanuts are rich in essential vitamins and minerals. They provide a good amount of Vitamin E, which is a powerful antioxidant, and B vitamins like niacin and folate, important for energy metabolism and cell function. You’ll also find minerals such as magnesium, phosphorus, and zinc, vital for bone health, nerve function, and immunity.
Finally, peanuts contain antioxidants like resveratrol, also found in red wine. These compounds help protect your cells from damage caused by free radicals, contributing to long-term health and disease prevention. Enjoying homemade peanut butter means you get all these benefits without any unnecessary additives.
Serving Suggestions
- Spread it generously on toast, bagels, or rice cakes for a classic breakfast or snack.
- Swirl it into your morning oatmeal or yogurt for added protein and flavor.
- Use it as a dip for apple slices, banana, celery sticks, or pretzels.
- Incorporate it into smoothies for a creamy texture and nutty taste.
- Use it as a base for savory sauces, like a satay sauce for chicken or tofu.
Storage Tips
Store your homemade peanut butter in an airtight container in the refrigerator. It will keep fresh for up to 2-3 weeks. Over time, the natural oils may separate; simply stir it back together before serving. You can also freeze homemade peanut butter for up to 3 months in a freezer-safe container. When ready to use, thaw it in the refrigerator overnight. Reheating is not typically needed, as it’s best enjoyed at room temperature or slightly chilled, but if it’s too firm, let it sit out on the counter for a bit to soften.
Conclusion
There you have it – your very own batch of homemade peanut butter! Isn’t it amazing how something so simple can be so incredibly delicious and satisfying? You’ve taken fresh, wholesome ingredients and transformed them into a versatile spread that’s perfect for any time of day.
Making peanut butter at home is not just about the incredible taste; it’s about taking control of what you eat. You’ve created a healthier, fresher option free from unnecessary additives. Give yourself a pat on the back for this culinary achievement!
So go ahead, slather it on, dip into it, or bake with it. Don’t forget to share your amazing creation with family and friends. They’ll be so impressed, and you’ll love watching their faces light up with every delicious bite!


