
Introduction
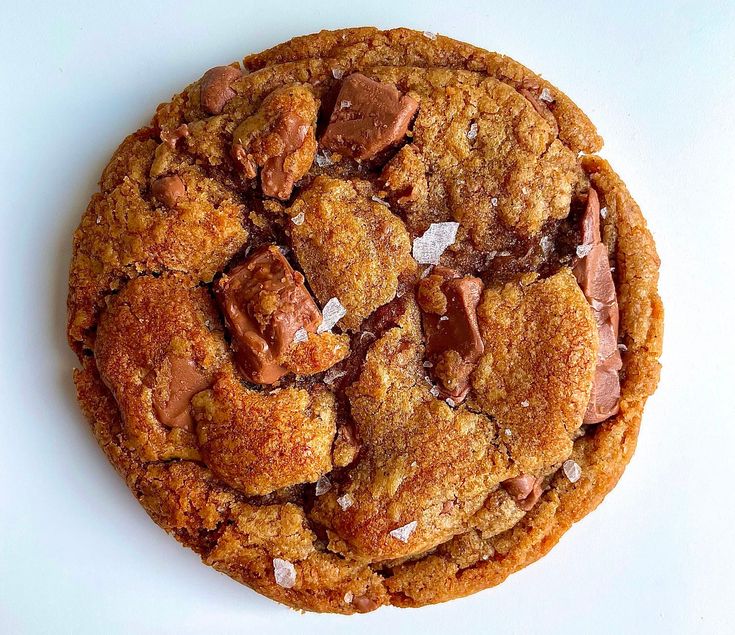
Get ready for the most incredible chocolate chip cookies you’ve ever tasted! These aren’t just any cookies; they’re “Best Brown Butter Chocolate Chunk Cookies.” The secret is in the nutty, rich brown butter, which adds an amazing depth of flavor that takes a classic cookie to a whole new level. Each bite is a perfect blend of chewy edges, soft centers, and gooey melted chocolate.
You might think making something so delicious would be complicated, but it’s surprisingly simple. Browning butter adds just a few extra minutes, but it’s totally worth it and easy to do. The rest of the process is just like your favorite cookie recipe, mixing simple ingredients to create magic. You’ll be amazed at how quickly these come together, especially after a short chill time.
So, why wait? Treat yourself, your family, and your friends to these extraordinary cookies. They’re perfect for any occasion, or just because you deserve a little bit of homemade joy. Let’s get baking and create some sweet memories!
Cooking Time & Prep Time
- Prep Time: 20 minutes
- Chill Time: 30 minutes (minimum)
- Cooking Time: 10-12 minutes per batch
- Total Time: Approximately 60-70 minutes (including chill time)
Small tip: The chill time is important for flavor development and preventing the cookies from spreading too much, so don’t skip it if you want the best results!
Ingredients
This recipe makes about 18-20 delicious cookies.
For the Brown Butter
- 1 cup (226g) unsalted butter
Dry Ingredients
- 2 ¼ cups (270g) all-purpose flour
- 1 teaspoon baking soda
- 1 teaspoon salt
Wet Ingredients & Add-ins
- ¾ cup (150g) granulated sugar
- ¾ cup (160g) packed light brown sugar
- 2 large eggs, at room temperature
- 2 teaspoons vanilla extract
- 1 ½ cups (about 250g) chocolate chunks or chips (a mix of milk and dark is wonderful!)
- Flaky sea salt for sprinkling (optional, but highly recommended)
Step-by-Step Instructions
-
Step 1: Brown the Butter
Place the unsalted butter in a light-colored saucepan over medium heat. Let it melt completely, then continue to cook, stirring occasionally. The butter will foam, then the milk solids at the bottom will start to turn golden brown and smell nutty. This usually takes about 5-8 minutes.
Small tip: Use a light-colored pan so you can easily see the butter solids browning. Don’t walk away; it can go from perfect to burnt very quickly!
-
Step 2: Cool the Brown Butter
Once the butter is deeply golden brown with a nutty aroma, immediately remove it from the heat and pour it into a heatproof bowl. Let it cool for about 10-15 minutes, or until it’s just warm but not hot. This prevents the eggs from scrambling later.
Small tip: If you’re in a hurry, you can place the bowl over an ice bath for faster cooling, stirring gently.
-
Step 3: Whisk Dry Ingredients
In a medium bowl, whisk together the all-purpose flour, baking soda, and salt. Make sure there are no lumps and everything is well combined. Set this bowl aside for now.
-
Step 4: Combine Sugars and Butter
In a large mixing bowl, combine the cooled brown butter with the granulated sugar and packed light brown sugar. Use an electric mixer on medium speed to beat them together until they are light and fluffy, about 2-3 minutes. This incorporates air and makes for a tender cookie.
-
Step 5: Add Eggs and Vanilla
Add the eggs one at a time to the butter and sugar mixture, beating well after each addition until fully incorporated. Then, stir in the vanilla extract. Scrape down the sides of the bowl to ensure everything is mixed evenly.
-
Step 6: Mix in Dry Ingredients
Gradually add the dry ingredient mixture to the wet ingredients, mixing on low speed until just combined. Be careful not to overmix the dough, as this can make the cookies tough. Stop mixing as soon as you no longer see streaks of flour.
-
Step 7: Fold in Chocolate Chunks
Gently fold in the chocolate chunks or chips using a spatula. Distribute them evenly throughout the dough. You want a good amount of chocolate in every bite!
-
Step 8: Chill the Dough
Cover the bowl with plastic wrap and refrigerate the cookie dough for at least 30 minutes. Chilling allows the flavors to meld and prevents the cookies from spreading too thin during baking. You can chill it for up to 24-48 hours for even richer flavor.
Small tip: Longer chill times lead to more complex flavors and chewier textures. Don’t skip this step for the best results!
-
Step 9: Preheat Oven and Prepare Baking Sheets
When you’re ready to bake, preheat your oven to 375°F (190°C). Line two baking sheets with parchment paper or silicone baking mats. This prevents sticking and helps with even baking.
-
Step 10: Scoop and Bake
Scoop rounded tablespoons (or use a 1.5-2 tablespoon cookie scoop) of dough onto the prepared baking sheets, leaving about 2 inches between each cookie. Sprinkle a tiny pinch of flaky sea salt on top of each dough ball if desired.
Bake for 10-12 minutes, or until the edges are golden brown and the centers are still slightly soft. They will continue to set as they cool.
Small tip: For perfectly round cookies, use a large round cookie cutter or a spatula to gently nudge the edges of the warm cookies back into a circle right after they come out of the oven.
-
Step 11: Cool and Enjoy
Let the cookies cool on the baking sheets for 5 minutes before transferring them to a wire rack to cool completely. This helps them firm up without breaking. Enjoy them warm or at room temperature!
Tips & Variations
- Gluten-Free Option: Easily make these cookies gluten-free by swapping the all-purpose flour for a 1:1 gluten-free baking flour blend that contains xanthan gum. The texture will be very similar!
- Vegetarian Option: This recipe is naturally vegetarian. For a plant-based version, you can try using a high-quality vegan butter substitute for browning (ensure it browns well) and a flax egg (1 tbsp ground flaxseed + 2.5 tbsp water per egg, let sit for 5 minutes) instead of chicken eggs. Results may vary slightly in texture.
- Add More Protein/Fiber: Boost the protein by adding ½ cup of chopped nuts like walnuts, pecans, or almonds along with the chocolate chunks. For extra fiber, you can replace ¼ cup of the all-purpose flour with whole wheat pastry flour or add 2 tablespoons of ground flaxseed meal.
- Spicy Version: For a subtle kick, add ¼ to ½ teaspoon of cayenne pepper to the dry ingredients. It won’t make them overtly spicy, but it will add a warm, complex note that perfectly complements the chocolate.
- Other Flavor Tips: Experiment with different types of chocolate, like white chocolate chips, butterscotch chips, or even chopped candy bars. A sprinkle of flaky sea salt on top before baking really enhances the chocolate flavor. You can also add a teaspoon of instant espresso powder to the dry ingredients to deepen the chocolate taste.
Nutritional Information
Approximate values per serving (based on 20 servings):
- Calories: 250 kcal
- Protein: 3g
- Carbohydrates: 30g
- Fat: 14g
Note: These values are approximate and may vary depending on specific ingredients used (e.g., type of chocolate, brand of butter).
Health Benefits
While these are indeed a treat, some of the ingredients do offer benefits!
Chocolate: Dark chocolate, especially, is a good source of antioxidants called flavonoids. These compounds can help protect your cells from damage and may contribute to heart health. It also contains minerals like iron, magnesium, and copper.
Eggs: Eggs are a fantastic source of high-quality protein, which is essential for building and repairing tissues. They also contain important vitamins like B12, D, and E, as well as choline, which is vital for brain function and metabolism.
Butter (in moderation): While high in fat, butter provides fat-soluble vitamins such as A, E, and K2. Vitamin A is crucial for vision and immune function, while K2 plays a role in bone health. It also provides energy for your body.
Flour: All-purpose flour mainly provides carbohydrates, which are the body’s primary source of energy. While this recipe uses refined flour, you can boost the nutritional profile by substituting a portion with whole wheat flour, adding more fiber and nutrients.
Serving Suggestions
- Classic Treat: Serve these cookies warm with a tall glass of cold milk or a scoop of vanilla bean ice cream for an ultimate dessert experience.
- Coffee Break Companion: They are perfect alongside your morning coffee or afternoon tea. The rich flavors pair wonderfully with a warm beverage.
- Dessert Platter Star: Arrange them on a dessert platter with fresh berries, whipped cream, or other small treats for a beautiful presentation at gatherings.
- Gift of Joy: Pack them in a pretty box or bag to share with neighbors, friends, or family. Homemade cookies make a thoughtful and delicious gift!
Storage Tips
Store leftover cookies in an airtight container at room temperature for up to 3-4 days. For longer storage, you can freeze the baked cookies. Once completely cooled, place them in a single layer on a baking sheet to flash freeze for about an hour, then transfer them to a freezer-safe bag or container. They will keep well for up to 2-3 months. To reheat, simply microwave for 10-15 seconds or warm in a preheated oven at 300°F (150°C) for a few minutes until soft and warm.
Conclusion
These “Best Brown Butter Chocolate Chunk Cookies” are truly something special. The deep, nutty flavor from the brown butter elevates them far beyond a standard chocolate chip cookie, making every bite a luxurious experience. They are chewy, gooey, and utterly irresistible, proving that a little extra effort for browning butter is completely worth it for such a fantastic result.
Don’t be intimidated; the process is straightforward, and the reward is immense. You’ll be so proud to pull these golden-brown beauties from your oven. Imagine the aroma filling your kitchen – it’s pure comfort and joy!
So go ahead, gather your ingredients, and give this recipe a try. Bake a batch (or two!) and share them with your loved ones. There’s nothing quite like the warmth and happiness that comes from sharing homemade cookies. Happy baking!


