
Introduction
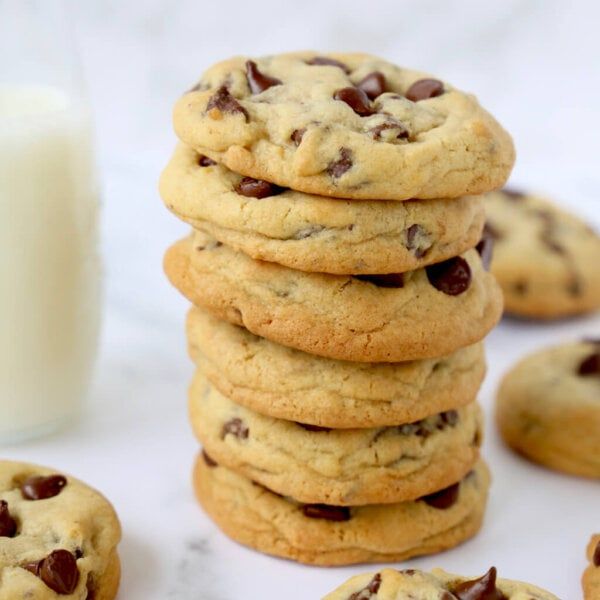
Imagine biting into a warm, gooey chocolate chip cookie, perfectly crisp at the edges and wonderfully soft in the middle. That’s exactly what you’ll get with these Bakery Style Chocolate Chip Cookies! They’re packed with rich chocolate and a delightful chewiness that will transport you straight to your favorite bakery. This recipe isn’t just a cookie; it’s an experience.
You might think bakery-quality cookies are hard to make at home, but I promise they are not. This recipe breaks down every step, making it super easy for even beginner bakers. With a few simple ingredients and a little love, you’ll be pulling professional-looking cookies from your oven in no time. The secret? A couple of clever techniques that make all the difference, and they’re quick to master!
So, get ready to fill your kitchen with the irresistible aroma of freshly baked chocolate chip cookies. Gather your ingredients, put on your favorite apron, and let’s create some magic together. Your taste buds (and anyone you share them with!) will thank you for making these truly special treats.
Cooking Time & Prep Time
- Prep Time: 20 minutes
- Chilling Time: 30 minutes (minimum, ideally 2 hours or overnight)
- Cooking Time: 10-12 minutes per batch
- Total Time: Approximately 60 minutes (with minimum chilling)
Small tip: Don’t skip the chilling time! It helps the flavors meld and prevents the cookies from spreading too much, giving you that perfect bakery texture.
Ingredients
This recipe makes approximately 18-24 cookies, depending on size.
- For the Dough:
- 1 cup (226g) unsalted butter, softened
- ¾ cup (150g) granulated sugar
- 1 cup (200g) packed light brown sugar
- 2 large eggs, at room temperature
- 2 teaspoons vanilla extract
- 2 ¼ cups (270g) all-purpose flour
- 1 teaspoon baking soda
- ½ teaspoon salt
- 1 teaspoon cornstarch
- For the Chocolate:
- 1 ½ cups (about 250g) chocolate chips (a mix of semi-sweet and milk chocolate works wonderfully)
- ½ cup (about 85g) chocolate chunks or chopped chocolate bar (optional, for extra gooeyness)
Step-by-Step Instructions
Step 1: Prepare Your Butter
In a large mixing bowl, cream together the softened unsalted butter, granulated sugar, and packed light brown sugar. Beat them with an electric mixer on medium speed until the mixture is light, fluffy, and pale in color. This usually takes about 2-3 minutes.
Small tip: Softened butter should be pliable but not melted. If it’s too warm, your cookies might spread too much.
Step 2: Add Wet Ingredients
Crack in the two large eggs, one at a time, mixing well after each addition. Make sure each egg is fully incorporated before adding the next. Stir in the vanilla extract until just combined. Scrape down the sides of the bowl to ensure everything is mixed evenly.
Step 3: Combine Dry Ingredients
In a separate medium bowl, whisk together the all-purpose flour, baking soda, salt, and cornstarch. The cornstarch is our secret ingredient for extra soft and chewy cookies. Make sure there are no lumps in the flour mixture.
Step 4: Mix Wet and Dry
Gradually add the dry ingredient mixture to the wet ingredients. Mix on low speed until just combined. Be careful not to overmix the dough, as this can lead to tough cookies. Stop mixing as soon as you no longer see streaks of dry flour.
Step 5: Fold in Chocolate
Gently fold in your chocolate chips and any optional chocolate chunks using a spatula. Distribute them evenly throughout the dough. You want a good amount of chocolate in every bite!
Step 6: Chill the Dough
Cover the bowl with plastic wrap and refrigerate the dough for at least 30 minutes. For truly bakery-style results, I highly recommend chilling for 2 hours or even overnight. This deepens the flavor and improves the texture significantly.
Small tip: If chilling overnight, let the dough sit at room temperature for about 10-15 minutes before scooping to make it easier to handle.
Step 7: Preheat Oven and Prepare Baking Sheets
When you’re ready to bake, preheat your oven to 375°F (190°C). Line two baking sheets with parchment paper or silicone baking mats. This prevents sticking and helps with even baking.
Step 8: Scoop and Bake
Using a cookie scoop (about 2 tablespoons per cookie) or your hands, form balls of dough and place them about 2 inches apart on the prepared baking sheets. Bake one sheet at a time for 10-12 minutes, or until the edges are golden brown and the centers are still slightly soft.
Small tip: For extra pretty cookies, press a few extra chocolate chips onto the tops of the dough balls right before baking.
Step 9: Cool and Enjoy
Remove the baking sheets from the oven and let the cookies cool on the sheets for 5 minutes. They will continue to set during this time. Then, transfer them to a wire rack to cool completely. Or, if you can’t resist, enjoy them warm with a glass of milk!
Tips & Variations
- Gluten-Free Option: Easily substitute the all-purpose flour with a 1:1 gluten-free baking flour blend. Ensure your blend contains xanthan gum for the best texture.
- Vegan Option: Replace the butter with a plant-based butter substitute (like Miyoko’s Kitchen or Earth Balance sticks) and use a flax egg (1 tablespoon ground flaxseed meal mixed with 3 tablespoons water, let sit for 5 minutes) for each egg.
- Add More Goodness: Boost fiber and healthy fats by adding ½ cup of chopped walnuts, pecans, or even some shredded coconut to the dough along with the chocolate chips.
- Spicy Kick: For a unique flavor twist, add ¼ teaspoon of cayenne pepper or a pinch of chili powder to your dry ingredients. It creates a subtle warmth that enhances the chocolate!
- Flavor Variations: Try adding a teaspoon of espresso powder for a mocha flavor, or orange zest for a bright, citrusy note that pairs beautifully with chocolate.
Nutritional Information
Approximate values per serving (based on 20 servings):
- Calories: 250 kcal
- Protein: 3g
- Carbohydrates: 35g
- Fat: 12g
Note: Nutritional values may vary depending on specific ingredients and brands used.
Health Benefits
While these cookies are a treat, some ingredients offer surprising benefits. Dark chocolate, for instance, is a key component. It’s rich in antioxidants like flavonoids, which can help protect your cells from damage. Studies suggest moderate consumption of dark chocolate may even support heart health.
Eggs provide high-quality protein and essential vitamins and minerals. They contain choline, which is important for brain health, and vitamin D, crucial for bone health and immunity. Even in a sweet treat, eggs contribute valuable nutrients.
Butter, when consumed in moderation, provides fat-soluble vitamins like A, E, and K2. Vitamin A is vital for vision and immune function, while K2 plays a role in bone health. It also contributes to satiety, making these cookies satisfying.
Lastly, while white flour is refined, the overall enjoyment and comfort derived from baking and sharing these cookies can contribute to mental well-being. Food isn’t just about nutrition; it’s also about joy and connection.
Serving Suggestions
- Serve warm with a scoop of vanilla bean ice cream for an ultimate dessert experience.
- Enjoy with a tall glass of cold milk or a hot cup of coffee or tea for a cozy snack.
- Crumble over yogurt or oatmeal for a decadent breakfast treat (in moderation, of course!).
- Package them beautifully as homemade gifts for friends, family, or neighbors.
Storage Tips: Store baked cookies in an airtight container at room temperature for up to 3-4 days. They tend to get chewier the next day, which is delicious! You can also freeze the raw cookie dough balls for up to 3 months. Simply place scooped dough balls on a baking sheet, freeze until solid, then transfer to a freezer-safe bag. When ready to bake, place frozen dough on a baking sheet and add 2-3 minutes to the baking time. Reheat baked cookies in a microwave for 10-15 seconds for that fresh-out-of-the-oven warmth.
Conclusion
There you have it – the secret to truly amazing, bakery-style chocolate chip cookies, made right in your own kitchen! These cookies are the perfect blend of chewy and crisp, packed with rich chocolate flavor that will make every bite a moment of pure bliss. They’re simple to make, yet yield impressive results that will have everyone asking for your recipe.
Don’t hesitate to give this recipe a try. The small steps, like chilling the dough and using a mix of sugars, make a huge difference in achieving that professional texture and depth of flavor. You’ll be so proud to present these golden-brown beauties.
So, bake a batch (or two!), fill your home with the most wonderful aroma, and share the joy. These cookies are perfect for celebrations, quiet evenings, or simply because you deserve a delicious treat. Happy baking!


