
Introduction
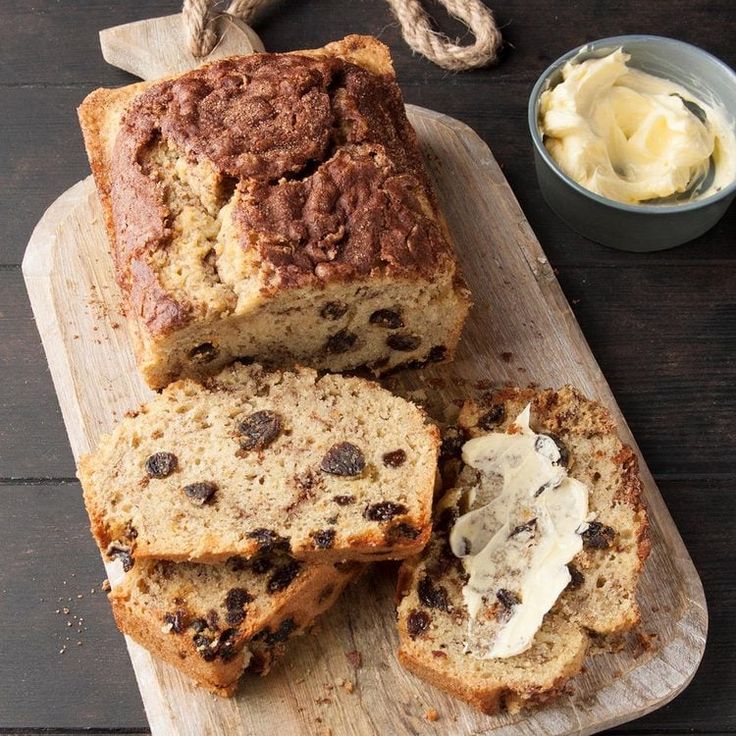
Get ready to fall in love with a bread that tastes like a warm hug! Our Cinnamon Raisin Sweet Sourdough Bread is an absolute dream. It combines the delightful tang of sourdough with the comforting sweetness of plump raisins and aromatic cinnamon. Every slice is a perfect balance of chewy texture and incredible flavor, making it a truly special treat.
You might think sourdough is tricky, but this recipe is simpler than you imagine. We’ve broken down each step to make it approachable for everyone, even if you’re new to sourdough baking. The active hands-on time is surprisingly short, letting the magic of fermentation do most of the work for you. It’s a rewarding bake that fills your home with the most wonderful scent.
So, why not give it a try? Imagine waking up to a slice of this toasted bread, slathered with butter, and a cup of coffee. It’s pure bliss! This recipe invites you to create something truly delicious and impressive. Let’s bake some happiness together!
Cooking Time & Prep Time
- Prep Time: 45 minutes (active hands-on time)
- Bulk Fermentation: 4-6 hours (passive time)
- Cold Proof: 8-12 hours (passive time)
- Cooking Time: 45 minutes
- Total Recipe Time: Approximately 14-20 hours (includes active, bulk fermentation, and cold proof)
Small tip: While the total recipe time seems long, most of it is passive waiting. You can easily fit the active steps into your day!
Ingredients
This recipe makes 1 large loaf (approximately 12 servings).
-
For the Dough
- Active Sourdough Starter: 100g (fed and bubbly)
- Warm Water: 300g (around 90-95°F / 32-35°C)
- All-Purpose Flour: 400g (or bread flour for extra chew)
- Granulated Sugar: 50g
- Fine Sea Salt: 8g
- Unsalted Butter: 30g (softened, cut into small pieces)
-
For the Filling
- Ground Cinnamon: 2 teaspoons
- Granulated Sugar: 2 tablespoons
- Raisins: 100g (plumped, see tip below)
Small tip: To plump raisins, soak them in hot water for 10 minutes, then drain thoroughly and pat dry. This makes them extra juicy in the bread!
Step-by-Step Instructions
-
Step 1: Prepare Your Starter and Autolyse
Make sure your sourdough starter is active and bubbly. Feed it 4-6 hours before you plan to mix the dough. In a large bowl, combine the flour and 280g of the warm water. Mix until just combined and no dry spots remain. Cover the bowl and let it rest for 30 minutes to 1 hour. This is called autolyse and helps develop the gluten.
Small tip: A strong, active starter is key to good sourdough rise. It should float in water!
-
Step 2: Mix the Dough
Add your active sourdough starter, granulated sugar, and salt to the autolysed dough. Mix with your hands, squeezing and folding until all ingredients are well incorporated. The dough will be shaggy at first. Slowly add the softened butter, one piece at a time, incorporating each piece fully before adding the next. Continue mixing for about 5-7 minutes until the dough starts to come together and feels a bit smoother.
Small tip: Don’t worry if the dough feels messy when adding butter; it will eventually come together.
-
Step 3: Incorporate Cinnamon and Raisins
Spread the dough out slightly on a clean surface. Sprinkle the 2 tablespoons of sugar and 2 teaspoons of cinnamon evenly over the dough. Scatter the plumped raisins over the top. Gently fold the dough over itself several times, ensuring the cinnamon, sugar, and raisins are evenly distributed throughout. Try not to overmix at this stage.
Small tip: You can gently knead for a minute or two to ensure even distribution of the filling.
-
Step 4: Bulk Fermentation and Stretch & Folds
Transfer the dough to a lightly oiled clean bowl. Cover with a damp kitchen towel or plastic wrap. Let it bulk ferment at room temperature (around 70-75°F / 21-24°C) for 4-6 hours. During this time, perform 3-4 sets of stretch and folds every 30-45 minutes during the first 2-3 hours. To do a stretch and fold, gently grab a portion of the dough, stretch it upwards, and fold it over itself. Rotate the bowl and repeat 3-4 times. This builds strength in the dough.
Small tip: The dough should increase in volume by about 30-50% during bulk fermentation and feel light and airy.
-
Step 5: Shape the Loaf
Gently turn the dough out onto a lightly floured surface. Preshape the dough into a round or a rectangular log, letting it rest for 20 minutes. This helps the gluten relax. Then, perform your final shaping. For a round loaf, gently pull the edges of the dough towards the center to create tension on the surface. For an oblong loaf, gently fold the top third down, then the bottom third up, and then roll it tightly. Place the shaped dough seam-side up into a floured banneton or a bowl lined with a floured kitchen towel.
Small tip: Use rice flour for dusting your banneton or towel; it prevents sticking better than wheat flour.
-
Step 6: Cold Proof
Cover the banneton or bowl with plastic wrap or a shower cap. Place it in the refrigerator for 8-12 hours (or up to 24 hours). This slow, cold proof develops flavor and makes the dough easier to handle and score.
Small tip: Cold proofing is essential for a good crust and flavor development. Don’t skip this step!
-
Step 7: Preheat Oven and Dutch Oven
About 45 minutes before you’re ready to bake, place your Dutch oven with its lid into your oven. Preheat the oven to 450°F (232°C). Ensure it’s fully preheated before moving to the next step.
Small tip: A hot Dutch oven creates a fantastic steamy environment for a beautiful crust.
-
Step 8: Score and Bake
Carefully remove the hot Dutch oven from the oven. Gently invert the cold dough into the hot Dutch oven. Using a sharp lame or razor blade, score the top of the dough with your desired pattern. This helps control the expansion of the loaf. Cover the Dutch oven with its lid and bake for 30 minutes. Then, remove the lid and continue baking for another 15-20 minutes, or until the crust is a deep golden brown and the internal temperature reaches 200-210°F (93-99°C).
Small tip: Be quick and confident with your scoring for the best oven spring.
-
Step 9: Cool Completely
Once baked, carefully remove the loaf from the Dutch oven and transfer it to a wire rack. Let it cool completely for at least 2-3 hours before slicing. This allows the internal structure to set and prevents a gummy texture.
Small tip: Patience is key! Slicing too early can ruin the texture you worked so hard to achieve.
Tips & Variations
- Gluten-Free Option: Substitute the all-purpose flour with a 1:1 gluten-free bread flour blend (ensure it contains xanthan gum). You might need to adjust water slightly as GF flours absorb differently. The dough will be stickier and less elastic.
- Vegan Option: This recipe is already vegetarian. To make it vegan, simply substitute the unsalted butter with a high-quality plant-based butter alternative.
- Add Nuts or Seeds: For extra texture and a protein boost, fold in 1/2 cup of chopped walnuts, pecans, or sunflower seeds along with the raisins.
- Spicy Twist: For a subtle warmth, add 1/4 teaspoon of ground ginger or a tiny pinch of cayenne pepper to the cinnamon-sugar mix.
- Orange Zest Delight: Enhance the flavor by adding 1-2 teaspoons of fresh orange zest to the dough with the cinnamon and raisins. It pairs beautifully with both.
- Chocolate Chip Swirl: For a decadent treat, replace half of the raisins with 1/2 cup of dark or milk chocolate chips.
Nutritional Information
Approximate values per serving (based on 12 servings):
- Calories: 250 kcal
- Protein: 7g
- Carbohydrates: 48g
- Fat: 4g
Please note: These values are approximate and may vary depending on the exact ingredients and brands used.
Health Benefits
Our Cinnamon Raisin Sweet Sourdough Bread isn’t just delicious; it offers some wonderful health benefits too!
- Sourdough Benefits: The fermentation process in sourdough bread breaks down gluten and phytic acid. This can make the bread easier to digest and increases the bioavailability of nutrients like iron, zinc, and magnesium. It also contains beneficial prebiotics and probiotics that support gut health.
- Raisins for Energy and Fiber: Raisins are a natural source of quick energy, packed with natural sugars. They are also a good source of dietary fiber, which aids digestion and helps maintain healthy blood sugar levels. Plus, they offer antioxidants and important minerals like potassium and iron.
- Cinnamon’s Antioxidant Power: Cinnamon is a powerhouse of antioxidants, which help protect your body from damage caused by free radicals. It’s also known for its anti-inflammatory properties and may help improve insulin sensitivity, contributing to better blood sugar control.
- Whole Grain Advantage (if using whole wheat flour): If you choose to incorporate some whole wheat flour, you’ll benefit from increased fiber, vitamins (like B vitamins), and minerals. Whole grains are linked to a reduced risk of heart disease and type 2 diabetes.
Serving Suggestions
- Classic Toast: Enjoy a thick slice toasted, spread generously with butter, cream cheese, or your favorite jam.
- Breakfast Sandwich: Use it as the base for a sweet breakfast sandwich with a fried egg and a slice of cheese.
- French Toast: Transform leftover slices into the most amazing Cinnamon Raisin Sourdough French Toast. The tang of the sourdough adds incredible depth.
- With Coffee or Tea: Simply enjoy a slice with your morning coffee or afternoon tea for a comforting snack.
- Sweet Dessert: Lightly toast and serve with a scoop of vanilla ice cream for


