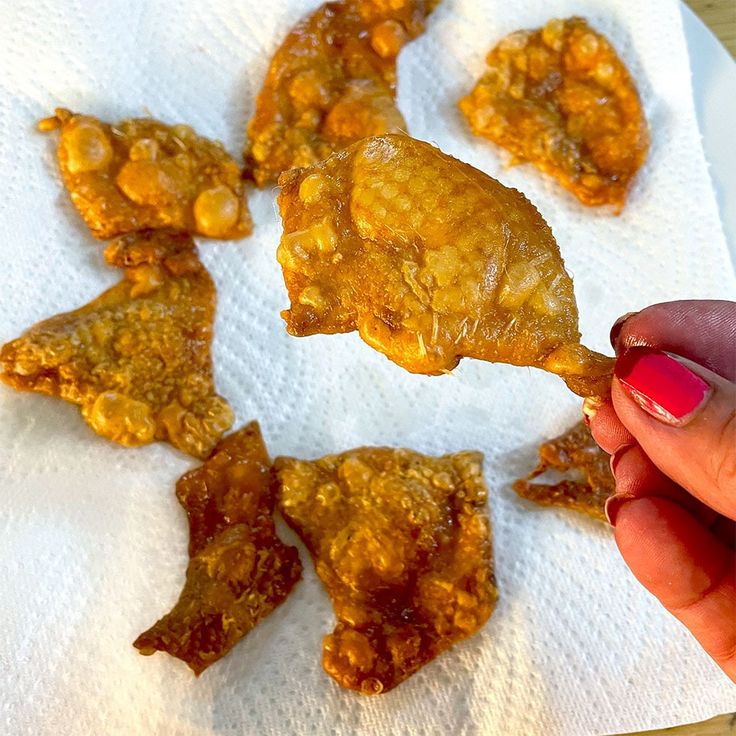
Why Your Chicken Skin Keeps Turning Rubbery And How To Finally Get That Crunch Right

Introduction
Imagine a perfectly cooked piece of chicken. The meat is juicy and tender, full of flavor. But what truly makes it special? That incredibly golden, shatteringly crisp skin! It’s the kind of skin that crackles with every bite, adding an irresistible texture and richness that elevates the entire dish. No more rubbery, sad chicken skin for us!
Many people struggle to get that perfect crunch, often ending up with chewy or soggy skin instead. But guess what? Achieving truly crispy chicken skin isn’t hard at all. It just requires a few simple, yet crucial, techniques that are easy to master. Once you know these secrets, you’ll wonder why you ever settled for less. It’s a quick win in the kitchen that makes a huge difference.
Today, we’re going to unlock the secrets to flawless, crispy chicken skin every single time. Get ready to transform your chicken dishes from good to absolutely unforgettable. You’ll be so proud of the results, and your taste buds will thank you. Let’s get cooking!
Cooking Time & Prep Time
- Prep Time: 20 minutes
- Cooking Time: 30 minutes
- Total Time: 50 minutes
Small tip: The prep time includes a crucial step of thoroughly drying the chicken skin, which is key to its crispiness. Don’t rush this part!
Ingredients
This recipe makes 4 servings.
- 4 bone-in, skin-on chicken thighs (about 6-8 ounces each)
- 1 tablespoon olive oil or avocado oil
- 1 teaspoon kosher salt (or ½ teaspoon fine sea salt)
- ½ teaspoon black pepper
- ½ teaspoon garlic powder
- ¼ teaspoon smoked paprika (optional, but adds great color and flavor)
- Fresh parsley, chopped, for garnish (optional)
Step-by-Step Instructions
Step 1: Prepare the Chicken
Remove the chicken thighs from their packaging. Pat them incredibly dry with paper towels. You want the skin to be as dry as possible. This is the most critical step for crispy skin.
Small tip: Use several sheets of paper towel and press firmly on all sides of the chicken, especially the skin. Even let them sit on a rack for 15-20 minutes after patting dry for extra air exposure.
Step 2: Season the Chicken
In a small bowl, combine the kosher salt, black pepper, garlic powder, and smoked paprika (if using). Sprinkle this seasoning mixture generously all over the chicken thighs, making sure to get some under the skin too. Gently rub it in.
Small tip: Don’t be shy with the salt on the skin. It helps to draw out moisture and enhance crispiness.
Step 3: Preheat Oven and Pan
Preheat your oven to 400°F (200°C). Place a heavy-bottomed, oven-safe skillet (cast iron or stainless steel works best) over medium-high heat on your stovetop. Add the olive oil to the hot pan.
Small tip: A hot pan is essential for a good sear. Make sure it’s shimmering slightly before adding the chicken.
Step 4: Sear Skin-Side Down
Carefully place the chicken thighs, skin-side down, into the hot skillet. You should hear a satisfying sizzle immediately. Do not move the chicken for 8-10 minutes. This allows the skin to render its fat and become deeply golden and crispy.
Small tip: Resist the urge to peek or move the chicken! Let it sear undisturbed. This creates a beautiful, even crust.
Step 5: Flip and Finish in Oven
Once the skin is golden brown and crispy, carefully flip the chicken thighs over. Transfer the skillet directly into the preheated oven. Continue to cook for another 15-20 minutes, or until the internal temperature of the thickest part of the chicken reaches 165°F (74°C).
Small tip: Use a meat thermometer to ensure the chicken is cooked through and safe to eat. Don’t overcook, or the meat will be dry.
Step 6: Rest the Chicken
Remove the skillet from the oven. Transfer the cooked chicken thighs to a cutting board or plate. Tent them loosely with foil and let them rest for 5-10 minutes. This allows the juices to redistribute, keeping the meat moist and tender.
Small tip: Resting is just as important as cooking. Skipping this step can result in dry chicken, even if perfectly cooked.
Step 7: Serve
Garnish with fresh chopped parsley, if desired. Serve your perfectly crispy-skinned chicken thighs immediately with your favorite sides. Enjoy that amazing crunch!
Tips & Variations
- Gluten-Free Option: This recipe is naturally gluten-free! Always double-check your seasoning labels to ensure they don’t contain any hidden gluten-containing ingredients, especially if you have severe sensitivities.
- Vegan/Vegetarian Option: While you can’t get “chicken skin” without chicken, you can achieve a similar satisfying crispiness with plant-based alternatives. Try pan-frying slices of firm tofu or tempeh until golden and crispy, or baking thinly sliced king oyster mushroom stems for a “pulled” texture. Season them similarly for a savory crunch!
- Add More Vegetables or Protein: Roast sturdy vegetables like broccoli florets, asparagus spears, or potato wedges on a separate baking sheet alongside the chicken in the oven during the last 15 minutes of cooking. For extra protein, serve with a side of quinoa or lentils.
- Spicy Version: Kick up the heat by adding ¼ to ½ teaspoon of cayenne pepper to your seasoning mix. You can also drizzle a little hot sauce over the chicken during the last few minutes of baking for a spicy glaze.
- Herb & Citrus Boost: For a different flavor profile, add ½ teaspoon of dried thyme or rosemary to your seasoning. A squeeze of fresh lemon juice over the chicken right before serving adds a bright, zesty finish that complements the rich skin beautifully.
Nutritional Information
Approximate values per serving (based on 4 servings):
- Calories: 420 kcal
- Protein: 35 g
- Carbohydrates: 2 g
- Fat: 29 g
Note: Nutritional values may vary depending on exact ingredient brands and portion sizes used.
Health Benefits
This crispy chicken thigh recipe offers several health benefits, making it a wholesome addition to your meal rotation.
Chicken, especially the thigh meat, is an excellent source of high-quality protein. Protein is essential for building and repairing tissues, making enzymes and hormones, and supporting overall muscle health. It also helps you feel full and satisfied, which can aid in weight management.
Beyond protein, chicken provides a good array of essential vitamins and minerals. It’s rich in B vitamins like niacin (B3), vitamin B6, and vitamin B12, which are crucial for energy metabolism and nervous system function. You’ll also get minerals like phosphorus, important for bone health, and selenium, a powerful antioxidant that supports immune function.
The olive or avocado oil used for cooking contributes healthy monounsaturated fats. These fats are known to support heart health by helping to lower bad cholesterol levels. They also provide antioxidants, which protect your body’s cells from damage.
Even the spices like garlic powder and smoked paprika offer benefits. Garlic is known for its immune-boosting and anti-inflammatory properties, while paprika contains capsaicinoids and carotenoids, which are antioxidants that can contribute to overall wellness. Enjoying this dish in moderation as part of a balanced diet is a delicious way to nourish your body.
Serving Suggestions
- Classic Comfort: Serve alongside creamy mashed potatoes or a fluffy rice pilaf and a side of steamed green beans or roasted asparagus.
- Light & Fresh: Pair with a vibrant mixed green salad dressed with a light vinaigrette, or a refreshing coleslaw for a lighter meal.
- Hearty & Wholesome: Enjoy with roasted root vegetables like carrots and parsnips, or a warm quinoa salad packed with herbs and cherry tomatoes.
- Meal Prep Idea: Cook a larger batch of chicken thighs. Once cooled, portion them out with a serving of brown rice and your favorite roasted vegetables into airtight containers for quick and easy lunches throughout the week.
Storage Tips
Leftover crispy chicken thighs can be stored in an airtight container in the refrigerator for up to 3-4 days. While you can freeze cooked chicken for up to 2-3 months, the skin will likely lose its crispiness upon thawing and reheating. To reheat, the best method is to use an oven or an air fryer at 350°F (175°C) for 10-15 minutes until heated through and the skin has crisped up again. Microwaving is not recommended as it will make the skin soft and rubbery.
Conclusion
There you have it! The secret to achieving that coveted, perfectly crispy chicken skin is now yours. It’s a simple combination of drying, seasoning, hot searing, and oven-finishing that guarantees amazing results every single time. No more rubbery disappointments, just pure, unadulterated crunch and flavor.
This technique isn’t just about making delicious food; it’s about building confidence in your kitchen skills. Once you master this, you’ll find yourself looking for more ways to incorporate that satisfying crispiness into your cooking. It truly elevates a humble chicken thigh into something special.
So go ahead, give this recipe a try this week! Impress your family and friends with your newfound crispy chicken expertise. They’ll be asking for your secret, and you can proudly share the joy of a truly perfect piece of chicken. Happy cooking!


