
Introduction
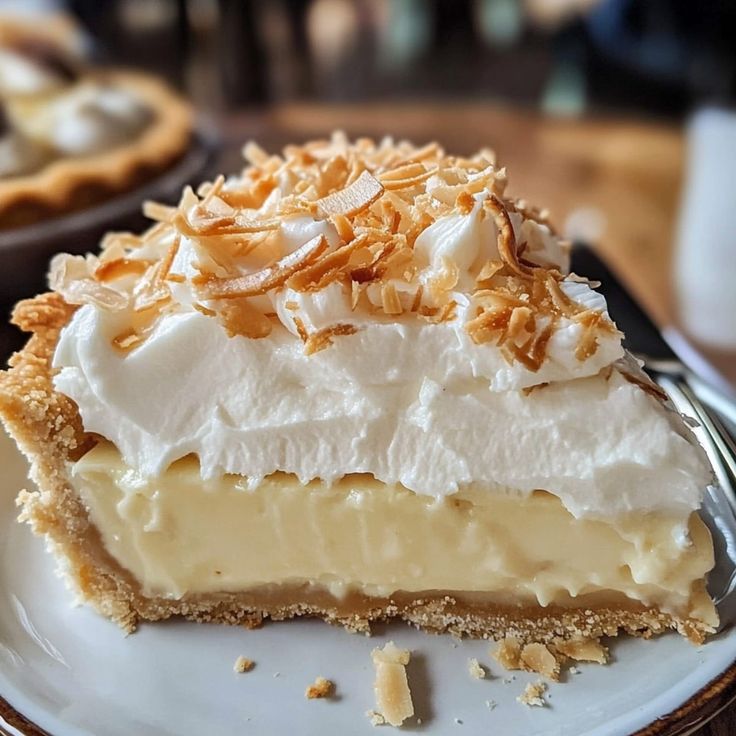
Get ready for a slice of pure heaven! Our Absolute Best Coconut Cream Pie is a dessert dream come true. It’s wonderfully creamy, bursting with fresh coconut flavor, and has a delicate, flaky crust. Every bite transports you to a tropical paradise, making it a truly special treat for any occasion.
You might think a pie this delicious is complicated to make, but think again! This recipe is surprisingly straightforward. We’ve broken down each step, making it simple for even beginner bakers to create a show-stopping dessert. With a few basic ingredients and a little love, you’ll have this magnificent pie ready in no time.
So, why wait? Gather your ingredients and prepare to impress your taste buds and everyone around your table. This pie is a guaranteed crowd-pleaser and will quickly become a cherished recipe in your collection. Let’s get baking!
Cooking Time & Prep Time
Prep Time: 45 minutes
Cooking Time: 20 minutes (for crust and custard)
Chill Time: 4 hours (minimum)
Total Time: 5 hours 5 minutes (including chill time)
Small tip: The chill time is crucial for the pie to set properly, so don’t rush this step for the best results!
Ingredients
This recipe makes 8 generous servings.
For the Flaky Pie Crust
- 1 ¼ cups all-purpose flour
- ½ teaspoon salt
- ½ cup (1 stick) unsalted butter, very cold and cut into small cubes
- ¼ cup ice water (or slightly more if needed)
For the Coconut Custard Filling
- 1 ½ cups full-fat canned coconut milk (not light)
- 1 ½ cups whole milk
- ½ cup granulated sugar
- ¼ cup cornstarch
- 2 large egg yolks
- 2 tablespoons unsalted butter
- 1 teaspoon vanilla extract
- 1 cup shredded sweetened coconut flakes, lightly toasted
For the Whipped Cream Topping
- 1 ½ cups heavy cream, very cold
- ¼ cup powdered sugar
- 1 teaspoon vanilla extract
For Garnish
- ¼ cup shredded sweetened coconut flakes, lightly toasted
- Optional: chocolate shavings or fresh fruit
Step-by-Step Instructions
-
Step 1: Prepare the Pie Crust
In a large bowl, whisk together the flour and salt. Add the cold butter cubes. Using a pastry blender or your fingertips, cut the butter into the flour until it resembles coarse crumbs with some pea-sized pieces of butter remaining. This texture is key for a flaky crust.
Small tip: Work quickly when incorporating the butter to prevent it from melting. Cold butter creates steam in the oven, which leads to flakiness!
-
Step 2: Add Ice Water to Crust
Gradually add the ice water, one tablespoon at a time, mixing gently until the dough just comes together. Be careful not to overmix. Form the dough into a disc, wrap it in plastic wrap, and refrigerate for at least 30 minutes.
Small tip: If your dough feels too dry, add a tiny bit more ice water, half a tablespoon at a time, until it barely holds together.
-
Step 3: Bake the Pie Crust
Preheat your oven to 375°F (190°C). On a lightly floured surface, roll out the chilled dough into a 12-inch circle. Carefully transfer it to a 9-inch pie plate. Trim and crimp the edges as desired. Prick the bottom of the crust all over with a fork.
Small tip: For a perfectly crisp crust, line it with parchment paper and fill with pie weights or dried beans before baking. This is called blind baking.
-
Step 4: Blind Bake the Crust
Blind bake the crust for 15-20 minutes, or until lightly golden brown. If using pie weights, remove them after 10 minutes and continue baking until golden. Let the baked crust cool completely on a wire rack.
Small tip: A fully cooled crust prevents the filling from becoming soggy. Patience is a virtue here!
-
Step 5: Prepare the Coconut Custard Base
In a medium saucepan, whisk together the coconut milk, whole milk, and granulated sugar. Bring the mixture to a gentle simmer over medium heat, stirring occasionally. Do not let it boil vigorously.
Small tip: Use full-fat coconut milk for the richest, most luxurious flavor and texture.
-
Step 6: Thicken the Custard
In a separate small bowl, whisk together the cornstarch and egg yolks until smooth. Slowly temper the hot milk mixture into the egg yolk mixture by adding a small amount of hot liquid to the yolks first, whisking constantly. Then, pour the tempered egg mixture back into the saucepan with the remaining milk.
Small tip: Tempering prevents the egg yolks from scrambling when added to the hot liquid. Go slowly!
-
Step 7: Cook the Custard
Return the saucepan to medium heat and cook, stirring constantly, until the custard thickens significantly and comes to a gentle boil. It should coat the back of a spoon. Remove from heat and stir in the 2 tablespoons of butter, vanilla extract, and 1 cup of toasted shredded coconut flakes.
Small tip: Continuously stirring helps prevent lumps and ensures even cooking of the custard.
-
Step 8: Chill the Custard
Pour the warm coconut custard into the cooled pie crust. Cover the surface of the custard directly with plastic wrap to prevent a skin from forming. Refrigerate for at least 4 hours, or preferably overnight, until completely set.
Small tip: Pressing the plastic wrap directly onto the custard ensures no skin forms, keeping it perfectly smooth.
-
Step 9: Prepare the Whipped Cream Topping
In a cold bowl with cold beaters (or a stand mixer), whip the very cold heavy cream, powdered sugar, and vanilla extract until stiff peaks form. Be careful not to overbeat, or it will turn into butter.
Small tip: Chilling your bowl and beaters for 10-15 minutes before whipping helps the cream whip up faster and fluffier.
-
Step 10: Assemble and Garnish
Once the pie is fully chilled and set, remove the plastic wrap. Spread the whipped cream evenly over the custard. Garnish with the remaining ¼ cup of toasted shredded coconut flakes, chocolate shavings, or fresh fruit if desired. Serve immediately and enjoy!
Small tip: Toasting coconut flakes brings out their natural sweetness and adds a lovely texture. Simply spread on a baking sheet and bake at 325°F (160°C) for 5-7 minutes, stirring occasionally.
Tips & Variations
- Gluten-Free Option: Easily make this pie gluten-free by using your favorite store-bought gluten-free pie crust, or make one from scratch with a gluten-free all-purpose flour blend.
- Vegan/Vegetarian Option: This pie is already vegetarian. To make it vegan, use a vegan pie crust (often made with vegetable shortening or vegan butter). For the filling, replace the egg yolks with 2 tablespoons of additional cornstarch mixed with a little plant-based milk, and use a vegan butter substitute. Ensure your sugar is bone-char free if strict.
- Add More Protein or Fiber: Boost the nutritional content by sprinkling toasted chopped nuts (like almonds or cashews) or seeds (like chia or flax seeds) over the whipped cream topping. You can also serve a small slice of pie alongside a bowl of fresh berries for added vitamins and fiber.
- Spicy Version: For a subtle warm kick, add a tiny pinch (⅛ teaspoon) of ground cardamom or cinnamon to the custard mixture along with the vanilla extract. It complements the coconut beautifully without making it overly spicy.
- Tropical Fruit Twist: For an extra burst of tropical flavor, layer thinly sliced fresh mango or pineapple chunks at the bottom of the cooled pie crust before pouring in the custard. This adds a lovely fruity contrast.
Nutritional Information
Approximate values per serving (based on 8 servings):
- Calories: 520 kcal
- Protein: 6g
- Carbohydrates: 50g
- Fat: 35g
Please note: These values are approximate and may vary depending on specific ingredients and brands used.
Health Benefits
While this is a delicious dessert, some of its key ingredients offer surprising health benefits:
Coconut Milk and Coconut Flakes: Coconut is a good source of healthy fats, including medium-chain triglycerides (MCTs). MCTs are easily digestible and can be used by the body for energy. Coconut also provides dietary fiber, which aids digestion, and essential minerals like manganese, copper, and selenium, important for antioxidant defense and bone health.
Whole Milk and Heavy Cream: Dairy products are excellent sources of calcium, vital for strong bones and teeth. They also provide protein, which is essential for muscle repair and growth, and vitamin D (often fortified), which helps with calcium absorption and immune function.
Eggs: Egg yolks contribute protein, choline (important for brain health), and fat-soluble vitamins like A, D, E, and K. They are also a good source of antioxidants like lutein and zeaxanthin, beneficial for eye health.
Vanilla Extract: Beyond its delightful flavor, vanilla contains antioxidants, which can help protect your body from damage caused by free radicals. It also has a calming effect and can contribute to overall well-being.
Serving Suggestions
- Classic Dessert: Serve a generous slice of this pie as the grand finale to any meal, especially after a light dinner.
- Coffee & Tea Companion: It pairs beautifully with a hot cup of coffee, a creamy latte, or a refreshing iced tea for an afternoon treat.
- Potluck Favorite: This pie travels well and is always a hit at gatherings, potlucks, and holiday celebrations.
- Seasonal Fruit Pairing: Serve alongside a vibrant fruit salad featuring berries, kiwi, or pineapple for a fresh contrast.
Storage Tips
Store any leftover coconut cream pie loosely covered in the refrigerator for up to 3-4 days. The whipped cream topping may soften slightly over time, but the custard will remain delicious. Freezing this pie is not recommended, as the custard can become watery and the crust soggy upon thawing. It’s best enjoyed fresh and chilled from the fridge.
Conclusion
There you have it – the recipe for The Absolute Best Coconut Cream Pie! This dessert is more than just a sweet treat; it’s a moment of pure bliss. With its creamy, luscious filling, flaky crust, and cloud-like topping, it truly delivers on its promise of tropical delight. It’s a simple pleasure that tastes incredibly luxurious.
Don’t be shy; give this recipe a try. You’ll be amazed at how easy it is to create such a stunning and delicious pie from scratch. The effort is minimal, but the rewards


