
Introduction
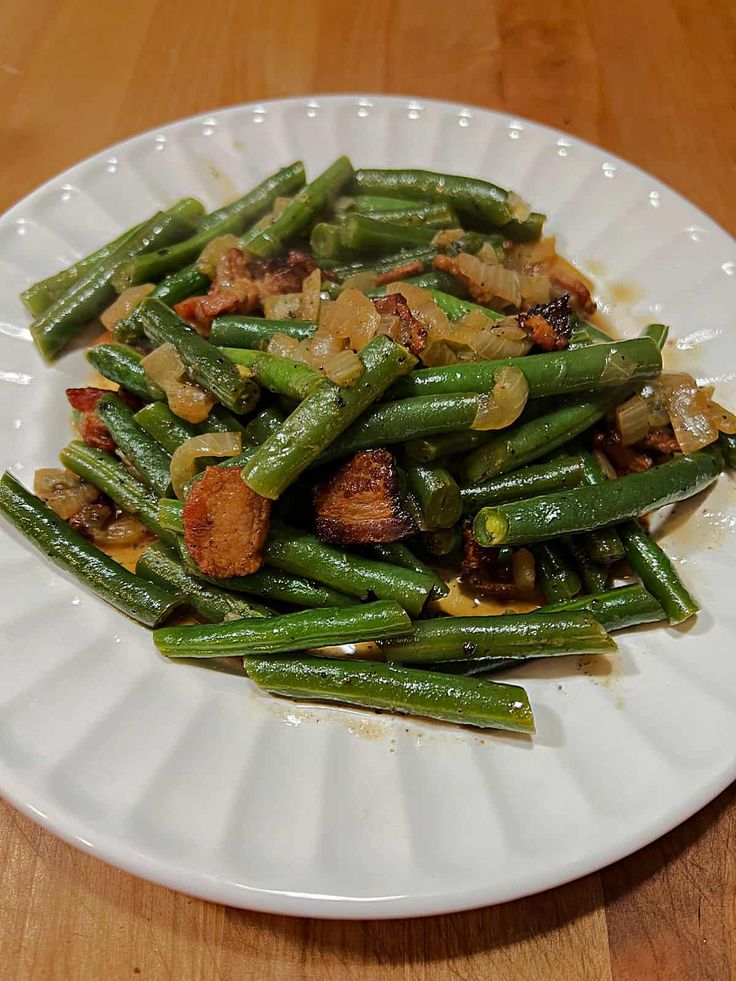
Get ready to bring the taste of your favorite steakhouse right into your kitchen! We’re talking about those incredibly tender, savory, and slightly sweet green beans from Texas Roadhouse. This dish isn’t just a side; it’s a star. Each bite offers a delightful blend of smoky bacon, sweet brown sugar, and perfectly cooked green beans that simply melt in your mouth. It’s comfort food at its finest, a true crowd-pleaser that complements almost any meal.
The best part? Recreating this iconic side dish at home is surprisingly simple and quick. You don’t need fancy ingredients or complex techniques. With just a few common pantry staples and a single skillet, you can whip up a batch of these irresistible green beans in no time. It’s perfect for a weeknight dinner, a casual get-together, or even a holiday feast when you want something special without the fuss.
So, if you’ve been craving those unbelievably delicious green beans, look no further. This recipe is your ticket to a flavorful journey. Prepare to impress your family and friends with this easy-to-make, incredibly tasty side. Let’s get cooking and bring that Texas Roadhouse magic home!
Cooking Time & Prep Time
- Prep Time: 15 minutes
- Cooking Time: 25 minutes
- Total Time: 40 minutes
Small tip: You can chop your bacon, onion, and garlic while the green beans are being trimmed to save a few minutes on prep time.
Ingredients
This recipe makes approximately 6 servings.
- 1 pound fresh green beans, trimmed and snapped
- 6 slices thick-cut bacon, diced
- 1 medium yellow onion, finely diced
- 3 cloves garlic, minced
- 2 cups chicken broth (low sodium preferred)
- 2 tablespoons light brown sugar, packed
- 1 tablespoon soy sauce (or Worcestershire sauce for a different depth)
- 1/2 teaspoon black pepper
- 1/4 teaspoon salt (adjust to taste, especially if using regular chicken broth and bacon)
Step-by-Step Instructions
-
Step 1: Cook the Bacon
Place the diced bacon in a large skillet or Dutch oven over medium heat. Cook until crispy, stirring occasionally. This usually takes about 7-10 minutes. Once crispy, remove the bacon with a slotted spoon and set aside on a paper towel-lined plate to drain. Leave about 1-2 tablespoons of bacon fat in the skillet.
Small tip: Don’t discard all the bacon fat! A little bit adds amazing flavor to the green beans.
-
Step 2: Sauté Aromatics
Add the finely diced onion to the skillet with the reserved bacon fat. Sauté over medium heat for about 5 minutes, until the onion softens and becomes translucent. Then, add the minced garlic and cook for another minute until fragrant. Be careful not to burn the garlic.
Small tip: Keep the heat medium to prevent the garlic from burning, which can make it bitter.
-
Step 3: Add Green Beans and Broth
Stir in the trimmed green beans into the skillet, coating them with the onion, garlic, and bacon fat. Pour in the chicken broth. Bring the mixture to a gentle simmer.
Small tip: Use fresh green beans for the best texture and flavor. Frozen can work but may be softer.
-
Step 4: Season the Beans
Once simmering, stir in the light brown sugar, soy sauce (or Worcestershire sauce), black pepper, and salt. Mix everything well to ensure the seasonings are evenly distributed. The brown sugar will dissolve into the broth, creating a sweet and savory base.
Small tip: Taste the broth before adding too much salt, as bacon and soy sauce are already quite salty.
-
Step 5: Simmer Until Tender
Reduce the heat to low, cover the skillet, and let the green beans simmer for 15-20 minutes, or until they are tender-crisp to your liking. Stir occasionally to prevent sticking and ensure even cooking. The liquid should reduce and thicken slightly.
Small tip: For extra tender beans, cook a few minutes longer. For a firmer bite, shorten the cooking time.
-
Step 6: Finish and Serve
Once the green beans are cooked to your desired tenderness, remove the lid and increase the heat slightly if there’s too much liquid. Cook for another 2-3 minutes, allowing some of the liquid to evaporate and concentrate the flavors. Stir in the reserved crispy bacon just before serving.
Small tip: Serving the bacon separately or stirring it in at the very end keeps it crispy!
Tips & Variations
- Gluten-Free Option: Ensure you use a certified gluten-free chicken broth. Also, swap regular soy sauce for tamari, which is a gluten-free alternative. Most Worcestershire sauces are gluten-free, but always check the label.
- Vegan/Vegetarian Option: Skip the bacon entirely. Instead, use 1-2 tablespoons of olive oil or vegan butter to sauté the onion and garlic. Replace chicken broth with vegetable broth. For a smoky flavor, add a dash of liquid smoke (about 1/4 teaspoon) to the cooking liquid.
- Add More Vegetables or Protein: For a heartier side, you can add sliced mushrooms or diced red bell pepper along with the onions. To incorporate protein, stir in some cooked, shredded chicken or crumbled plant-based sausage during the last few minutes of simmering.
- Spicy Version: If you love a little kick, add 1/4 to 1/2 teaspoon of red pepper flakes along with the garlic. A dash of your favorite hot sauce can also be stirred in at the end for an extra layer of heat.
- Flavor Boosters: A teaspoon of apple cider vinegar added at the very end can brighten the flavors. You can also experiment with different sweeteners like maple syrup or honey instead of brown sugar for a slightly different sweet profile.
Nutritional Information
Approximate values per serving (based on 6 servings):
- Calories: 130 kcal
- Protein: 8g
- Carbohydrates: 11g
- Fat: 7g
Please note that these values are approximate and may vary depending on the specific brands and quantities of ingredients used.
Health Benefits
Green beans are more than just a delicious side; they’re packed with goodness! They are an excellent source of dietary fiber, which is crucial for digestive health and can help keep you feeling full and satisfied. This fiber content also contributes to stable blood sugar levels.
These vibrant veggies are rich in essential vitamins, including Vitamin K, which is important for bone health and blood clotting. They also provide a good amount of Vitamin C, a powerful antioxidant that supports the immune system, and Vitamin A, vital for vision and skin health.
Green beans contain important minerals like folate, which is essential for cell growth and function, especially important during pregnancy. They also offer manganese, an antioxidant mineral involved in metabolism and bone development. Their low calorie count and high nutrient density make them a fantastic addition to any healthy diet.
While this recipe includes bacon and brown sugar, which should be enjoyed in moderation, the base of green beans, garlic, and onion brings significant health advantages. Garlic and onion are known for their anti-inflammatory and immune-boosting properties, thanks to compounds like allicin and quercetin. They add flavor without adding many calories.
Serving Suggestions
- Classic Steakhouse Pairing: Serve these green beans alongside a perfectly grilled steak, juicy pork chops, or roasted chicken for a complete and satisfying meal.
- Holiday Feast Favorite: These beans make an excellent addition to any holiday spread, offering a fresh, savory counterpoint to richer dishes like mashed potatoes and gravy.
- Light Lunch or Dinner: Pair them with a simple baked salmon or a side of quinoa for a lighter, yet flavorful, meal. They also work wonderfully as a vibrant addition to a grain bowl.
Storage Tips
Leftover Texas Roadhouse Green Beans can be stored in an airtight container in the refrigerator for up to 3-4 days. They can also be frozen for longer storage, up to 3 months, though the texture of the green beans may become slightly softer upon thawing. To reheat, gently warm them on the stovetop over medium-low heat until heated through, adding a splash of chicken broth or water if they seem dry. You can also microwave them in short intervals, stirring occasionally.
Conclusion
There you have it – your very own homemade Texas Roadhouse Green Beans! This recipe truly captures the essence of that beloved restaurant classic: tender, savory, and with just the right touch of sweetness. It’s a comforting side dish that brings a burst of flavor to any table, proving that delicious, restaurant-quality food is absolutely achievable in your own kitchen.
We hope you feel inspired to give this recipe a try. It’s designed to be simple, straightforward, and incredibly rewarding. The aroma alone will make your mouth water, and the first bite will confirm that all your efforts were well worth it. You’ll be amazed at how easy it is to recreate such a memorable dish.
So, gather your ingredients, fire up your skillet, and prepare to enjoy a truly delightful meal. Share these amazing green beans with your family and friends, and watch their faces light up. Happy cooking, and enjoy every delicious bite!


