
Introduction
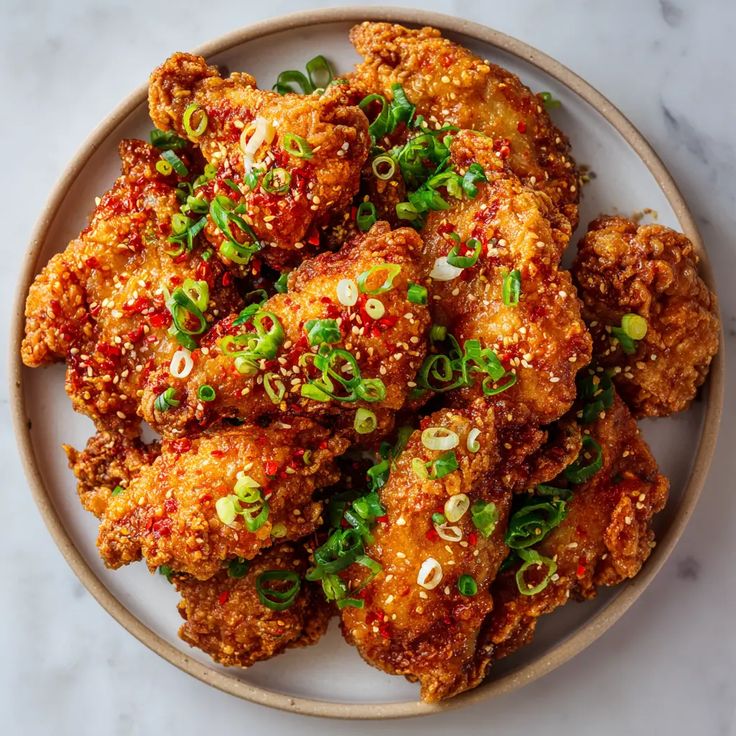
Get ready for a flavor explosion with this incredible Soy Garlic Korean Fried Chicken! Imagine perfectly crispy chicken, twice-fried to golden perfection, then coated in a sticky, savory, sweet, and garlicky sauce. It’s truly a taste sensation that will transport your taste buds straight to the streets of Seoul.
You might think making Korean fried chicken at home is hard, but I promise it’s much easier than you imagine. The secret to that amazing crunch is a simple double-frying technique, and the sauce comes together in minutes. With clear steps and a few easy-to-find ingredients, you’ll be a fried chicken master in no time.
So, roll up your sleeves and prepare to impress yourself and everyone you share this with. This recipe is a guaranteed crowd-pleaser and a fantastic way to enjoy restaurant-quality Korean fried chicken in your own kitchen. Let’s get cooking!
Cooking Time & Prep Time
- Prep Time: 30 minutes
- Cooking Time: 40 minutes
- Total Time: 70 minutes
Small tip: You can marinate the chicken for an hour or two in the fridge for extra flavor, but it’s not strictly necessary for a delicious result!
Ingredients
This recipe makes 4 generous servings.
For the Chicken
- 2 lbs (about 900g) boneless, skinless chicken thighs, cut into 1.5-inch pieces
- 1 teaspoon salt
- ½ teaspoon black pepper
For the Coating
- 1 cup all-purpose flour
- ½ cup cornstarch
- 1 large egg
- ¾ cup cold water
- 1 teaspoon baking powder
For the Soy Garlic Sauce
- ½ cup soy sauce (low sodium preferred)
- ¼ cup mirin (sweet rice wine)
- 2 tablespoons rice vinegar
- 2 tablespoons brown sugar (packed)
- 1 tablespoon honey or corn syrup
- 5 cloves garlic, minced
- 1 teaspoon fresh ginger, grated
- 1 tablespoon cornstarch mixed with 2 tablespoons cold water (slurry)
For Frying
- 6-8 cups vegetable oil, canola oil, or peanut oil, for deep frying
For Garnish (Optional)
- 1 tablespoon toasted sesame seeds
- 2 green onions, thinly sliced
Step-by-Step Instructions
-
Step 1: Prepare the Chicken
Start by patting your chicken pieces very dry with paper towels. This helps the coating stick better. Season the chicken all over with salt and black pepper. Set aside while you prepare the other components.
Small tip: Dry chicken is key for crispy results! Don’t skip this step.
-
Step 2: Make the Coating Batter
In a large bowl, whisk together the flour, cornstarch, and baking powder. In a separate small bowl, whisk the egg and cold water. Pour the wet ingredients into the dry ingredients and mix until just combined. A few lumps are okay. Add the seasoned chicken pieces to the batter and toss until each piece is evenly coated.
-
Step 3: Prepare the Soy Garlic Sauce
In a medium saucepan, combine the soy sauce, mirin, rice vinegar, brown sugar, honey, minced garlic, and grated ginger. Bring the mixture to a gentle simmer over medium heat, stirring until the sugar dissolves. Let it simmer for 2-3 minutes to allow the flavors to meld.
Small tip: Taste the sauce and adjust sweetness or saltiness to your liking before adding the slurry.
-
Step 4: First Fry the Chicken
Heat the frying oil in a large pot or Dutch oven over medium-high heat to 325°F (160°C). Carefully add the coated chicken pieces in batches, making sure not to overcrowd the pot. Fry for 5-7 minutes until lightly golden and cooked through. Remove the chicken with a slotted spoon and place it on a wire rack set over a baking sheet to drain. Let it rest for at least 10 minutes.
Small tip: Using a thermometer is crucial for maintaining the correct oil temperature and ensuring even cooking.
-
Step 5: Second Fry for Extra Crisp
Increase the oil temperature to 350°F (175°C). Return the rested chicken to the hot oil for a second fry. Fry for another 3-5 minutes, or until the chicken is deeply golden brown and incredibly crispy. This double-frying is the secret to that amazing crunch! Remove and place on a clean wire rack.
-
Step 6: Coat the Chicken
While the chicken is frying, return the sauce to a simmer. Give the cornstarch slurry a quick whisk and slowly pour it into the simmering sauce, stirring constantly. The sauce will thicken quickly. Remove from heat once it reaches a syrupy consistency. Add the hot, crispy chicken directly into the sauce and toss gently to coat every piece evenly.
Small tip: Don’t overcook the sauce once the slurry is added; it will thicken significantly as it cools.
-
Step 7: Garnish and Serve
Transfer the coated chicken to a serving platter. Garnish generously with toasted sesame seeds and thinly sliced green onions. Serve immediately and enjoy the incredible crunch and flavor!
Tips & Variations
- Gluten-Free Option: Easily make this recipe gluten-free by using tamari instead of soy sauce and a gluten-free all-purpose flour blend (like a rice flour blend) for the coating.
- Vegan or Vegetarian Option: This sauce is fantastic with crispy fried tofu, cauliflower florets, or even thick-cut king oyster mushrooms. Simply follow the frying steps for your chosen vegetable or plant-based protein.
- Add More Vegetables or Protein: For a more complete meal, toss in some steamed broccoli florets or blanched snap peas with the coated chicken. You can also add edamame or pan-fried bell peppers to the serving plate.
- Spicy Version: If you love a kick, add 1-2 tablespoons of gochujang (Korean chili paste) to the sauce mixture in Step 3. You can also sprinkle red pepper flakes over the finished dish.
- Extra Flavor Boost: A tiny splash of sesame oil added to the sauce right before tossing the chicken can add a wonderful nutty aroma. You can also experiment with a pinch of five-spice powder in the coating for a different twist.
Nutritional Information
Approximate values per serving (based on 4 servings):
- Calories: 720 kcal
- Protein: 45g
- Carbohydrates: 55g
- Fat: 38g
Note: Nutritional values may vary depending on specific ingredients used and the amount of oil absorbed during frying.
Health Benefits
This delicious dish offers some good-for-you components! Chicken, especially boneless, skinless thighs, provides a fantastic source of lean protein. Protein is essential for muscle repair, growth, and overall body function, keeping you feeling full and energized.
Garlic, a star ingredient in our sauce, is known for its impressive health benefits. It’s packed with powerful antioxidants and compounds like allicin, which may support immune function and have anti-inflammatory properties.
Ginger, another key flavor enhancer, is not just for taste! It’s celebrated for its anti-inflammatory and antioxidant effects. It can also aid digestion and may help soothe upset stomachs.
While we enjoy this as a treat, it’s good to know that even our indulgent meals can offer some beneficial nutrients!
Serving Suggestions
- Serve this crispy chicken with a side of fluffy white rice to soak up all that amazing sauce.
- A refreshing side of quick pickled radishes or a simple cucumber salad makes a perfect counterpoint to the rich chicken.
- Don’t forget the kimchi! The fermented cabbage adds a tangy, spicy crunch that complements the sweet and savory chicken beautifully.
- This dish is fantastic as a main course, but it also makes an incredible appetizer for a party or game night.
Storage Tips
Leftover Soy Garlic Korean Fried Chicken can be stored in an airtight container in the refrigerator for up to 3 days. While the chicken can be frozen, the crispiness will be lost upon thawing and reheating. To reheat, place the chicken on a baking sheet in a preheated oven at 375°F (190°C) for 10-15 minutes, or until heated through and somewhat crispy again. Avoid the microwave if you want to retain any crispness.
Conclusion
There you have it – your very own homemade Soy Garlic Korean Fried Chicken! This dish truly delivers on all fronts: incredible crispiness, a sticky, flavorful sauce, and that irresistible savory-sweet balance. It’s a recipe that tastes like it came from your favorite Korean restaurant, but made with love in your own kitchen.
Don’t be intimidated by the double-frying; it’s the secret to success and surprisingly simple. Once you try this, you’ll wonder why you ever ordered takeout. The joy of biting into that perfectly crunchy, saucy chicken is unmatched!
So go ahead, give this recipe a try. Gather your ingredients, follow these easy steps, and prepare for a truly delicious experience. It’s perfect for a cozy dinner, a fun gathering with friends, or a special treat for your family. Happy cooking!


