
Introduction
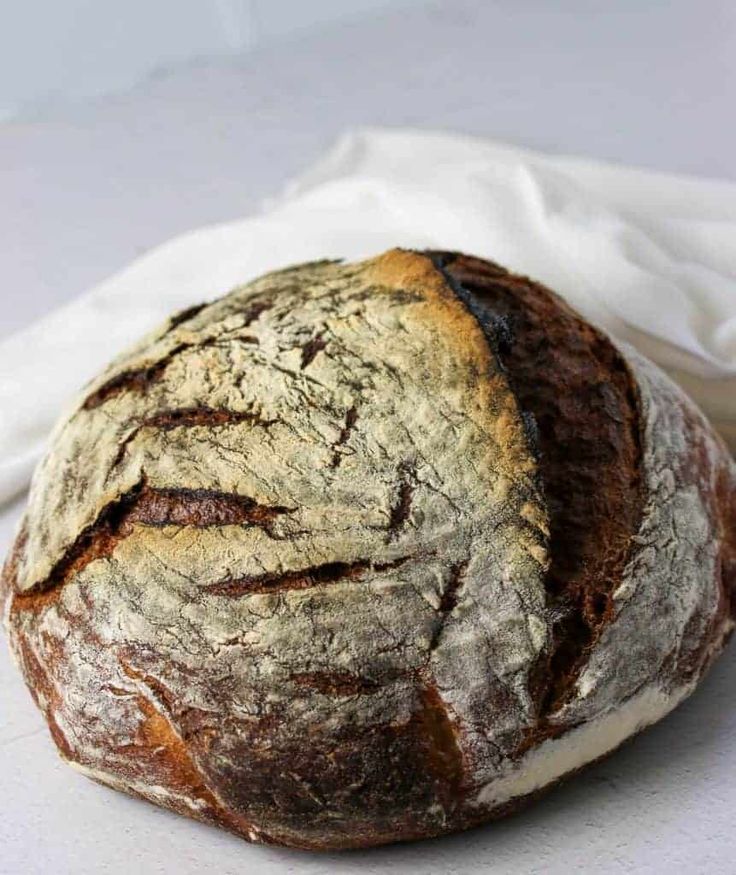
Get ready to bake a truly special loaf of bread right in your own kitchen! Our Rustic Rye Sourdough Loaf is a delightful blend of hearty rye and classic sourdough tang. It offers a chewy texture, a wonderfully crisp crust, and a deep, complex flavor that store-bought bread just can’t match. This bread isn’t just food; it’s an experience, perfect for elevating any meal.
While sourdough baking often gets a reputation for being complicated, this recipe breaks it down into simple, manageable steps. The hands-on time is surprisingly minimal, with most of the “work” being done by time and your active sourdough starter. It’s a forgiving process that yields incredibly rewarding results, making it accessible even for newer bakers.
So, why not give it a try? Imagine the aroma filling your home as this beautiful loaf bakes. Picture slicing into its open, airy crumb. This Rustic Rye Sourdough Loaf is waiting to become your new favorite bread. Let’s get baking!
Cooking Time & Prep Time
- Prep Time (active): 30 minutes
- Bulk Fermentation (inactive): 4-6 hours
- Cold Proofing (inactive): 8-12 hours (or up to 24 hours)
- Cooking Time: 45-50 minutes
- Total Time (active + inactive): Approximately 13-20 hours (mostly inactive waiting time)
Small tip: Sourdough baking requires patience and planning. Start your dough the day before you want to bake to allow for proper fermentation and proofing.
Ingredients
This recipe makes 1 large loaf (approximately 12-16 servings).
- For the Dough:
- 100 grams active sourdough starter (fed and bubbly)
- 350 grams warm water (about 90-95°F / 32-35°C)
- 50 grams dark rye flour
- 400 grams strong bread flour (or all-purpose flour)
- 10 grams fine sea salt
- Optional Add-in:
- 1 tablespoon caraway seeds (for extra rye flavor)
Step-by-Step Instructions
-
Step 1: Mix the Autolyse
In a large mixing bowl, combine the warm water, rye flour, and bread flour. Mix until just combined and no dry spots remain. It will be a shaggy, rough dough. Cover the bowl with a clean kitchen towel or plastic wrap and let it rest for 30 minutes to 1 hour. This step helps the flour hydrate and gluten develop.
Small tip: The autolyse step is crucial for developing gluten structure with minimal effort. Don’t skip it!
-
Step 2: Incorporate Starter and Salt
After the autolyse, add your active sourdough starter and the salt to the dough. If using caraway seeds, add them now too. Use your hands to gently squeeze and fold the starter and salt into the dough until fully incorporated. The dough might feel a bit sticky at first.
Small tip: Wet your hands slightly before mixing to prevent the dough from sticking too much.
-
Step 3: Bulk Fermentation and Stretch & Folds
Cover the bowl again and let the dough rest for 30 minutes. Then, perform your first set of stretch and folds. Gently grab a portion of the dough, stretch it upwards, and fold it over itself. Rotate the bowl and repeat this process 3-4 times until you’ve worked your way around the dough. Repeat this stretch and fold process every 30-45 minutes for a total of 4-6 sets over 3-5 hours, depending on your room temperature. The dough should become more elastic and show some bubbles.
Small tip: The dough should increase in volume by about 20-30% during bulk fermentation. Don’t let it over-proof at this stage.
-
Step 4: Pre-shape the Dough
Gently turn the dough out onto a lightly floured surface. Using a bench scraper, gently shape the dough into a loose round or rectangle. Try not to de-gas it too much. Cover it with the bowl or a clean towel and let it rest for 20-30 minutes. This resting period helps the dough relax before final shaping.
Small tip: A light dusting of flour is all you need. Too much flour can prevent the dough from sticking to itself during shaping.
-
Step 5: Final Shaping and Cold Proofing
After the rest, gently shape the dough into its final round or oval form. You can find many shaping tutorials online. Place the shaped dough seam-side up into a floured banneton basket or a bowl lined with a floured kitchen towel. Cover tightly with plastic wrap or a shower cap and refrigerate for 8-12 hours, or up to 24 hours. Cold proofing develops flavor and makes the dough easier to handle.
Small tip: Make sure your banneton or towel is well-floured with rice flour to prevent sticking.
-
Step 6: Preheat Oven and Dutch Oven
About an hour before you’re ready to bake, place your Dutch oven (with its lid) in your oven. Preheat the oven to 475°F (245°C). Ensure the oven and Dutch oven are fully preheated to ensure a good crust and oven spring.
Small tip: A well-preheated Dutch oven mimics a professional bread oven, trapping steam for an amazing crust.
-
Step 7: Score and Bake
Carefully remove the hot Dutch oven from the oven. Gently invert the cold dough from the banneton into the hot Dutch oven. Use a sharp razor blade or lame to score the top of the dough. You can make a simple slash or a more intricate design. Immediately place the lid back on the Dutch oven and bake for 30 minutes with the lid on.
Small tip: Work quickly and carefully when handling the hot Dutch oven. The colder the dough, the easier it is to score.
-
Step 8: Finish Baking and Cool
After 30 minutes, carefully remove the lid from the Dutch oven. Reduce the oven temperature to 450°F (230°C) and continue baking for another 15-20 minutes, or until the crust is a deep golden brown and the internal temperature reaches 200-210°F (93-99°C). Carefully remove the loaf from the Dutch oven and place it on a wire rack to cool completely for at least 2 hours before slicing. This cooling time is essential for the crumb to set.
Small tip: Resist the urge to slice into your warm loaf immediately! Cooling allows the starches to fully set, preventing a gummy texture.
Tips & Variations
- Gluten-Free Option: Replace all flours with a gluten-free bread flour blend (ensure it contains xanthan gum) and use a gluten-free sourdough starter. Note that the texture will be denser and less open.
- Vegan/Vegetarian Option: This recipe is naturally vegan and vegetarian! Sourdough bread uses only flour, water, salt, and starter.
- Add-ins for More Flavor/Texture: Feel free to add 1/4 cup of toasted nuts (walnuts, pecans), seeds (sunflower, pumpkin), or dried fruits (cranberries, raisins) during Step 2.
- Spicy Version: Incorporate 1-2 teaspoons of red pepper flakes into the dough along with the salt for a subtle kick. Alternatively, serve slices with a spicy spread.
- Different Flours: Experiment with different proportions of rye flour for a stronger flavor (e.g., 100g rye, 350g bread flour). You can also substitute some bread flour with whole wheat or spelt flour for added nutrition and flavor complexity.
Nutritional Information
Approximate values per serving (based on 12 servings per loaf):
- Calories: 190 kcal
- Protein: 7 grams
- Carbohydrates: 38 grams
- Fat: 1 gram
Note: Nutritional values may vary depending on the specific brands of ingredients used and exact serving size.
Health Benefits
Our Rustic Rye Sourdough Loaf isn’t just delicious; it also offers some wonderful health benefits, thanks to its special ingredients and fermentation process.
- Improved Digestion: Sourdough’s long fermentation process helps break down complex carbohydrates and gluten, making the bread easier to digest for many people compared to conventionally leavened bread. It also acts as a prebiotic, feeding beneficial gut bacteria.
- Lower Glycemic Index: The fermentation process in sourdough bread has been shown to lower its glycemic index. This means it causes a slower, more gradual rise in blood sugar, which is beneficial for sustained energy and blood sugar management.
- Nutrient Absorption: Sourdough fermentation helps reduce phytic acid, an anti-nutrient found in grains. This allows your body to absorb more of the essential minerals like iron, zinc, and magnesium present in the flour.
- Rye Flour Benefits: Rye flour is a powerhouse of nutrition. It’s rich in dietary fiber, which aids digestion, promotes fullness, and can help regulate blood sugar. It also provides important minerals such as magnesium, iron, zinc, and B vitamins, contributing to overall well-being.
Serving Suggestions
- Classic Pairing: Enjoy thick slices with a hearty bowl of soup or stew, perfect for soaking up every last drop.
- Breakfast Bliss: Toast a slice and top it with mashed avocado, a poached egg, and a sprinkle of chili flakes for a satisfying breakfast.
- Gourmet Sandwiches: Use this sturdy bread for incredible sandwiches. It holds up beautifully to fillings like smoked salmon, pastrami, or roasted vegetables.
- Cheese Board Star: Serve alongside a selection of cheeses, charcuterie, olives, and fruit for an elegant appetizer or light meal.
- Croutons or Breadcrumbs: If you have any leftover, cube it, toast it, and use it for homemade croutons, or process it into fresh breadcrumbs.
Storage Tips: Store your cooled sourdough loaf at room temperature, cut-side down on a cutting board, or in a bread bag for 2-3 days. For longer storage, slice the loaf and freeze the slices in an airtight bag for up to 3 months. To reheat, simply toast frozen slices directly, or wrap a whole loaf in foil and warm in a 350°F (175°C) oven for 15-20 minutes until crusty again.
Conclusion
There’s truly nothing quite like the satisfaction of baking your own Rustic Rye Sourdough Loaf. The rich, tangy flavor, the satisfying chew, and the incredible aroma make all the waiting worthwhile. This bread isn’t just food; it’s a creation born of simple ingredients and a little bit of patience. It’s a rewarding journey from flour and water to a masterpiece.
We hope this detailed recipe inspires you to dive into the wonderful world of sourdough baking. Don’t be intimidated; embrace the process, trust your starter, and enjoy the magic. Your kitchen will smell amazing, and your taste buds will thank you.
Once you’ve mastered this loaf, be sure to share your creation! Slice it up for family and friends, impress them with your baking skills, and enjoy the delicious moments together. Happy baking!


