
Introduction
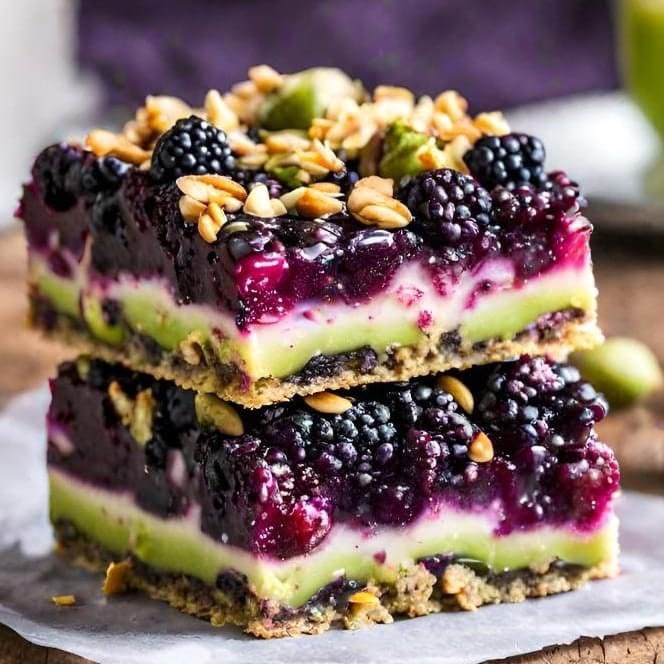
Get ready to discover your new favorite healthy treat: Refreshing No Bake Chia Pudding Bars! These delightful bars are a perfect blend of creamy, fruity, and utterly satisfying. They taste like a dream, offering a burst of natural sweetness and a lovely texture that makes them feel truly special.
The best part? They are incredibly easy and quick to make, requiring absolutely no oven time! You just mix, layer, and chill. This makes them ideal for busy weekdays, spontaneous cravings, or when you want a wholesome dessert without all the fuss. Minimal effort, maximum deliciousness – that’s our kind of recipe!
So, if you’re looking for a guilt-free indulgence that’s packed with goodness and simple to prepare, these No Bake Chia Pudding Bars are calling your name. Give them a try, and prepare to fall in love with their refreshing taste and effortless charm. Let’s get started!
Cooking Time & Prep Time
- Prep Time: 20 minutes
- Chilling Time: 4 hours (minimum, preferably overnight)
- Total Time: 4 hours 20 minutes
Small tip: While the active prep time is short, plan ahead to allow for sufficient chilling. This ensures your bars set perfectly and are easy to slice!
Ingredients
This recipe makes approximately 8-10 refreshing bars.
For the Chia Pudding Layer
- 1 cup (240ml) unsweetened almond milk (or any plant-based milk)
- 1/4 cup (40g) chia seeds
- 2 tablespoons maple syrup (or agave nectar), adjust to taste
- 1 teaspoon vanilla extract
- Pinch of salt
For the Fruit Topping Layer
- 1.5 cups (about 200g) mixed berries (fresh or frozen, thawed)
- 1 tablespoon lemon juice
- 1 tablespoon maple syrup (optional, for extra sweetness)
- 1/2 teaspoon vanilla extract (optional)
Optional Garnishes
- Fresh mint leaves
- Extra berries
- Shredded coconut
Step-by-Step Instructions
-
Step 1: Prepare the Chia Pudding Base
In a medium-sized bowl, combine the unsweetened almond milk, chia seeds, 2 tablespoons of maple syrup, vanilla extract, and a pinch of salt. Whisk everything together really well to ensure there are no clumps of chia seeds. This initial whisking is crucial for a smooth pudding.
Small tip: If you want an extra creamy pudding, you can blend half of the chia seeds with the milk before adding the rest whole.
-
Step 2: Let the Chia Pudding Set
Cover the bowl and refrigerate the chia pudding mixture for at least 30 minutes, or until it thickens. Stir it again halfway through to prevent the chia seeds from clumping at the bottom. The mixture should become gel-like and thick.
Small tip: For the best results, let it chill for an hour or even longer to get a really firm base.
-
Step 3: Line Your Pan
Line an 8×8 inch (20×20 cm) square baking dish or a loaf pan with parchment paper, leaving an overhang on the sides. This will make it super easy to lift the bars out later. A loaf pan will yield thicker bars, while a square dish will make them thinner.
Small tip: A little cooking spray on the pan before the parchment paper helps the paper stay in place.
-
Step 4: Create the Pudding Layer
Pour the thickened chia pudding mixture into the prepared pan. Use a spatula to spread it evenly into a flat layer. Make sure the surface is as smooth as possible, as this will be the base of your bars.
Small tip: Tap the pan gently on the counter a few times to release any air bubbles and help settle the pudding evenly.
-
Step 5: Chill the First Layer
Place the pan with the chia pudding layer in the refrigerator. Let it chill for at least 2 hours, or until it is firm enough to support the fruit topping. This step is important to ensure the layers don’t mix.
Small tip: While the first layer chills, you can start preparing your fruit topping to save time.
-
Step 6: Prepare the Fruit Topping
In a separate bowl, combine the mixed berries, lemon juice, optional maple syrup, and optional vanilla extract. If using fresh berries, mash them slightly with a fork to release their juices. If using frozen berries, thaw them first and then mash.
Small tip: For a smoother topping, you can blend the fruit mixture in a food processor until desired consistency. Leave some chunks for texture if you prefer!
-
Step 7: Add the Fruit Topping
Once the chia pudding layer is firm, carefully spread the fruit topping evenly over it. Use your spatula to create a smooth, vibrant layer. Make sure it covers the entire surface of the chia pudding.
Small tip: Be gentle when spreading the fruit layer so you don’t disturb the set chia pudding underneath.
-
Step 8: Final Chilling
Return the pan to the refrigerator and chill for another 2 hours, or preferably overnight. The longer it chills, the firmer and easier the bars will be to cut. Overnight chilling is highly recommended for the best results.
Small tip: Don’t rush this step! Patience here will lead to perfectly set, beautiful bars.
-
Step 9: Slice and Serve
Once fully chilled and firm, use the parchment paper overhang to lift the entire slab out of the pan. Place it on a cutting board. Using a sharp knife, cut the slab into 8-10 bars. You can wipe your knife between cuts for cleaner slices. Garnish with fresh mint or extra berries if desired, and enjoy!
Small tip: For clean cuts, dip your knife in hot water and wipe it dry before each slice.
Tips & Variations
- Gluten-Free Option: This recipe is naturally gluten-free! Chia seeds are a wonderful grain-free ingredient, making these bars perfect for those with gluten sensitivities.
- Vegan/Vegetarian Option: This recipe is already 100% vegan and vegetarian. Just ensure your plant-based milk and maple syrup are certified vegan.
- Add More Protein: Stir a scoop of your favorite plant-based protein powder into the chia pudding mixture for an extra protein boost. Vanilla or unflavored protein works best.
- Boost with Veggies: For an invisible veggie boost, blend a handful of spinach or a small cooked beet into your fruit topping. The color of the fruit will usually mask the veggie, and you won’t taste it!
- Different Fruit Flavors: Experiment with different fruit toppings! Mango puree, peach compote, or even a layer of mashed avocado with lime for a creamy green twist would be delicious.
- Nutty Crunch: Add a layer of finely chopped nuts (like almonds or walnuts) or shredded coconut between the chia pudding and fruit layers for added texture and flavor.
- Citrus Zing: For an extra refreshing kick, add the zest of half a lemon or lime to either the chia pudding or the fruit topping.
Nutritional Information
Approximate values per serving (based on 8 servings):
- Calories: 150-180 kcal
- Protein: 4-6 g
- Carbohydrates: 20-25 g
- Fat: 8-10 g
Note: Nutritional values may vary depending on the specific brands and amounts of ingredients used, especially the type of milk and amount of sweetener.
Health Benefits
These Refreshing No Bake Chia Pudding Bars are not just delicious; they are packed with amazing health benefits, making them a smart choice for a snack or dessert.
Chia Seeds: These tiny powerhouses are an excellent source of dietary fiber, which aids digestion and helps you feel fuller for longer. They are also rich in Omega-3 fatty acids, crucial for heart health and reducing inflammation. Plus, chia seeds provide a good amount of plant-based protein, essential for muscle repair and growth, and minerals like calcium, magnesium, and phosphorus for strong bones.
Berries: The fruit topping, especially mixed berries, is bursting with antioxidants. These compounds help protect your cells from damage caused by free radicals, supporting overall health and potentially reducing the risk of chronic diseases. Berries are also a great source of Vitamin C, which boosts immunity, and various other vitamins and minerals.
Plant-Based Milk: Using unsweetened almond milk or other plant-based milk keeps the saturated fat content low and avoids dairy for those with sensitivities. Many plant milks are fortified with calcium and Vitamin D, contributing to bone health.
Overall, these bars offer a wholesome combination of fiber, healthy fats, protein, vitamins, and antioxidants, all while being naturally sweet and satisfying.
Serving Suggestions
- Breakfast Boost: Enjoy a bar with your morning coffee or tea for a quick, nutritious start to your day.
- Afternoon Pick-Me-Up: A perfect healthy snack to beat the afternoon slump, providing sustained energy.
- Light Dessert: Serve chilled as a refreshing and guilt-free dessert after any meal.
- On-the-Go Snack: Wrap individual bars for a convenient and portable snack for work, school, or post-workout.
Storage Tips
These No Bake Chia Pudding Bars keep wonderfully in the refrigerator. Store them in an airtight container for up to 3-5 days. They are best enjoyed cold and fresh. Freezing is generally not recommended as the texture of the chia pudding can become a bit grainy upon thawing, and the fruit layer might separate. These bars are designed to be a refreshing, chilled treat, so no reheating is necessary or recommended.
Conclusion
There you have it – a truly wonderful recipe for Refreshing No Bake Chia Pudding Bars! This dish truly embodies the best of healthy eating: it’s incredibly easy to make, packed with nutritious ingredients, and absolutely delicious. The creamy chia base paired with the vibrant fruit topping creates a symphony of flavors and textures that will leave you feeling satisfied and happy.
We encourage you to roll up your sleeves and give these bars a try. They are perfect for anyone looking for a simple, wholesome, and incredibly tasty snack or dessert. You’ll love how little effort they require and how much goodness they deliver.
Whip up a batch today and share the love! These bars are fantastic for sharing with family and friends, or simply keeping all to yourself for a week of delightful, healthy indulgence. Enjoy every single bite!


