
Introduction
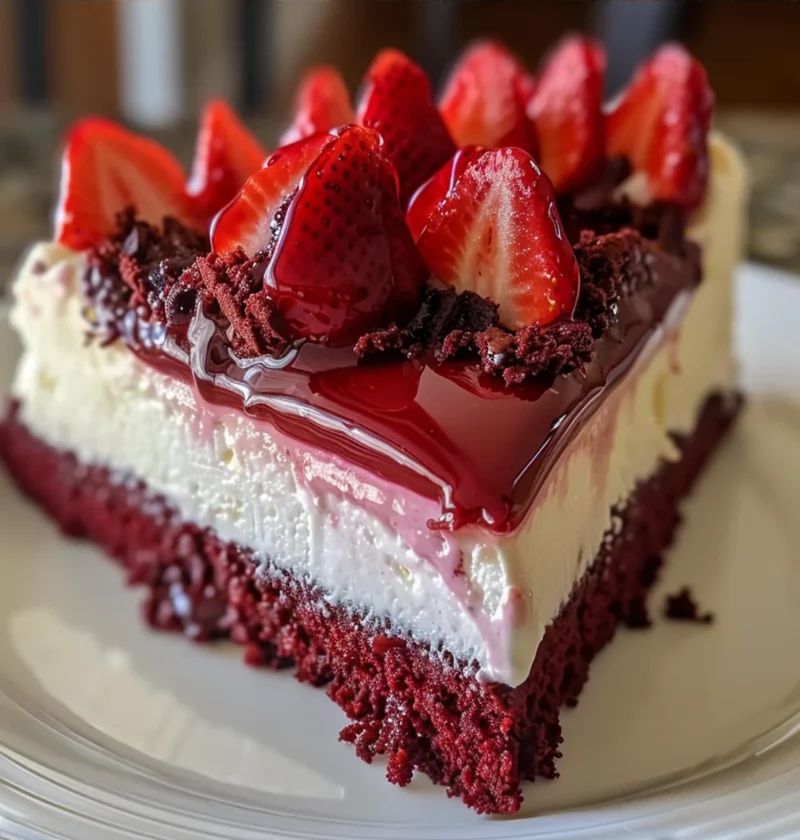
Get ready to fall in love with our Red Velvet Strawberry Cheesecake! This dessert is an absolute showstopper, combining the rich, cocoa-kissed flavor and vibrant color of red velvet with a creamy, dreamy cheesecake and a burst of fresh strawberries. It’s a symphony of textures and tastes that will delight your senses and impress anyone you share it with.
You might think a dessert this fancy would be complicated, but think again! Our recipe is surprisingly easy to make. It’s a no-bake wonder, meaning you won’t need to turn on your oven. With simple steps and readily available ingredients, you can whip up this gorgeous cheesecake without any stress or fuss.
So, whether you’re celebrating a special occasion or just craving something truly extraordinary, this Red Velvet Strawberry Cheesecake is your answer. It’s a dessert that tastes as good as it looks, and we promise you’ll enjoy every single spoonful. Let’s get baking (or rather, no-baking)!
Cooking Time & Prep Time
- Prep Time: 35 minutes
- Chilling Time: 4 hours (minimum)
- Total Time: 4 hours 35 minutes
Small tip: The chilling time is crucial for the cheesecake to set perfectly. Don’t rush it! For best results, chill overnight.
Ingredients
This recipe makes 10-12 generous servings.
For the Red Velvet Cookie Crust:
- 1 ½ cups (about 180g) chocolate sandwich cookies (like Oreos), crushed
- ¼ cup (55g) unsalted butter, melted
For the Red Velvet Cheesecake Filling:
- 24 oz (680g) full-fat cream cheese, softened
- 1 ½ cups (300g) granulated sugar
- 1 teaspoon pure vanilla extract
- 2 tablespoons unsweetened cocoa powder
- 1 ½ tablespoons red food coloring (liquid or gel)
- 1 ½ cups (360ml) heavy cream, cold
For the Fresh Strawberry Topping:
- 2 cups (about 300g) fresh strawberries, hulled and sliced
- ¼ cup (50g) granulated sugar
- 1 tablespoon fresh lemon juice
For Garnish (Optional):
- Whipped cream
- Extra chocolate cookie crumbs
- Fresh mint leaves
Step-by-Step Instructions
-
Step 1: Prepare the Cookie Crust
First, crush your chocolate sandwich cookies very finely. You can use a food processor for this or place them in a zip-top bag and crush with a rolling pin. In a medium bowl, combine the crushed cookies with the melted butter. Mix until the crumbs are evenly moistened.
Small tip: For an extra rich crust, use chocolate graham crackers instead of sandwich cookies.
-
Step 2: Press the Crust into the Pan
Press the cookie mixture firmly into the bottom of a 9-inch springform pan. Use the back of a spoon or the bottom of a flat glass to create an even, compact layer. Place the pan in the refrigerator while you prepare the filling.
-
Step 3: Begin the Cheesecake Filling
In a large mixing bowl, beat the softened cream cheese with an electric mixer on medium speed until smooth and creamy. Make sure there are no lumps. Add the granulated sugar and vanilla extract, continuing to beat until well combined and fluffy.
Small tip: Ensure your cream cheese is truly at room temperature. This prevents lumps and ensures a smooth filling.
-
Step 4: Add Red Velvet Flavor and Color
Sift the cocoa powder into the cream cheese mixture. This prevents cocoa powder clumps. Add the red food coloring. Beat on low speed until the color is vibrant and evenly distributed throughout the mixture, scraping down the sides of the bowl as needed.
-
Step 5: Whip the Heavy Cream
In a separate, chilled bowl, whip the cold heavy cream until stiff peaks form. Be careful not to over-whip, or it will become grainy. Stiff peaks mean the cream holds its shape when the whisk is lifted.
Small tip: Chilling your bowl and beaters for 10-15 minutes before whipping cream helps it whip faster and achieve better volume.
-
Step 6: Combine Filling Ingredients
Gently fold the whipped cream into the red velvet cream cheese mixture. Use a spatula and fold until just combined, being careful not to deflate the whipped cream. This step creates a light and airy texture for your cheesecake.
-
Step 7: Assemble and Chill the Cheesecake
Pour the red velvet cheesecake filling over the chilled cookie crust in the springform pan. Smooth the top with a spatula. Cover the pan loosely with plastic wrap and refrigerate for at least 4 hours, or preferably overnight, until the cheesecake is firm and set.
-
Step 8: Prepare the Strawberry Topping
About 30 minutes before serving, combine the sliced fresh strawberries, granulated sugar, and lemon juice in a small bowl. Stir gently and let it sit at room temperature. The sugar will draw out the juices from the strawberries, creating a delicious, simple sauce.
-
Step 9: Serve Your Cheesecake
Carefully remove the cheesecake from the springform pan. You can run a thin knife around the edge of the pan before releasing the spring. Spoon the fresh strawberry topping generously over the cheesecake. Garnish with whipped cream, extra cookie crumbs, or fresh mint leaves if desired. Slice and enjoy!
Tips & Variations
- Gluten-Free Option: Easily make this gluten-free by using gluten-free chocolate sandwich cookies for the crust. The filling is naturally gluten-free!
- Vegan or Vegetarian Option: For a vegan version, use a plant-based cream cheese alternative, vegan heavy cream (like coconut cream, chilled and only use the thick part), and vegan chocolate cookies for the crust.
- Add More Protein/Nutrient Boost: Fold ¼ cup of finely chopped walnuts or pecans into the cookie crust for added texture and healthy fats. You can also sprinkle some chia seeds into the strawberry topping for a boost of omega-3s.
- Spicy Twist: For a subtle kick, add a tiny pinch of cayenne pepper (¼ teaspoon) to the cocoa powder in the cheesecake filling. It enhances the chocolate flavor without making it overtly spicy. Alternatively, a hint of black pepper in the strawberry topping can be surprisingly delicious!
- Flavor Variation: Instead of strawberries, try a raspberry or cherry topping. You can also add ½ teaspoon of almond extract to the cheesecake filling for a different flavor profile.
Nutritional Information
Approximate values per serving (based on 12 servings):
- Calories: 450 kcal
- Protein: 6g
- Carbohydrates: 48g
- Fat: 28g
Note: Nutritional values are estimates and may vary depending on specific brands and ingredients used.
Health Benefits
While this is a decadent treat, some ingredients offer lovely health benefits!
- Strawberries: These vibrant berries are packed with Vitamin C, which is essential for immune function and skin health. They also contain antioxidants like anthocyanins, which give them their red color and help fight inflammation.
- Cocoa Powder: Unsweetened cocoa powder is a good source of antioxidants, particularly flavonoids. These compounds can help improve heart health and may even boost brain function.
- Cream Cheese (in moderation): Cream cheese provides some calcium, important for strong bones and teeth. It also contains a small amount of protein.
- Healthy Fats: The healthy fats from butter (in moderation) and potentially nuts (if added as a variation) can contribute to satiety and provide energy.
Remember, this cheesecake is a delightful indulgence. Enjoy it as part of a balanced diet!
Serving Suggestions
- Serve chilled with a dollop of fresh whipped cream and a few extra fresh strawberry slices.
- This cheesecake is a perfect dessert for special occasions like birthdays, anniversaries, or holiday gatherings. It’s definitely a standalone star!
- Enjoy a slice with a cup of coffee or a glass of sparkling rosé for an elegant treat.
Storage Tips
Store leftover Red Velvet Strawberry Cheesecake in an airtight container in the refrigerator for up to 4-5 days. It can also be frozen! To freeze, place uncovered cheesecake in the freezer until firm (about 1-2 hours), then wrap tightly in plastic wrap and then aluminum foil. It will keep in the freezer for up to 1 month. Thaw overnight in the refrigerator before serving. This cheesecake is best served chilled, so reheating is not recommended.
Conclusion
There you have it – a show-stopping Red Velvet Strawberry Cheesecake that’s as easy to make as it is delicious to eat. Its vibrant color, creamy texture, and sweet-tart strawberry topping create an unforgettable dessert experience. This is truly a recipe that brings joy to any table.
Don’t be shy about trying this one. The no-bake method makes it approachable for even the newest bakers. You’ll be amazed at how quickly you can create something so beautiful and incredibly tasty. Give it a go; you won’t regret it!
Whether you’re treating yourself, celebrating with loved ones, or simply looking for a dessert that stands out, this Red Velvet Strawberry Cheesecake is sure to become a new favorite. Share the love, share the cheesecake!


