
Introduction
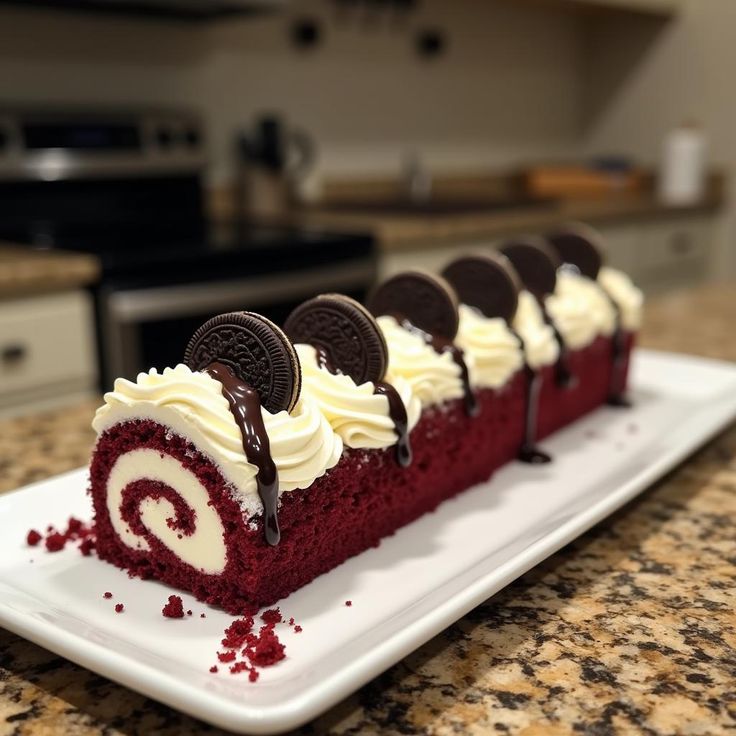
Get ready for a dessert that will make your taste buds sing! Imagine a vibrant red velvet cake, soft and moist, rolled up with a luscious, creamy filling studded with crunchy Oreo cookie pieces. This Red Velvet Oreo Roll is a showstopper, a perfect blend of classic flavors and irresistible texture. It’s truly a special treat that looks impressive but is surprisingly simple to create.
You might think a cake roll is complicated, but I promise it’s easier than it looks. With a few simple steps and my helpful tips, you’ll be rolling like a pro in no time. The joy of creating something so beautiful and delicious from scratch is incredibly rewarding. Plus, it’s a fantastic make-ahead dessert, perfect for parties or a cozy night in.
So, clear your counter, gather your ingredients, and let’s embark on this sweet adventure together. This Red Velvet Oreo Roll is more than just a dessert; it’s an experience. Get ready to indulge and impress everyone with your baking prowess!
Cooking Time & Prep Time
- Prep Time: 35 minutes
- Cooking Time: 12 minutes
- Chilling Time: 2 hours (minimum)
- Total Time: 2 hours 47 minutes
Small tip: The chilling time is crucial for the roll to set properly and slice cleanly, so don’t rush it!
Ingredients
This recipe makes 10-12 generous servings.
For the Red Velvet Cake Roll
- 1 cup (120g) all-purpose flour
- 1 teaspoon baking powder
- 1/4 teaspoon salt
- 1/4 cup (22g) unsweetened cocoa powder
- 1 cup (200g) granulated sugar
- 4 large eggs
- 1/4 cup (60ml) vegetable oil
- 1/4 cup (60ml) buttermilk
- 1 tablespoon red food coloring (liquid or gel)
- 1 teaspoon vanilla extract
- 1/2 teaspoon white vinegar
- 1/2 teaspoon baking soda
- Powdered sugar, for dusting
For the Oreo Cream Cheese Filling
- 8 ounces (226g) cream cheese, softened
- 1/2 cup (113g) unsalted butter, softened
- 3 cups (360g) powdered sugar, sifted
- 1 teaspoon vanilla extract
- 10-12 Oreo cookies, crushed (about 1 cup)
For Garnish (Optional)
- Extra crushed Oreo cookies
- White chocolate drizzle
Step-by-Step Instructions
-
Step 1: Preheat Oven and Prepare Pan
Preheat your oven to 350°F (175°C). Line a 15×10-inch jelly roll pan with parchment paper, allowing some overhang on the sides. Lightly grease the parchment paper for easy release.
Small tip: The parchment paper overhang will act as “handles” to lift the cake easily after baking.
-
Step 2: Whisk Dry Ingredients
In a medium bowl, whisk together the flour, baking powder, salt, and cocoa powder. Make sure there are no lumps. Set this bowl aside for a moment.
-
Step 3: Beat Eggs and Sugar
In a large bowl, using an electric mixer, beat the granulated sugar and eggs on high speed for about 3-5 minutes. The mixture should become pale yellow, thick, and fluffy. This step incorporates air, making your cake light.
-
Step 4: Add Wet Ingredients
To the egg mixture, add the vegetable oil, buttermilk, red food coloring, and vanilla extract. Beat on low speed until just combined. Don’t overmix at this stage.
-
Step 5: Combine Wet and Dry
Gradually add the dry ingredient mixture to the wet ingredients, beating on low speed until just combined. Be careful not to overmix, as this can make your cake tough. A few streaks of flour are okay.
-
Step 6: Activate Baking Soda
In a small bowl, combine the white vinegar and baking soda. It will fizz up immediately. Quickly add this mixture to your cake batter and gently fold it in with a spatula. This creates the classic red velvet texture and helps with rising.
-
Step 7: Bake the Cake
Pour the batter evenly into your prepared jelly roll pan. Spread it out to the edges. Bake for 10-12 minutes, or until the cake springs back when lightly touched in the center. Do not overbake.
Small tip: A slightly underbaked cake is more pliable and less likely to crack when rolled.
-
Step 8: Prepare for Rolling
While the cake is still warm, immediately dust a clean kitchen towel generously with powdered sugar. Carefully invert the warm cake onto the sugared towel. Peel off the parchment paper gently.
-
Step 9: Roll the Cake
Starting from one short end, carefully roll the warm cake and the towel together into a tight spiral. Place the rolled cake (still in the towel) seam-side down on a wire rack to cool completely. This step “trains” the cake to hold its rolled shape without cracking.
Small tip: Rolling the cake while warm is key! If it cools too much, it will crack.
-
Step 10: Make the Oreo Cream Cheese Filling
While the cake cools, prepare the filling. In a large bowl, beat the softened cream cheese and butter together until smooth and creamy. This should take about 2-3 minutes with an electric mixer.
-
Step 11: Finish the Filling
Gradually add the sifted powdered sugar to the cream cheese mixture, beating on low speed until combined, then increasing to high speed until light and fluffy. Stir in the vanilla extract. Finally, fold in the crushed Oreo cookies by hand. Set aside.
-
Step 12: Unroll and Fill the Cake
Once the cake is completely cool (this can take about an hour), gently unroll it from the towel. Spread the Oreo cream cheese filling evenly over the entire surface of the cake, leaving a small border (about 1/2 inch) around the edges.
-
Step 13: Re-roll and Chill
Carefully re-roll the cake, without the towel this time, into a tight spiral. Place the rolled cake seam-side down on a piece of plastic wrap or foil. Wrap it tightly and refrigerate for at least 2 hours to allow the filling to set and the cake to firm up.
Small tip: Chilling makes slicing much neater and helps the roll hold its shape.
-
Step 14: Slice and Serve
Once chilled, unwrap the cake roll. Using a sharp knife, trim off the ends for a clean look. Slice the roll into 1-inch thick pieces. Garnish with extra crushed Oreos or a white chocolate drizzle, if desired. Enjoy your beautiful creation!
Tips & Variations
- Gluten-Free Option: Easily make this cake gluten-free by substituting the all-purpose flour with a 1:1 gluten-free baking flour blend. Make sure your chosen blend contains xanthan gum for best results.
- Vegan or Vegetarian Option: For a vegan version, use egg substitutes (like flax eggs or commercial egg replacers), plant-based buttermilk (plant milk + vinegar), vegan butter, and vegan cream cheese. Ensure your Oreos are vegan-friendly (most are, but check labels!).
- Add More Fruit or Nuts: For a touch of freshness or added texture, fold 1/4 cup of finely chopped pecans, walnuts, or even freeze-dried raspberries into the cream cheese filling. This adds a lovely crunch and subtle flavor complexity.
- Spicy Version: For a surprising twist, add a tiny pinch (1/8 teaspoon) of cayenne pepper to the red velvet cake batter. The subtle heat will enhance the cocoa flavor without overpowering it, creating a sophisticated spicy chocolate note.
- Flavor Boosts: Experiment with extracts! Try almond extract in the cake batter for a different undertone, or a hint of peppermint extract in the filling for a holiday-inspired roll. A drizzle of melted white chocolate or dark chocolate over the finished roll also adds elegance.
Nutritional Information
Approximate values per serving (based on 12 servings):
- Calories: 450-500 kcal
- Protein: 5g
- Carbohydrates: 60g
- Fat: 25g
Note: These values are approximate and may vary depending on specific ingredients used and portion sizes.
Health Benefits
While this Red Velvet Oreo Roll is definitely an indulgent treat, we can still find a few bright spots! Cocoa powder, a key ingredient in red velvet, contains antioxidants called flavonoids. These compounds are known for their potential to help protect your cells from damage, contributing to overall well-being. Of course, the amount in a single slice is small, but every little bit helps!
The cream cheese and butter in the filling contribute to dairy intake. Dairy products provide calcium, which is essential for strong bones and teeth. They also offer protein, important for muscle repair and growth. Enjoying this dessert in moderation can be part of a balanced diet.
This dessert also provides a good source of energy from carbohydrates and fats. Sometimes, a little sweet treat can boost your mood and provide the energy needed for daily activities. Food isn’t just about nutrition; it’s also about enjoyment and satisfaction.
Ultimately, the main “health benefit” of this Red Velvet Oreo Roll is the pure joy and happiness it brings. Sharing delicious food with loved ones and indulging in a homemade delight can significantly contribute to mental well-being and a positive outlook. It’s about savoring the moment and treating yourself!
Serving Suggestions
- Classic Dessert: Serve slices of the Red Velvet Oreo Roll on their own, perhaps with a dusting of powdered sugar or a dollop of whipped cream.
- Coffee Companion: This rich dessert pairs beautifully with a hot cup of coffee, espresso, or a glass of cold milk.
- Party Platter: Cut into smaller, bite-sized pieces for a dessert platter at your next gathering. It’s visually appealing and easy for guests to enjoy.
- Ice Cream Treat: For an extra decadent experience, serve a slice warm (just a few seconds in the microwave) with a scoop of vanilla bean ice cream.
Storage Tips
Store any leftover Red Velvet Oreo Roll


