
Introduction
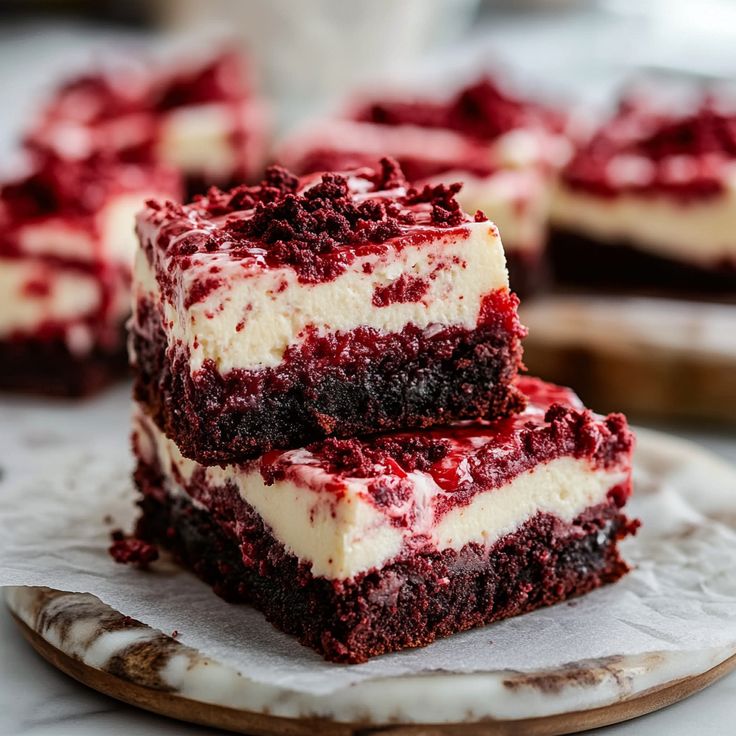
Get ready for a treat that’s as beautiful as it is delicious! Our Red Velvet Cream Cheese Brownies are a delightful twist on two classic desserts. Imagine a rich, fudgy red velvet brownie base, topped with a luscious, tangy cream cheese swirl. Every bite offers that perfect balance of deep chocolate notes and creamy sweetness, making it truly special.
You might think something this stunning would be complicated, but think again! This recipe is surprisingly easy and quick to whip up. With straightforward steps and simple ingredients, you’ll have these gorgeous brownies ready for baking in no time. It’s perfect for a weekend baking project or a last-minute dessert for guests.
So, why wait? Dust off your apron and let’s make some magic in the kitchen! These Red Velvet Cream Cheese Brownies are sure to become a new favorite in your home. They’re perfect for sharing, or for keeping all to yourself – we won’t tell!
Cooking Time & Prep Time
- Prep Time: 20 minutes
- Cooking Time: 30-35 minutes
- Total Time: 50-55 minutes
Small tip: To save time, gather and measure all your ingredients before you start mixing. This is called “mise en place” and makes cooking much smoother!
Ingredients
Makes 16 brownies
For the Red Velvet Brownie Base:
- 1/2 cup (113g) unsalted butter, melted
- 1 cup (200g) granulated sugar
- 2 large eggs
- 1 teaspoon vanilla extract
- 1 teaspoon red food coloring (gel preferred for vibrant color)
- 1/4 cup (22g) unsweetened cocoa powder
- 1/2 teaspoon salt
- 1 cup (125g) all-purpose flour
For the Cream Cheese Swirl:
- 8 ounces (226g) cream cheese, softened
- 1/4 cup (50g) granulated sugar
- 1 large egg yolk
- 1/2 teaspoon vanilla extract
Step-by-Step Instructions
-
Step 1: Prepare Your Baking Pan
Preheat your oven to 350°F (175°C). Line an 8×8 inch baking pan with parchment paper, leaving an overhang on the sides. This makes it easy to lift the brownies out later. Lightly grease the parchment paper.
Small tip: Make sure your parchment paper covers the bottom and sides completely to prevent sticking.
-
Step 2: Mix Wet Ingredients for Brownie Base
In a large bowl, whisk together the melted butter and granulated sugar until well combined. Add the two large eggs, one at a time, mixing well after each addition. Stir in the vanilla extract and red food coloring until the mixture is a uniform vibrant red.
-
Step 3: Combine Dry Ingredients for Brownie Base
In a separate medium bowl, whisk together the cocoa powder, salt, and all-purpose flour. Make sure there are no lumps of cocoa powder. This helps distribute the dry ingredients evenly.
-
Step 4: Combine Wet and Dry for Brownie Base
Gradually add the dry ingredient mixture to the wet mixture, stirring until just combined. Be careful not to overmix; overmixing can lead to tough brownies. The batter should be thick and glossy.
-
Step 5: Prepare the Cream Cheese Swirl
In a medium bowl, beat the softened cream cheese with the 1/4 cup granulated sugar until smooth and creamy. Add the egg yolk and 1/2 teaspoon vanilla extract, beating until just combined. The mixture should be light and fluffy.
Small tip: Ensure your cream cheese is truly softened to room temperature for a smooth, lump-free swirl.
-
Step 6: Assemble the Brownies
Pour about two-thirds of the red velvet brownie batter into the prepared baking pan and spread it evenly. Dollop spoonfuls of the cream cheese mixture over the brownie batter. Then, drop the remaining red velvet batter in small spoonfuls over the cream cheese layer.
-
Step 7: Create the Swirl
Using a knife or a skewer, gently swirl the cream cheese and brownie batters together. Create beautiful patterns, but don’t overmix. A few swirls are enough to create that classic marbled effect.
Small tip: For the best swirl, make S-shapes or figure-eights with your knife, going about halfway into the batter.
-
Step 8: Bake the Brownies
Bake for 30-35 minutes, or until a toothpick inserted into the brownie part (not the cream cheese part) comes out with moist crumbs, but not wet batter. The cream cheese portion might still be slightly soft, which is perfect.
-
Step 9: Cool and Cut
Let the brownies cool completely in the pan on a wire rack before lifting them out using the parchment paper overhang. Once completely cool, cut them into 16 squares. This ensures clean cuts and a perfect texture.
Small tip: Chilling the brownies in the fridge for 30 minutes before cutting makes for incredibly neat slices.
Tips & Variations
- Gluten-Free Option: Easily make these gluten-free by swapping the all-purpose flour for a 1:1 gluten-free baking flour blend. Ensure your blend contains xanthan gum for the best texture.
- Vegan/Vegetarian Option: For a vegan version, use plant-based butter, egg replacers (like flax eggs or commercial egg substitutes), and a dairy-free cream cheese alternative. Ensure your chocolate and food coloring are also vegan-friendly.
- Add More Protein: Stir 1-2 tablespoons of unflavored or vanilla protein powder into the dry ingredients of the brownie base. This can add a slight protein boost without altering the flavor too much.
- Spicy Version: For a surprising kick, add 1/4 teaspoon of cayenne pepper or chili powder to the dry ingredients of the brownie base. It enhances the chocolate flavor with a subtle warmth.
- Flavor Boosters: Add a handful of white chocolate chips to the brownie batter before baking for extra sweetness. You can also experiment with different extracts, like almond extract in the cream cheese swirl, for a unique flavor.
Nutritional Information
Approximate values per serving (based on 16 servings):
- Calories: 280
- Protein: 4g
- Carbohydrates: 30g
- Fat: 17g
Note: Nutritional values are approximate and may vary depending on specific ingredients and brands used.
Health Benefits
While these brownies are definitely a treat, some of their core ingredients offer a few benefits!
Cocoa Powder: The unsweetened cocoa powder in these brownies is packed with antioxidants called flavanols. These compounds are known to help reduce inflammation and may improve heart health. It’s a small dose, but every little bit counts!
Eggs: Eggs are a fantastic source of high-quality protein, which is essential for building and repairing tissues. They also contain important vitamins and minerals like Vitamin D, Vitamin B12, and choline, which supports brain health.
Dairy (Cream Cheese & Butter): Dairy products provide calcium, which is vital for strong bones and teeth. They also offer protein and other fat-soluble vitamins like Vitamin A, D, E, and K. Enjoyed in moderation, these ingredients contribute to a balanced diet.
Remember, these brownies are a delicious indulgence designed to be enjoyed! Focusing on whole, nutritious foods for most of your meals allows for delightful treats like these.
Serving Suggestions
- Serve warm with a scoop of vanilla bean ice cream for an extra decadent dessert.
- Garnish with fresh raspberries or strawberries for a touch of freshness and color.
- Enjoy with a hot cup of coffee, tea, or a glass of milk for a perfect afternoon treat.
- Cut into smaller squares and arrange on a dessert platter for parties or potlucks.
Storage Tips
Store Red Velvet Cream Cheese Brownies in an airtight container in the refrigerator for up to 5 days. Due to the cream cheese, it’s best to keep them chilled. You can also freeze individual brownies for up to 2-3 months. Wrap them tightly in plastic wrap and then aluminum foil. To reheat, simply let them thaw at room temperature or warm gently in the microwave for 10-15 seconds until soft and gooey.
Conclusion
There you have it – a recipe for Red Velvet Cream Cheese Brownies that’s as delightful to make as it is to eat! These beauties are truly a showstopper, combining the best of fudgy red velvet and tangy cream cheese in every perfect square. They’re incredibly moist, bursting with flavor, and have that stunning swirl that will impress everyone.
Don’t be shy, give this recipe a try! It’s an easy win for any baker, whether you’re a seasoned pro or just starting out. The simple steps ensure success, and the results are truly rewarding. You’ll love the compliments you get!
So go ahead, bake a batch (or two!) and share the joy with your family and friends. These Red Velvet Cream Cheese Brownies are perfect for celebrations, a cozy night in, or just because you deserve a little something special. Happy baking!


