
Introduction
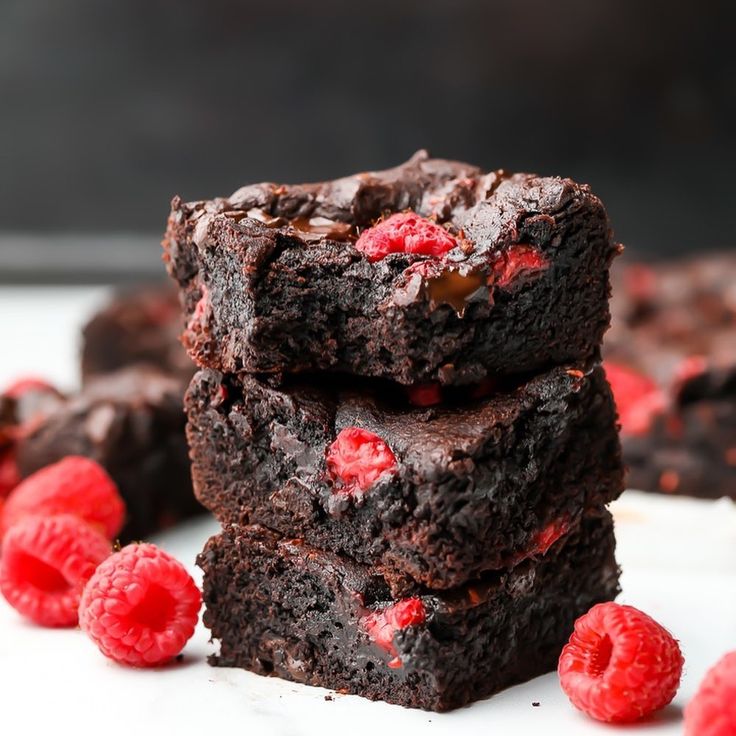
Get ready for a treat that will make your taste buds sing! Our Raspberry Brownies are a delightful twist on a classic dessert. Imagine rich, fudgy chocolate brownies bursting with the vibrant, tart sweetness of fresh raspberries. It’s a perfect balance of deep cocoa and bright fruit, making every bite an absolute joy.
You might think making brownies from scratch is complicated, but not with this recipe! We’ve designed it to be super easy and quick to whip up. You won’t need any fancy equipment or advanced baking skills. Just a few simple steps stand between you and a pan of warm, gooey, chocolatey raspberry bliss.
So, why wait? This recipe is perfect for a cozy night in, a potluck with friends, or simply when you need a little something sweet. Gather your ingredients, put on your apron, and let’s bake some unforgettable Raspberry Brownies together!
Cooking Time & Prep Time
- Prep Time: 15 minutes
- Cooking Time: 30-35 minutes
- Total Time: 45-50 minutes
Small tip: Always preheat your oven before you start mixing ingredients. This ensures it’s at the perfect temperature when your batter is ready to go in.
Ingredients
This recipe makes 16 delicious servings.
For the Brownies:
- 1 cup (2 sticks) unsalted butter, melted
- 2 cups granulated sugar
- 4 large eggs
- 1 teaspoon vanilla extract
- 1 cup all-purpose flour
- ¾ cup unsweetened cocoa powder
- ½ teaspoon baking powder
- ¼ teaspoon salt
- 1 cup fresh raspberries (about 5 oz)
For the Chocolate Drizzle (Optional):
- ½ cup semi-sweet chocolate chips
- 1 teaspoon coconut oil or butter
Step-by-Step Instructions
-
Step 1: Prepare Your Baking Pan and Oven
Preheat your oven to 350°F (175°C). Lightly grease a 9×13 inch baking pan. You can also line it with parchment paper, leaving an overhang on the sides. This makes lifting the brownies out super easy after baking.
Small tip: Using parchment paper makes cleanup a breeze and helps prevent sticking.
-
Step 2: Melt the Butter and Mix Wet Ingredients
In a large mixing bowl, melt the butter. You can do this in the microwave in short bursts or on the stovetop. Add the granulated sugar to the melted butter and whisk until well combined. The mixture should look smooth.
Small tip: Make sure your butter isn’t too hot when adding the sugar; just warm enough to be liquid.
-
Step 3: Add Eggs and Vanilla
Crack the eggs into the butter and sugar mixture, one at a time. Whisk well after each addition. Stir in the vanilla extract. Your mixture should be light and fluffy, almost like a thin custard.
Small tip: Whisking eggs in one at a time helps to create a fudgier brownie texture.
-
Step 4: Combine Dry Ingredients
In a separate medium bowl, whisk together the all-purpose flour, unsweetened cocoa powder, baking powder, and salt. Make sure there are no lumps of cocoa powder. This ensures even distribution in your brownies.
Small tip: Sifting your dry ingredients can help make your brownies even lighter and prevent lumps.
-
Step 5: Mix Wet and Dry
Gradually add the dry ingredients to the wet ingredients. Mix until just combined. Be careful not to overmix the batter. Overmixing can lead to tough brownies.
Small tip: Stop mixing as soon as you see no more streaks of flour. A few small lumps are perfectly fine.
-
Step 6: Fold in Raspberries
Gently fold in the fresh raspberries into the brownie batter. Be very careful not to crush them too much. You want those beautiful bursts of whole fruit in your brownies.
Small tip: If your raspberries are very delicate, you can toss them with a teaspoon of flour before adding them to the batter. This helps prevent them from sinking.
-
Step 7: Bake the Brownies
Pour the batter into your prepared 9×13 inch baking pan. Spread it evenly with a spatula. Bake for 30-35 minutes, or until a toothpick inserted into the center comes out with moist crumbs, not wet batter.
Small tip: Brownies are often better slightly underbaked for that gooey, fudgy texture. Don’t overbake them!
-
Step 8: Cool and Drizzle (Optional)
Let the brownies cool completely in the pan on a wire rack. While they cool, if desired, melt the chocolate chips and coconut oil together in a microwave-safe bowl. Heat in 30-second intervals, stirring until smooth. Drizzle over the cooled brownies.
Small tip: Cooling completely is crucial for clean cuts and to prevent them from falling apart. Patience is a virtue here!
Tips & Variations
- Gluten-Free Option: Easily make these brownies gluten-free by swapping the all-purpose flour for a 1:1 gluten-free baking flour blend. Ensure your blend contains xanthan gum for best results.
- Vegan Option: For a delicious vegan version, use plant-based butter (like a stick margarine or vegan butter alternative). Replace the eggs with 4 “flax eggs” (mix 1 tablespoon ground flaxseed meal with 3 tablespoons water for each egg, let sit for 5 minutes). Use dairy-free chocolate chips for the drizzle.
- Add More Vegetables or Protein: For a sneaky veggie boost, grate in ½ cup of very finely shredded zucchini (squeeze out excess moisture!) with the wet ingredients. You won’t taste it! For extra protein, you could stir in 2 tablespoons of unflavored collagen powder or your favorite protein powder with the dry ingredients.
- Spicy Version: Add a pinch (¼ teaspoon) of cayenne pepper or chili powder to the dry ingredients. The subtle heat will enhance the chocolate flavor in a surprising and delightful way!
- Other Flavor Tips: Feel free to experiment with other berries like blueberries or chopped strawberries. You can also add ½ cup of white chocolate chips or chopped nuts (pecans or walnuts) to the batter for extra texture and flavor.
Nutritional Information
Approximate values per serving (based on 16 servings):
- Calories: 310 kcal
- Protein: 4g
- Carbohydrates: 45g
- Fat: 15g
Note: Nutritional values may vary depending on specific brands and ingredients used.
Health Benefits
While these are brownies, they do pack some goodness! The star ingredient, raspberries, are tiny powerhouses. They are rich in antioxidants, which help protect your body’s cells from damage. They also provide a good source of dietary fiber, which is great for digestive health.
Raspberries are also packed with Vitamin C, essential for a healthy immune system, and manganese, important for bone health. Their vibrant color comes from anthocyanins, a type of flavonoid with potential anti-inflammatory benefits.
The cocoa powder in these brownies also contributes to their health profile. Dark cocoa is known for its high content of flavanols, powerful antioxidants that can support heart health and improve blood flow. It can even boost your mood!
So, while you’re enjoying a delicious treat, you’re also getting a little dose of beneficial nutrients. It’s a win-win!
Serving Suggestions
- Warm with Ice Cream: Serve warm brownies with a scoop of vanilla bean ice cream. The cold, creamy ice cream perfectly complements the warm, fudgy brownie.
- Dust with Powdered Sugar: A simple dusting of powdered sugar makes them look elegant and adds a touch of sweetness.
- With Fresh Berries: Garnish with extra fresh raspberries or a mix of berries for a beautiful presentation and an extra burst of freshness.
- As a Dessert Platter: Cut into small squares and arrange on a platter with other small desserts for a party.
- Meal Prep Idea: Bake a batch on Sunday and enjoy a delicious treat throughout the week! They’re perfect for an afternoon pick-me-up.
Storage Tips
Store your Raspberry Brownies in an airtight container at room temperature for up to 3-4 days. For longer storage, you can keep them in the refrigerator for up to a week. Brownies also freeze beautifully! Wrap individual brownies tightly in plastic wrap, then place them in a freezer-safe bag or container for up to 3 months. To reheat, simply thaw at room temperature or warm gently in the microwave for a few seconds until soft and gooey again.
Conclusion
And there you have it – a recipe for Raspberry Brownies that truly lives up to its name: Deliciously Fruity! These brownies are the perfect combination of rich, deep chocolate and bright, juicy raspberries. They are incredibly fudgy, wonderfully flavorful, and surprisingly simple to make, even for beginner bakers.
We absolutely encourage you to try this recipe. The joy of pulling a warm pan of these beauties from the oven is unmatched. Your kitchen will smell amazing, and your taste buds will thank you for the delightful experience.
So go ahead, bake a batch (or two!). Share them with your family, bring them to a gathering, or simply keep them all to yourself for a well-deserved treat. Happy baking!


