
Introduction
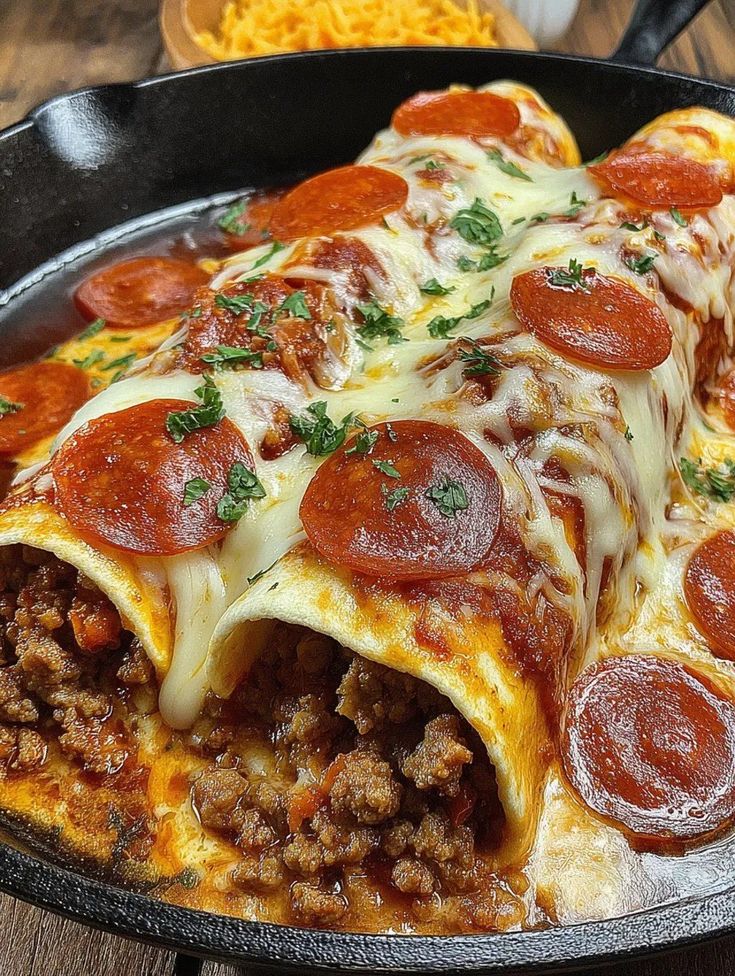
Get ready for a flavor explosion that brings two of your favorite comfort foods together! We’re talking about Pizza Enchiladas. Imagine the gooey, cheesy goodness of a classic pizza, all wrapped up in a soft tortilla, then baked to perfection like an enchilada. It’s truly the best of both worlds, offering a familiar taste with an exciting, new twist.
This dish is incredibly tasty and special because it combines the rich tomato sauce, savory pepperoni, and melted mozzarella you love from pizza with the comforting, roll-up style of an enchilada. It’s a meal that feels both indulgent and wonderfully homemade. Plus, it’s surprisingly easy and quick to put together, making it perfect for a weeknight dinner or a fun weekend meal.
You don’t need any fancy cooking skills to master this recipe. Just a few simple steps and you’ll have a bubbling, cheesy dish ready to impress. So, gather your ingredients and let’s dive into making these incredible Pizza Enchiladas. Your taste buds are going to thank you!
Cooking Time & Prep Time
- Prep Time: 30 minutes
- Cooking Time: 25 minutes
- Total Time: 55 minutes
Small tip: To save time, you can chop your vegetables and pre-cook any meats the day before. This makes assembly a breeze on cooking day!
Ingredients
This recipe makes 6-8 generous servings.
- For the Filling:
- 1 tablespoon olive oil
- 1 pound mild Italian sausage, casings removed (or ground beef/chicken)
- 1/2 cup finely diced red onion
- 1/2 cup finely diced green bell pepper
- 2 cloves garlic, minced
- 1 teaspoon dried oregano
- 1/2 teaspoon dried basil
- 1/4 teaspoon red pepper flakes (optional, for a little kick)
- 1/2 cup pizza sauce (plus more for assembly)
- 1 cup shredded mozzarella cheese
- 1/2 cup sliced pepperoni, quartered
- Salt and black pepper to taste
- For Assembly:
- 12 medium (8-inch) flour tortillas
- 1 1/2 cups pizza sauce (divided)
- 2 cups shredded mozzarella cheese (divided)
- 1 cup shredded cheddar or Monterey Jack cheese (divided)
- 1/4 cup grated Parmesan cheese
- For Garnish:
- Fresh basil leaves, chopped
- Extra sliced pepperoni (optional)
Step-by-Step Instructions
-
Step 1: Prepare Your Baking Dish and Oven
Preheat your oven to 375°F (190°C). Lightly grease a 9×13 inch baking dish with cooking spray or a little olive oil. This will prevent the enchiladas from sticking and make cleanup easier.
Small tip: Make sure your oven is fully preheated before putting the dish in for even baking.
-
Step 2: Cook the Filling
Heat the olive oil in a large skillet over medium-high heat. Add the Italian sausage and cook, breaking it up with a spoon, until it’s browned and cooked through. Drain any excess grease from the skillet.
Small tip: Browning the sausage well adds a lot of flavor to your filling.
-
Step 3: Sauté Vegetables and Season
Add the diced red onion and green bell pepper to the skillet with the cooked sausage. Cook for about 5-7 minutes, or until the vegetables are softened. Stir in the minced garlic, dried oregano, dried basil, and red pepper flakes (if using) and cook for another minute until fragrant.
Small tip: Don’t burn the garlic! Cook it just until it smells fragrant to avoid a bitter taste.
-
Step 4: Combine Filling Ingredients
Remove the skillet from the heat. Stir in 1/2 cup of pizza sauce, 1 cup of shredded mozzarella cheese, and the quartered pepperoni slices into the sausage and vegetable mixture. Taste and season with salt and black pepper as needed. This creates a rich and flavorful filling for your tortillas.
Small tip: Let the mixture cool slightly before adding the cheese to prevent it from melting too much too soon.
-
Step 5: Assemble the Enchiladas
Spread about 1/2 cup of pizza sauce evenly over the bottom of your prepared baking dish. This creates a flavorful base for the enchiladas. Take one tortilla and spoon about 1/3 to 1/2 cup of the filling down the center. Roll the tortilla up tightly and place it seam-side down in the baking dish.
Small tip: Warming your tortillas slightly in the microwave for 15-20 seconds can make them more pliable and easier to roll without tearing.
-
Step 6: Layer with Sauce and Cheese
Repeat the filling and rolling process with the remaining tortillas, arranging them snugly in a single layer in the baking dish. Once all tortillas are rolled, pour the remaining 1 cup of pizza sauce evenly over the top of the enchiladas. Sprinkle generously with the remaining 1 cup of mozzarella cheese, 1 cup of cheddar/Monterey Jack cheese, and the grated Parmesan cheese.
Small tip: Don’t skimp on the cheese! It’s what gives these enchiladas their irresistible pizza-like crust.
-
Step 7: Bake to Golden Perfection
Bake for 20-25 minutes, or until the cheese is melted, bubbly, and lightly golden brown. The edges of the tortillas should also be slightly crispy. Keep an eye on it to prevent over-browning.
Small tip: If the cheese starts to brown too quickly, you can loosely tent the dish with foil for the last few minutes of baking.
-
Step 8: Garnish and Serve
Remove the baking dish from the oven. Let the Pizza Enchiladas rest for 5-10 minutes before serving. This helps the cheese set and makes them easier to cut and serve. Garnish with fresh chopped basil and extra pepperoni, if desired. Serve hot and enjoy!
Small tip: Resting time is important for casseroles like this. It helps everything meld together beautifully.
Tips & Variations
- Gluten-Free Option: Easily make this dish gluten-free by swapping traditional flour tortillas for gluten-free flour tortillas or corn tortillas. Corn tortillas will give a slightly different texture but are equally delicious!
- Vegan or Vegetarian Option: For a meat-free version, omit the Italian sausage and pepperoni. Instead, use plant-based ground “meat” crumbles or extra sautéed mushrooms and spinach. For a fully vegan dish, use your favorite dairy-free shredded mozzarella and cheddar cheeses.
- Add More Vegetables or Protein: Boost the nutrition and flavor by adding more veggies to the filling. Sautéed mushrooms, finely chopped spinach (squeezed dry), black olives, or even corn kernels would be fantastic. For extra protein, cooked shredded chicken or ground turkey works wonderfully in place of or in addition to the Italian sausage.
- Spicy Version: If you love a kick, increase the red pepper flakes in the filling to 1/2 teaspoon or more. You can also add finely diced jalapeños or a dash of hot sauce to the pizza sauce for an extra fiery punch.
- Flavor Boost: For an added layer of flavor, drizzle a little pesto inside each tortilla before rolling, or swirl some into your pizza sauce. Different cheese blends like provolone or smoked gouda can also add a unique twist to the cheesy topping.
Nutritional Information
Approximate values per serving (based on 6 servings):
- Calories: 580
- Protein: 35g
- Carbohydrates: 45g
- Fat: 32g
Note: Nutritional values may vary depending on the specific brands and types of ingredients used.
Health Benefits
This dish, while comforting, also packs some great nutritional benefits from its key ingredients.
- Tomatoes: The pizza sauce is rich in tomatoes, which are a fantastic source of lycopene, a powerful antioxidant known for its potential heart health benefits. They also provide Vitamin C, essential for immune function.
- Lean Protein: If you use lean Italian sausage or opt for ground chicken or turkey, you’re getting a good dose of high-quality protein. Protein is crucial for muscle repair, growth, and keeping you feeling full and satisfied.
- Dairy Goodness: The mozzarella and cheddar cheeses contribute essential calcium, vital for strong bones and teeth. They also offer more protein and Vitamin D (if fortified), which helps with calcium absorption.
- Vibrant Vegetables: Bell peppers and onions add fiber, vitamins, and minerals. Bell peppers are especially high in Vitamin C and antioxidants, while onions provide compounds that support immune health.
Serving Suggestions
- Classic Side Salad: A simple, crisp green salad with a light vinaigrette is the perfect fresh contrast to the rich and cheesy enchiladas.
- Garlic Bread: You can never go wrong with a side of warm, crusty garlic bread for dipping into any extra sauce.
- Steamed Vegetables: A side of lightly steamed broccoli, green beans, or asparagus adds extra nutrients and a touch of color to your plate.
- Main Dish Marvel: These Pizza Enchiladas are hearty enough to be a complete meal on their own. They are definitely the star of the show!
- Meal Prep Magic: Assemble the enchiladas in the baking dish, cover tightly with foil, and refrigerate for up to 24 hours before baking. Just add an extra 5-10 minutes to the baking time if cooking from cold.
Storage Tips: Leftover Pizza Enchiladas will keep well in an airtight container in the refrigerator for up to 3-4 days. Yes, they can be frozen! For best results, freeze unbaked or fully baked enchiladas (covered tightly with foil and then plastic wrap) for up to 2-3 months. Thaw in the refrigerator overnight before baking or reheating. To reheat, bake in a preheated oven at 350°F (175°C) until heated through and bubbly, about 20-30 minutes. You can also microwave individual portions, but the oven provides a better texture.
Conclusion
There you have it – a truly magnificent dish that brings the best of pizza and enchiladas right to your dinner table! These Pizza Enchiladas are a fantastic example of comfort food fusion, delivering incredible flavor and satisfying every craving. The gooey cheese, savory filling, and perfect sauce make every bite an absolute delight.
We truly hope you give this recipe a try. It’s simple to follow, packed with flavor, and guarantees smiles all around. Don’t be shy about experimenting with your favorite pizza toppings to make it truly your own. It’s a fun and flexible recipe!
Imagine sharing this bubbling, cheesy creation with your family and friends. It’s a dish that’s perfect for gatherings, weeknight dinners, or whenever you need a little extra comfort. Enjoy the process, savor the flavors, and happy cooking!


