
Introduction
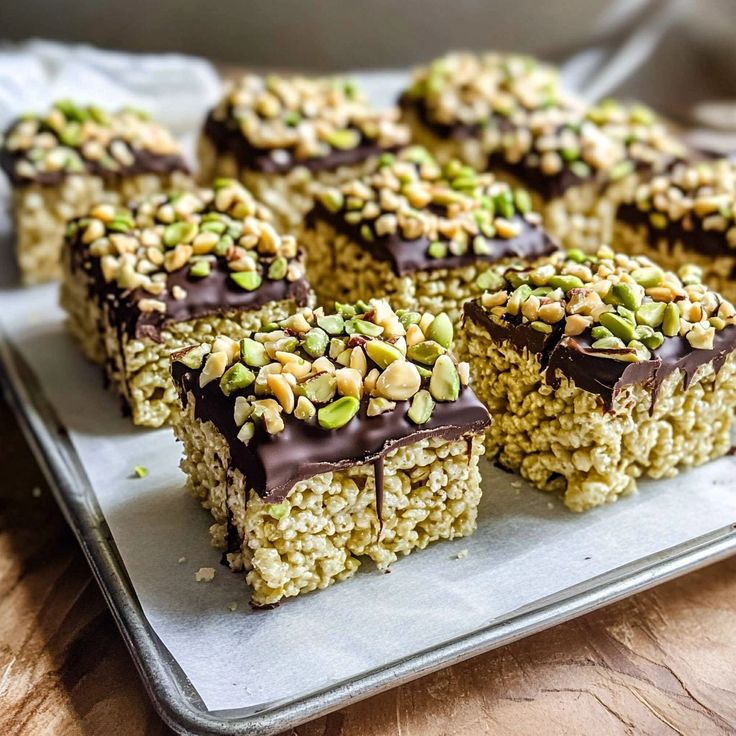
Get ready to transform a childhood favorite into an elegant, vibrant, and utterly irresistible treat! Our Pistachio Rice Krispie Treats take the classic crispy, chewy square and infuse it with the rich, nutty flavor of pistachios. It’s a delightful surprise for your taste buds, offering that familiar satisfying crunch with a sophisticated twist that makes it feel truly special.
The best part? This recipe is incredibly simple and lightning-fast to make. There’s no baking involved, just a few easy steps that come together in minutes. You’ll be amazed at how quickly you can whip up a batch of these beautiful green squares, perfect for any last-minute gathering or a spontaneous sweet craving. It’s a foolproof recipe that delivers maximum flavor with minimal effort.
So, if you’re looking for a quick, fun, and deliciously unique dessert, you’ve found it! These Pistachio Rice Krispie Treats are guaranteed to be a hit with everyone who tries them. Gather your ingredients, and let’s make some magic in the kitchen. You’re just moments away from enjoying these delightful, chewy, and nutty squares!
Cooking Time & Prep Time
- Prep Time: 15 minutes
- Cooking Time: 5 minutes
- Total Time: 20 minutes
Small tip: To make cleanup a breeze, always line your baking pan with parchment paper or foil before you start. This ensures the sticky treats lift out easily!
Ingredients
This recipe makes approximately 12-16 servings.
- For the Treats:
- 4 tablespoons unsalted butter
- 10 ounces (about 40 large or 6 cups mini) marshmallows
- 1 teaspoon pistachio extract (or 2 tablespoons pistachio paste for richer flavor and natural color)
- 2-3 drops green food coloring (optional, for a brighter green hue)
- Pinch of salt (about 1/4 teaspoon)
- 6 cups Rice Krispies cereal
- 1/2 cup shelled pistachios, finely chopped (plus extra for garnish)
Step-by-Step Instructions
-
Step 1: Prepare Your Pan
First, get your pan ready. Lightly grease a 9×13 inch baking pan with butter or cooking spray. For even easier removal, line the pan with parchment paper or foil, leaving an overhang on the sides. This creates “handles” to lift the treats out later.
Small tip: If using parchment paper, crinkle it up first before lining the pan. This makes it more pliable and easier to fit into the corners.
-
Step 2: Melt the Butter
In a large non-stick pot or Dutch oven, melt the unsalted butter over low heat. Be patient and don’t rush this step, as you want the butter to melt evenly without burning. Low heat is key for perfect marshmallow treats.
Small tip: Using a non-stick pot will save you a lot of scrubbing later on.
-
Step 3: Melt the Marshmallows and Flavor
Once the butter is fully melted, add all the marshmallows to the pot. Continue to stir constantly over low heat until the marshmallows are completely melted and smooth. Remove the pot from the heat.
Now, stir in the pistachio extract (or paste), green food coloring (if using), and the pinch of salt. Mix well until the color is even and the flavor is fully incorporated into the marshmallow mixture.
Small tip: If using pistachio paste, you might need less food coloring as the paste often provides a natural green tint. Taste a tiny bit to adjust the pistachio flavor if desired.
-
Step 4: Combine with Cereal
Pour the Rice Krispies cereal into the marshmallow mixture in the pot. Using a large spatula or spoon, gently fold the cereal into the marshmallow mixture until it is evenly coated. Work quickly but carefully to ensure every piece of cereal is covered.
Small tip: A rubber spatula sprayed lightly with non-stick spray can help prevent the sticky marshmallow from clinging too much.
-
Step 5: Press into Pan and Garnish
Immediately transfer the cereal mixture into your prepared 9×13 inch baking pan. Using a buttered spatula, a piece of parchment paper, or your buttered hands, gently and evenly press the mixture into the pan. Don’t press too hard, as this can make the treats too dense.
Sprinkle the reserved chopped pistachios evenly over the top of the pressed treats. Lightly press them down so they adhere to the surface.
Small tip: For perfectly even treats, use another piece of parchment paper on top and gently press with a flat bottomed glass or a second pan.
-
Step 6: Cool and Cut
Allow the treats to cool completely at room temperature for at least 30-60 minutes. They need to set up firm enough to cut cleanly. Once cooled, use the parchment paper overhang to lift the entire block of treats out of the pan.
Place them on a cutting board and cut into squares or rectangles of your desired size. Enjoy your delicious Pistachio Rice Krispie Treats!
Small tip: For clean cuts, use a sharp knife that has been lightly buttered or sprayed with cooking spray. Wipe clean between cuts if needed.
Tips & Variations
- Gluten-Free Option: Ensure you use certified gluten-free rice cereal. Most major brands offer a gluten-free version, but always check the label to be safe.
- Vegan/Vegetarian Option: To make these treats suitable for a vegan diet, use a plant-based butter alternative (like a vegan butter stick) and vegan marshmallows. Many brands now offer delicious gelatin-free marshmallow options.
- Boost the Protein/Add-ins: While this is a sweet treat, you can enhance the nutty protein by adding an extra 1/4 cup of finely chopped pistachios or other nuts like almonds or cashews to the cereal mixture. You could also stir in white chocolate chips for extra sweetness and texture.
- Spicy Version: For a surprisingly delightful kick, add a tiny pinch (1/8 teaspoon) of cayenne pepper to the melted marshmallow mixture along with the pistachio extract. It won’t make them overtly spicy, but it will add a subtle warmth that complements the sweet and nutty flavors beautifully.
- Other Flavor Twists: Experiment with different extracts! A touch of almond extract pairs wonderfully with pistachio. You could also swirl in some melted white chocolate or dark chocolate before pressing the mixture into the pan for a marbled effect.
Nutritional Information
Approximate values per serving (based on 12 servings):
- Calories: 230 kcal
- Protein: 3g
- Carbohydrates: 35g
- Fat: 10g
Please note: These values are approximate and may vary depending on the specific brands and quantities of ingredients used.
Health Benefits
While these are indeed a treat, some key ingredients offer notable health benefits:
- Pistachios: These vibrant green nuts are little powerhouses! They are a good source of healthy fats, including monounsaturated and polyunsaturated fats, which are beneficial for heart health. Pistachios also provide a decent amount of plant-based protein and dietary fiber, which aids digestion and helps you feel full.
- Vitamins and Minerals from Pistachios: Beyond fats and protein, pistachios are rich in essential vitamins and minerals. They are particularly high in Vitamin B6, which is important for metabolism and immune function. They also contain potassium, important for blood pressure regulation, and antioxidants like lutein and zeaxanthin, beneficial for eye health.
- Fortified Cereal: Many rice cereals are fortified with essential vitamins and minerals, such as iron and various B vitamins. While marshmallows are primarily sugar, the cereal component can contribute some nutritional value, especially when enjoyed in moderation.
- Mindful Indulgence: Enjoying a delicious treat like this can also have mental health benefits! Allowing yourself to indulge in moderation can reduce feelings of deprivation and promote a healthier relationship with food. It’s all about balance and savoring the moments.
Serving Suggestions
- Sweet Treat: These Pistachio Rice Krispie Treats are perfect on their own as a delightful snack or a light dessert after any meal.
- Coffee/Tea Pairing: Serve them with a hot cup of coffee, tea, or a glass of cold milk for a comforting afternoon pick-me-up.
- Dessert Platter: Cut them into smaller squares and arrange them on a dessert platter alongside other treats like cookies, brownies, or fresh fruit for a colorful and varied spread.
- Ice Cream Topping: Crumble a few pieces over a scoop of vanilla or pistachio ice cream for an added layer of crunch and flavor.
- Party Favorite: They are an excellent addition to potlucks, birthday parties, or holiday gatherings. Their unique flavor and pretty green color make them stand out!
Storage Tips
Store your Pistachio Rice Krispie Treats in an airtight container at room temperature for up to 3 days. They can also be kept in the refrigerator for up to 5 days, though they may become a bit firmer. Freezing is not recommended as it can alter their texture, making them hard and potentially stale. If refrigerated, allow them to come to room temperature for about 15-20 minutes before serving for the best chewy texture. You can also microwave a single square for 5-10 seconds to soften it slightly.
Conclusion
And there you have it – a truly remarkable twist on a beloved classic! These Pistachio Rice Krispie Treats are a testament to how simple ingredients can come together to create something truly special and memorable. The combination of crispy cereal, chewy marshmallow, and the distinct, nutty flavor of pistachios makes for an irresistible dessert that’s as beautiful to look at as it is delicious to eat.
We absolutely encourage you to try making a batch (or two!) of these delightful treats. They are incredibly easy, require no baking, and are ready in a flash. Whether you’re a seasoned baker or a kitchen novice, you’ll find joy in creating these vibrant green squares.
So go ahead, whip up these Pistachio Rice Krispie Treats and share the joy! They’re perfect for bringing a smile to your family’s faces, impressing guests, or simply treating yourself to a moment of sweet, crunchy bliss. Happy cooking, and even happier eating!


