
Introduction
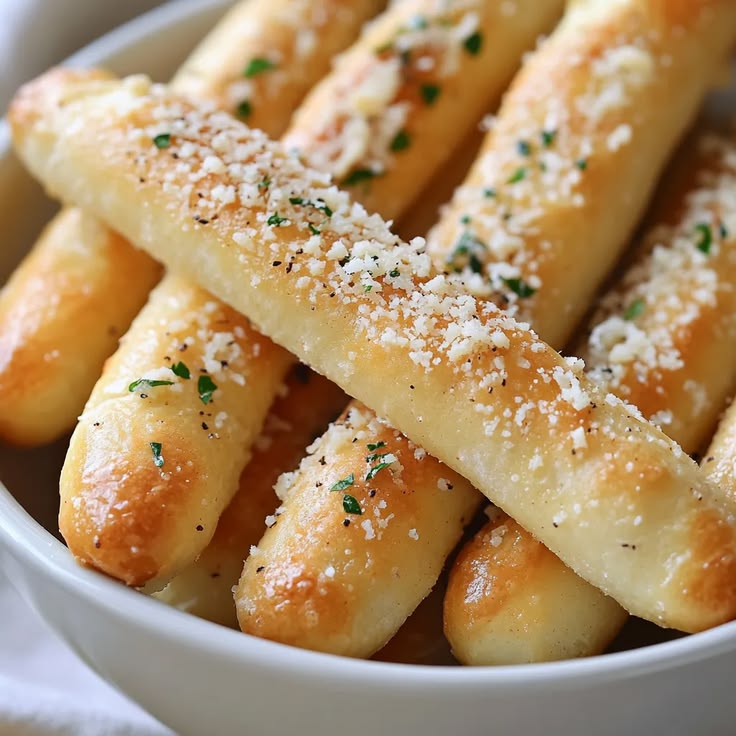
Get ready to bring the magic of your favorite Italian-American restaurant right into your kitchen! We’re talking about those irresistible, warm, and wonderfully garlicky breadsticks from Olive Garden. They are a true crowd-pleaser, known for their soft, fluffy texture and that signature savory topping that makes you reach for just one more.
You might think making these at home is a big project, but I promise you, it’s simpler than you imagine. With a few basic ingredients and a little patience for rising dough, you’ll be amazed at how easily these come together. The process is straightforward and incredibly rewarding, perfect for even beginner bakers.
So, clear your counter, gather your ingredients, and prepare to embark on a delicious journey. Once you taste these homemade Olive Garden-style breadsticks, you’ll wonder why you ever bought them! Let’s get baking and create some culinary comfort.
Cooking Time & Prep Time
Prep Time: 25 minutes
Rising Time: 1 hour 30 minutes (first rise) + 30 minutes (second rise)
Cooking Time: 12-15 minutes
Total Time: Approximately 2 hours 40 minutes (mostly hands-off)
Small tip: While the dough is rising, you can prepare the garlic butter topping or get started on your main course!
Ingredients
This recipe makes approximately 16-18 breadsticks.
For the Breadsticks
- 1 cup warm water (105-115°F / 40-46°C)
- 2 ¼ teaspoons active dry yeast (one standard packet)
- 1 tablespoon granulated sugar
- 1 teaspoon salt
- 2 tablespoons olive oil (plus more for greasing)
- 3 cups all-purpose flour (plus more for dusting)
For the Garlic Butter Topping
- ½ cup unsalted butter, melted
- 2 cloves garlic, minced (or 1 teaspoon garlic powder)
- 1 teaspoon dried parsley flakes
- ¼ teaspoon salt
Step-by-Step Instructions
-
Step 1: Activate the Yeast
In a large mixing bowl, combine the warm water and granulated sugar. Sprinkle the active dry yeast over the top. Stir gently, then let it sit for 5-10 minutes until it becomes foamy. This shows your yeast is alive and ready to work!
Small tip: Ensure your water isn’t too hot (it will kill the yeast) or too cold (it won’t activate it). A kitchen thermometer is very helpful here.
-
Step 2: Mix the Dough
Add the salt and olive oil to the foamy yeast mixture. Gradually add the flour, one cup at a time, mixing with a wooden spoon or a stand mixer with a dough hook until a shaggy dough forms. It might seem a little sticky at first.
Small tip: Don’t add all the flour at once. Sometimes you might need slightly less or more depending on humidity.
-
Step 3: Knead the Dough
Turn the dough out onto a lightly floured surface. Knead for 7-10 minutes, until the dough is smooth, elastic, and no longer sticky. If using a stand mixer, knead with the dough hook for 5-7 minutes.
Small tip: The dough should spring back slowly when you gently poke it with your finger.
-
Step 4: First Rise
Lightly grease a clean large bowl with olive oil. Place the dough in the bowl, turning it once to coat the top. Cover the bowl with plastic wrap or a clean kitchen towel. Let it rise in a warm place for 1 to 1.5 hours, or until doubled in size.
Small tip: A warm oven (turned off, with just the light on) or a sunny spot on your counter works perfectly for rising.
-
Step 5: Shape the Breadsticks
Punch down the risen dough to release the air. Turn it out onto a lightly floured surface. Divide the dough into 16-18 equal pieces. Roll each piece into a log about 6-7 inches long and ½-inch thick.
Small tip: Try to make the breadsticks as uniform as possible for even baking.
-
Step 6: Second Rise and Preheat Oven
Place the shaped breadsticks on a baking sheet lined with parchment paper, leaving about an inch between each one. Cover them loosely with plastic wrap or a kitchen towel. Let them rise again for 20-30 minutes, or until slightly puffy. Preheat your oven to 375°F (190°C) during this time.
Small tip: Giving them enough space prevents them from sticking together as they bake and expand.
-
Step 7: Bake the Breadsticks
Bake the breadsticks in the preheated oven for 12-15 minutes, or until they are golden brown on top and bottom. Keep an eye on them towards the end of the baking time, as ovens can vary.
Small tip: For a slightly crispier bottom, you can bake them directly on the baking sheet without parchment paper, but parchment helps with cleanup.
-
Step 8: Prepare and Apply Garlic Butter Topping
While the breadsticks are baking, melt the butter in a small bowl. Stir in the minced garlic (or garlic powder), dried parsley, and salt. As soon as the breadsticks come out of the oven, brush them generously with the garlic butter mixture. Serve warm and enjoy!
Small tip: Brushing the butter on while the breadsticks are hot helps them absorb all that delicious garlicky flavor.
Tips & Variations
- Gluten-Free Option: Substitute the all-purpose flour with a 1:1 gluten-free baking flour blend that contains xanthan gum. You might need to adjust the water slightly, as GF flours can absorb liquids differently.
- Vegan or Vegetarian Option: This recipe is already vegan if you use plant-based butter for the topping! Ensure your olive oil is pure and no dairy products are used.
- Add More Flavor: For an extra kick, add a pinch of onion powder to the dough or the garlic butter topping. You could also sprinkle a little Parmesan cheese on top of the breadsticks after brushing with butter for a cheesy twist.
- Spicy Version: Stir ¼ to ½ teaspoon of red pepper flakes into the garlic butter topping for a delightful warmth.
- Herbaceous Twist: Add a teaspoon of dried Italian herbs (like oregano, basil, and thyme) to the dough along with the flour, or mix them into the garlic butter for an aromatic variation.
Nutritional Information
Approximate values per serving (based on 16 servings):
- Calories: 170
- Protein: 4g
- Carbohydrates: 25g
- Fat: 6g
Note: These values are approximate and may vary depending on specific brands and exact measurements of ingredients used.
Health Benefits
While breadsticks are a delicious treat, some of their core ingredients offer health benefits:
Yeast: Active dry yeast is a good source of B vitamins, including thiamine (B1), riboflavin (B2), niacin (B3), and folic acid (B9). These vitamins are essential for energy metabolism, nerve function, and overall cellular health. They play a crucial role in converting food into energy.
Olive Oil: Extra virgin olive oil, used in the dough and potentially for greasing, is rich in monounsaturated fatty acids (MUFAs). These “good fats” are known to help lower bad cholesterol levels and reduce the risk of heart disease. Olive oil also contains antioxidants, which help protect the body’s cells from damage.
Garlic: Fresh garlic, or even garlic powder, is packed with beneficial compounds like allicin. Garlic is well-known for its immune-boosting properties and has been studied for its potential to reduce blood pressure and cholesterol. It also acts as a powerful antioxidant.
All-Purpose Flour: While not a whole grain, all-purpose flour provides carbohydrates, which are the body’s primary source of energy. Opting for whole wheat flour in this recipe would significantly increase fiber content, aiding digestion and promoting satiety.
Serving Suggestions
- Classic Pairing: Serve these warm breadsticks alongside a hearty bowl of Zuppa Toscana or Pasta e Fagioli soup for a true Olive Garden experience.
- Pasta Perfection: They are the ideal accompaniment to any pasta dish, from a creamy Fettuccine Alfredo to a robust Spaghetti with Meat Sauce.
- Dipping Delight: Offer a side of marinara sauce, alfredo sauce, or a simple olive oil and balsamic vinegar dip for an extra layer of flavor.
- Side Dish Star: These breadsticks can elevate a simple salad or act as a delicious side to grilled chicken or fish, turning any meal into a special occasion.
- Meal Prep Idea: Bake a double batch and freeze half for quick weeknight dinners. They reheat beautifully!
Storage Tips
Store leftover breadsticks in an airtight container at room temperature for up to 2-3 days. For longer storage, you can freeze baked breadsticks for up to 1 month. To reheat, place them on a baking sheet in a 300°F (150°C) oven for 5-7 minutes until warm and slightly crispy, or microwave briefly for a softer texture.
Conclusion
There you have it – the secret to making those beloved Olive Garden breadsticks right in your own kitchen! These soft, garlicky, and utterly delicious breadsticks are more than just a side dish; they’re a comforting treat that brings joy to any meal. The aroma alone as they bake will make your home feel extra cozy and inviting.
Don’t be intimidated by working with yeast; this recipe is designed to be straightforward and rewarding. With just a little bit of time and effort, you’ll create breadsticks that are even better than the restaurant’s, because they’re made with love by you!
So go ahead, give this recipe a try. Share these warm, buttery delights with your family and friends, and watch their faces light up. Happy baking, and enjoy every single bite!


