
Introduction
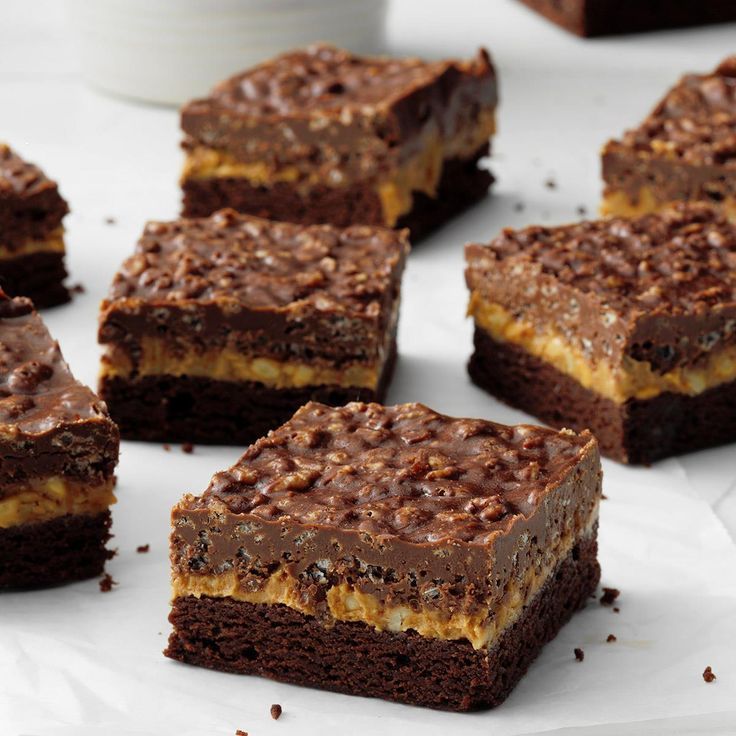
Are you ready for a treat that’s unbelievably delicious and incredibly easy to make? Get ready to fall in love with these No Bake Peanut Butter Chocolate Bars! Imagine a rich, creamy peanut butter base, perfectly sweet and slightly salty, topped with a smooth, decadent layer of chocolate. Every bite is pure bliss, a perfect harmony of two classic flavors that just belong together.
The best part? No oven required! That’s right, these bars come together quickly with just a few simple ingredients and minimal effort. They are perfect for a last-minute dessert, a potluck, or just when you need a sweet fix without the fuss of baking. You’ll spend more time enjoying them than making them, which is always a win in our book!
So, clear some space in your fridge and get ready to whip up a batch of these irresistible bars. They are guaranteed to become a new favorite in your household. Let’s get started and bring some deliciousness into your day!
Cooking Time & Prep Time
- Prep Time: 20 minutes
- Chilling Time: 2 hours (minimum)
- Total Time: 2 hours 20 minutes
Small tip: To speed up the chilling process, you can place the bars in the freezer for about 30-45 minutes after each layer. Just be careful not to freeze them solid if you want a softer texture.
Ingredients
This recipe makes 12-16 servings, depending on how you cut your bars.
For the Peanut Butter Base:
- 1 ½ cups (about 15-18 full sheets) graham cracker crumbs (or digestive biscuits, crushed)
- ½ cup (1 stick or 113g) unsalted butter, melted
- 1 cup creamy peanut butter (smooth, not natural style as the oil separates)
- 2 cups powdered sugar (confectioners’ sugar)
- ½ teaspoon salt
For the Chocolate Topping:
- 1 ½ cups semi-sweet chocolate chips (or your favorite chocolate bar, chopped)
- ¼ cup creamy peanut butter
- 2 tablespoons unsalted butter
- 1 teaspoon vanilla extract (optional)
- Pinch of sea salt (for sprinkling, optional)
Step-by-Step Instructions
-
Step 1: Prepare Your Pan
First, line a 9×13 inch baking pan with parchment paper, leaving an overhang on the sides. This makes it super easy to lift the bars out later. A little cooking spray under the parchment can help it stick to the pan.
Small tip: Make sure the parchment paper covers the bottom and goes up the sides. This creates “handles” for easy removal once the bars are set.
-
Step 2: Make the Graham Cracker Crumbs
If you’re using whole graham crackers, crush them finely. You can do this in a food processor for quick results, or place them in a Ziploc bag and crush them with a rolling pin. You want fine crumbs, not large chunks.
Small tip: A food processor makes this step a breeze and ensures uniform crumbs, which helps the base hold together better.
-
Step 3: Combine Base Ingredients
In a large mixing bowl, combine the graham cracker crumbs, melted butter, 1 cup of peanut butter, 2 cups of powdered sugar, and ½ teaspoon of salt. Mix everything together really well. It will be thick and crumbly at first, but keep mixing until it comes together like a stiff dough.
Small tip: Use a sturdy spoon or even your hands (clean, of course!) to mix the base thoroughly. You want all the ingredients fully incorporated.
-
Step 4: Press the Base into the Pan
Transfer the peanut butter mixture to your prepared 9×13 inch pan. Use the back of a spoon, a spatula, or your hands to press the mixture down firmly and evenly into the bottom of the pan. Make sure it’s packed tightly from edge to edge.
Small tip: For a perfectly smooth and even layer, you can place a piece of plastic wrap over the base and use a flat-bottomed glass or a second pan to press it down.
-
Step 5: Chill the Base
Once the base is pressed, place the pan in the refrigerator to chill for at least 30 minutes. This helps the base firm up and makes it easier to add the chocolate topping without disturbing it.
Small tip: Don’t skip this chilling step! It’s crucial for the layers to set properly and prevent them from mixing.
-
Step 6: Prepare the Chocolate Topping
While the base is chilling, prepare the chocolate topping. In a microwave-safe bowl, combine the chocolate chips, ¼ cup of peanut butter, and 2 tablespoons of butter. Microwave on high for 30-second intervals, stirring well after each, until smooth and fully melted. This usually takes 1-2 minutes.
Small tip: Alternatively, you can melt the chocolate mixture in a double boiler over simmering water for a more controlled melting process, stirring until smooth.
-
Step 7: Add Vanilla and Spread Topping
Once the chocolate mixture is smooth, stir in the vanilla extract, if using. Pour the melted chocolate topping evenly over the chilled peanut butter base. Use an offset spatula or the back of a spoon to spread it out to the edges.
Small tip: Work quickly but carefully when spreading the chocolate, as it will start to set as it cools.
-
Step 8: Final Chill and Slice
If desired, sprinkle a pinch of sea salt over the chocolate topping for a lovely sweet and salty contrast. Return the pan to the refrigerator for at least 2 hours, or until the chocolate layer is completely firm. Once firm, lift the bars out of the pan using the parchment paper handles and slice into squares or rectangles. Enjoy!
Small tip: For clean cuts, use a warm, sharp knife. You can run your knife under hot water and wipe it dry between slices.
Tips & Variations
- Gluten-Free Option: Easily make these bars gluten-free by using gluten-free graham cracker crumbs or crushed gluten-free digestive biscuits. The rest of the ingredients are naturally gluten-free!
- Vegan Option: For a completely vegan treat, swap out the butter for a good quality vegan butter alternative. Ensure your chocolate chips are dairy-free (many dark chocolate chips are). All other ingredients are typically vegan-friendly.
- Boosted Protein: Stir 1-2 scoops of your favorite unflavored or vanilla protein powder into the peanut butter base mixture. You might need to add an extra tablespoon of melted butter or a splash of plant-based milk to maintain the right consistency.
- Spicy Kick: Add a tiny pinch (¼ teaspoon) of cayenne pepper to the chocolate topping mixture before melting. The subtle heat will add an exciting unexpected twist to the sweetness!
- Nut Butter Swirl: After spreading the chocolate topping, drizzle a few tablespoons of warm, creamy peanut butter over the chocolate and use a toothpick or skewer to create a beautiful swirled pattern before chilling.
- Different Topping: Instead of a solid chocolate layer, you could try a white chocolate topping, or even a mix of dark and white chocolate for a marbled effect. Crushed nuts or sprinkles can also be added for extra texture and fun.
Nutritional Information
Approximate values per serving (based on 16 servings):
- Calories: 350-400 kcal
- Protein: 7-9g
- Carbohydrates: 40-45g
- Fat: 20-25g
Note: These values are approximate and can vary significantly depending on the specific brands and types of ingredients used, especially for peanut butter and chocolate.
Health Benefits
While these are a treat, some key ingredients offer notable health benefits:
- Peanut Butter: A fantastic source of plant-based protein, which helps with muscle repair and satiety. It also provides healthy monounsaturated and polyunsaturated fats, beneficial for heart health. Peanuts are rich in essential minerals like magnesium (important for nerve and muscle function), phosphorus, and zinc.
- Dark Chocolate: Contains powerful antioxidants called flavonoids, which can help protect your cells from damage. It’s also known to improve blood flow, lower blood pressure, and even boost mood. Look for chocolate with a higher cocoa percentage for more benefits.
- Graham Crackers (Whole Grains): Many graham crackers are made with whole wheat flour, providing some dietary fiber. Fiber is crucial for digestive health, helping to regulate blood sugar levels and promote a feeling of fullness.
- Healthy Fats: The healthy fats from peanut butter and butter provide sustained energy and help in the absorption of fat-soluble vitamins. They are an important part of a balanced diet when consumed in moderation.
Enjoying these bars in moderation means you can savor the delicious taste while still appreciating the nutritional contributions of their core ingredients.
Serving Suggestions
- Perfect Dessert: Serve these bars as a delightful end to any meal. They are rich enough on their own, but a side of fresh berries adds a lovely contrast.
- Afternoon Treat: Cut them into smaller squares for a satisfying afternoon snack with a cup of coffee or tea.
- Party Favorite: These bars are always a hit at potlucks, parties, and gatherings. They are easy to transport and universally loved.
- Lunchbox Surprise: Pack a small square in a lunchbox for a sweet surprise that will brighten anyone’s day.
Storage Tips
These No Bake Peanut Butter Chocolate Bars keep wonderfully! Store them in an airtight container in the refrigerator for up to 1 week. The cold helps them maintain their firm texture and prevents the chocolate from becoming too soft. For longer storage, you can freeze the bars. Place them in a single layer in an airtight container or wrap individual bars tightly in plastic wrap and then foil. They will keep in the freezer for up to 3 months. When you’re ready to enjoy, simply let them thaw at room temperature for about 15-30 minutes, or enjoy them straight from the freezer for a firmer, almost fudge-like texture!
Conclusion
And there you have it – a recipe for No Bake Peanut Butter Chocolate Bars that is as simple to make as it is utterly delicious to eat! These bars truly embody comfort and joy, bringing together the timeless pairing of peanut butter and chocolate in a way that requires zero baking stress.
Whether you’re a seasoned dessert maker or just starting out, this recipe is incredibly forgiving and yields spectacular results every time. It’s perfect for satisfying those sweet cravings, impressing guests, or simply treating yourself to something special without turning on the oven.
So go ahead, gather your ingredients, and give these amazing bars a try. You’ll be amazed at how quickly they disappear once your family and friends get a taste. Happy no-baking!


