
Introduction
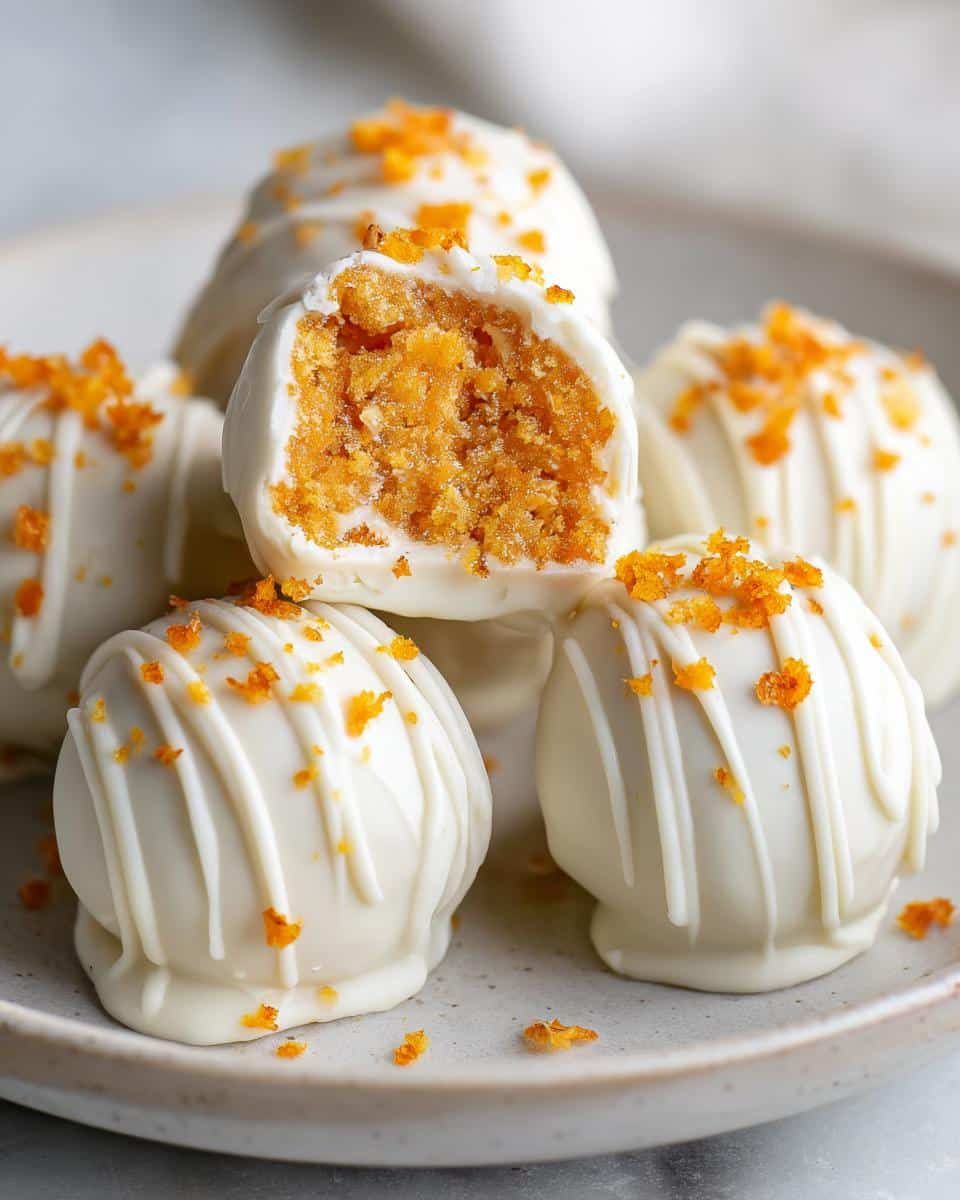
Get ready to discover a treat that’s pure sunshine in a bite! Our No Bake Orange Creamsicle Truffles are a delightful journey back to childhood. They capture all the creamy, dreamy, zesty flavor of your favorite frozen creamsicle, but in a bite-sized, melt-in-your-mouth truffle form. These little beauties are wonderfully refreshing and incredibly addictive.
The best part? You don’t need to turn on your oven for these! This recipe is incredibly easy and quick to whip up, making it perfect for busy days or when you crave something sweet without all the fuss. With just a few simple ingredients and minimal effort, you’ll have a batch of these irresistible truffles ready to chill.
Imagine biting into a soft, sweet, tangy orange truffle, perfectly balanced with creamy vanilla notes. It’s the ideal dessert for a warm afternoon, a party treat, or just a little pick-me-up. So, gather your ingredients and let’s make some magic together. You’re going to love these!
Cooking Time & Prep Time
- Prep Time: 20 minutes
- Chill Time: 60 minutes (minimum)
- Total Time: 80 minutes
Small tip: The chill time is crucial for the truffles to set properly, so don’t rush this step! You can even prepare them the day before.
Ingredients
Makes about 24-28 truffles
For the Truffle Base:
- 2 cups (about 200g) vanilla wafer cookies, finely crushed
- 8 oz (226g) cream cheese, softened
- 1/2 cup (113g) unsalted butter, softened
- 1/2 cup (100g) powdered sugar
- 1 tablespoon fresh orange zest (from 1 large orange)
- 2 tablespoons fresh orange juice
- 1 teaspoon vanilla extract
- 1/4 teaspoon salt
For the Coating:
- 1 cup (170g) white chocolate chips or chopped white chocolate
- 1 tablespoon coconut oil (optional, for smoother melting)
- 1/4 cup (about 40g) finely crushed vanilla wafer cookies, for dusting
- Extra orange zest, for garnish (optional)
Step-by-Step Instructions
-
Prepare the Cookie Crumbs
Take your vanilla wafer cookies and crush them very finely. You can do this in a food processor for the best results, pulsing until they resemble fine crumbs. If you don’t have a food processor, place them in a Ziploc bag and crush them with a rolling pin.
Small tip: Ensure the crumbs are very fine so they blend smoothly into the truffle mixture.
-
Cream Together Butter and Cream Cheese
In a large mixing bowl, combine the softened cream cheese and softened butter. Beat them together with an electric mixer on medium speed until the mixture is light, fluffy, and well combined. Scrape down the sides of the bowl as needed.
Small tip: Make sure both the butter and cream cheese are truly softened to room temperature. This prevents lumps and ensures a smooth base.
-
Add the Sweet and Zesty Flavors
To the cream cheese and butter mixture, add the powdered sugar, fresh orange zest, fresh orange juice, vanilla extract, and salt. Beat again on medium speed until everything is fully incorporated and the mixture is smooth and fragrant. You’ll smell that lovely orange aroma right away!
-
Combine Wet and Dry Ingredients
Gently fold in the finely crushed vanilla wafer crumbs into the wet mixture. Use a spatula or wooden spoon to mix until just combined. Be careful not to overmix. The mixture should be thick and slightly sticky.
-
Chill the Truffle Mixture
Cover the bowl with plastic wrap and refrigerate the truffle mixture for at least 30-45 minutes. This chilling time is essential! It helps the mixture firm up, making it much easier to roll into truffles later.
Small tip: If the mixture is too sticky to roll after chilling, pop it back into the fridge for another 15-20 minutes.
-
Roll the Truffles
Once chilled, scoop out small portions of the mixture, about 1 tablespoon each. Roll them between your palms to form smooth, uniform balls. Place the rolled truffles on a parchment-lined baking sheet. Continue until all the mixture is used.
Small tip: For uniform truffles, use a small cookie scoop or a measuring spoon. Lightly moisten your hands with water if the mixture starts sticking too much.
-
Prepare the White Chocolate Coating
In a microwave-safe bowl, combine the white chocolate chips and coconut oil (if using). Microwave in 30-second intervals, stirring well after each, until the chocolate is completely melted and smooth. Be careful not to overheat the chocolate, as it can seize.
Small tip: If you don’t have a microwave, you can melt the chocolate in a double boiler over simmering water.
-
Coat the Truffles
Dip each truffle into the melted white chocolate, ensuring it’s fully coated. Use a fork or a dipping tool to lift the truffle out, allowing any excess chocolate to drip off. Immediately place the coated truffle back onto the parchment-lined baking sheet.
-
Finish and Chill Again
While the chocolate is still wet, sprinkle each truffle with some of the extra finely crushed vanilla wafer crumbs or a tiny bit of fresh orange zest for garnish. Once all truffles are coated, return the baking sheet to the refrigerator for at least 30 minutes to allow the chocolate coating to set completely.
-
Serve and Enjoy!
Once the chocolate is firm, your No Bake Orange Creamsicle Truffles are ready to enjoy! Arrange them on a pretty platter and watch them disappear. These are best served chilled.
Tips & Variations
- Gluten-Free Option: Easily make these truffles gluten-free by using gluten-free vanilla wafer cookies or a plain gluten-free shortbread cookie. Ensure all other ingredients are certified gluten-free.
- Vegan Option: To make these truffles vegan, use plant-based cream cheese, vegan butter, and vegan white chocolate chips. Ensure your vanilla wafers are also plant-based (some brands are, or look for vegan shortbread cookies).
- Boosted Nutrition: For a little extra fiber and healthy fats, try adding 1-2 tablespoons of finely ground flaxseed or chia seeds to the truffle base mixture. You won’t taste them much, but they add a subtle nutritional boost.
- Spicy Kick: If you enjoy a touch of heat, add a tiny pinch (about 1/8 teaspoon) of cayenne pepper to the white chocolate coating. It creates a surprising and delightful warmth that complements the orange beautifully.
- Different Flavors: Experiment with other citrus! Lemon zest and juice can create a “Lemon Meringue” truffle, or use lime for a “Key Lime Pie” flavor. You can also drizzle with dark chocolate instead of white for a different look and taste.
Nutritional Information
Approximate values per serving (based on 26 servings):
- Calories: 165
- Protein: 2g
- Carbohydrates: 18g
- Fat: 10g
Please note: These values are approximate and may vary depending on the specific brands and quantities of ingredients used.
Health Benefits
While these truffles are a delightful indulgence, some of their key ingredients offer lovely benefits!
- Oranges: The fresh orange zest and juice provide a wonderful dose of Vitamin C. Vitamin C is a powerful antioxidant, crucial for immune health and skin vitality. It also helps in collagen production, keeping your skin looking fresh.
- Cream Cheese (in moderation): Cream cheese offers some protein and calcium, which are important for bone health and muscle function. It contributes to the creamy texture and satiety of the truffles.
- Vanilla: Vanilla extract, beyond its comforting flavor, contains antioxidants. It can also have a calming effect and contribute to overall well-being.
- Healthy Fats: If you choose to use coconut oil in your coating, it provides healthy medium-chain triglycerides (MCTs), which can be a quick source of energy.
Enjoying these truffles in moderation can be a mood booster and a delicious way to get a little Vitamin C, especially from the fresh orange.
Serving Suggestions
- Serve these truffles as a delightful after-dinner treat with a cup of coffee or a light herbal tea.
- They make a fantastic addition to any dessert platter for parties, potlucks, or holiday gatherings. Their vibrant color and refreshing taste stand out.
- Pack a few in a lunchbox for a special midday snack, or enjoy one as a perfect pick-me-up on a warm afternoon.
- Present them in small decorative paper cups for an elegant touch, especially if giving them as a homemade gift.
Storage Tips
These No Bake Orange Creamsicle Truffles must be stored in an airtight container in the refrigerator. They will keep well for up to 5-7 days. While you can freeze them for longer storage (up to 1 month), their texture is best when enjoyed from the fridge. To freeze, place them in a single layer on a baking sheet until solid, then transfer to a freezer-safe bag or container. Thaw in the refrigerator before serving. Do not reheat; these are meant to be served chilled.
Conclusion
There you have it – a recipe for No Bake Orange Creamsicle Truffles that truly delights! These little spheres of joy are not just easy to make, but they bring a burst of sunny, creamy, and refreshing flavor with every bite. They are the perfect embodiment of a classic summer treat, transformed into an elegant yet simple dessert.
Don’t hesitate to give this recipe a try. You’ll be amazed at how quickly you can create something so incredibly delicious and satisfying. It’s a fantastic project for a lazy afternoon, and the results are always impressive.
Whip up a batch for yourself, or better yet, share them with family and friends. These truffles are sure to bring smiles and happy memories. Enjoy the bright, zesty goodness!


