
Introduction
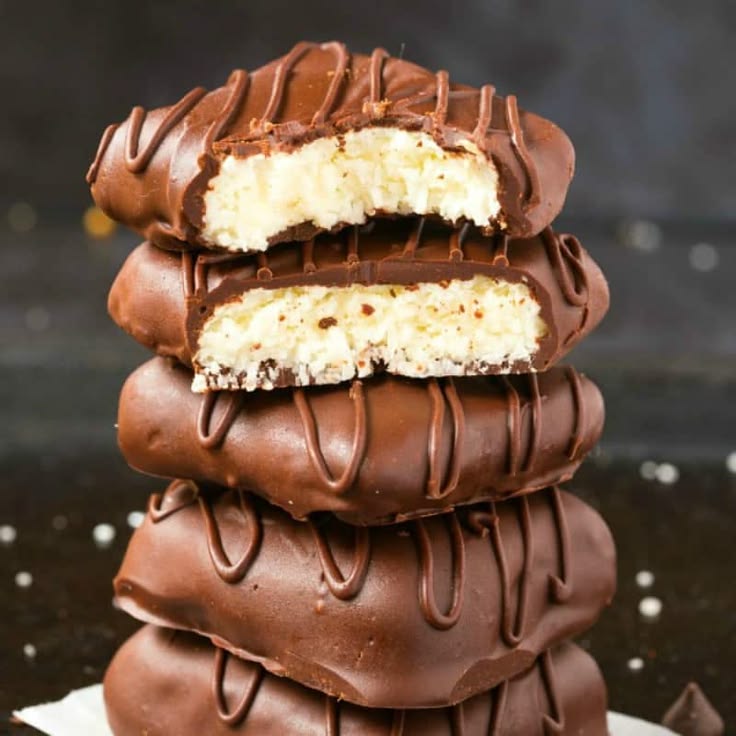
Get ready for a treat that will make your taste buds sing! These No Bake Coconut Chocolate Bars are a dream come true for anyone who loves the classic combination of sweet, chewy coconut and rich, decadent chocolate. They are like your favorite candy bar, but even better because they’re homemade with love. Each bite offers a delightful texture contrast and an explosion of flavor that will leave you wanting more.
The best part? You don’t even need to turn on your oven! This recipe is incredibly easy and quick to whip up. With just a few simple ingredients and minimal effort, you can create a dessert that looks impressive but is surprisingly fuss-free. It’s perfect for busy days, warm weather, or whenever you crave something sweet without the hassle of baking.
So, if you’re looking for a simple yet show-stopping dessert that requires no baking, look no further. These No Bake Coconut Chocolate Bars are calling your name. Gather your ingredients, and let’s make some magic happen in your kitchen!
Cooking Time & Prep Time
- Prep Time: 25 minutes
- Chill Time: 2-3 hours
- Total Time: 2 hours 25 minutes – 3 hours 25 minutes
Small tip: The chill time is crucial for these bars to set properly, so don’t rush it! Plan accordingly for the best results.
Ingredients
This recipe makes approximately 12-16 delicious bars.
For the Coconut Base:
- 2 cups (about 180g) desiccated coconut (unsweetened or sweetened, depending on preference)
- 1 ½ cups (about 150g) graham cracker crumbs (or digestive biscuit crumbs)
- ½ cup (about 100g) granulated sugar
- ½ cup (1 stick or 113g) unsalted butter, melted
- 1 teaspoon vanilla extract
- ¼ teaspoon salt
For the Chocolate Topping:
- 1 ½ cups (about 250g) semi-sweet chocolate chips or chopped dark chocolate
- ½ cup (120ml) heavy cream (or full-fat coconut milk for a dairy-free option)
- 1 tablespoon unsalted butter (optional, for extra shine and smoothness)
- Pinch of salt
Step-by-Step Instructions
-
Step 1: Prepare Your Pan
Line an 8×8 inch (20×20 cm) square baking pan with parchment paper, leaving an overhang on two sides. This overhang will act as “handles” to easily lift the bars out later. Lightly grease the pan before adding the parchment for extra security.
Small tip: Ensure the parchment paper is smooth against the bottom and sides of the pan for a neat finish.
-
Step 2: Combine Dry Base Ingredients
In a large mixing bowl, combine the desiccated coconut, graham cracker crumbs, granulated sugar, and salt. Whisk them together thoroughly until all ingredients are evenly distributed. This ensures every bite of your bar will have balanced flavor.
Small tip: If your graham cracker crumbs are not fine enough, you can quickly pulse them in a food processor.
-
Step 3: Add Wet Base Ingredients
Pour the melted butter and vanilla extract into the dry mixture. Stir well with a spoon or spatula until everything is fully combined and the mixture is moist and clumpy. It should resemble wet sand and hold together when pressed.
Small tip: Make sure your melted butter isn’t too hot, or it might cook the coconut slightly. Let it cool for a minute or two after melting.
-
Step 4: Press the Base into the Pan
Transfer the coconut mixture into your prepared baking pan. Using the back of a spoon, a flat-bottomed glass, or your hands, firmly press the mixture down into an even layer. Make sure it’s packed tightly and evenly across the bottom of the pan.
Small tip: Pressing firmly is key to a stable base that won’t crumble when cut. Don’t be shy with your pressure!
-
Step 5: Chill the Coconut Base
Place the pan with the pressed coconut base into the refrigerator. Let it chill for at least 30 minutes to an hour. This step allows the butter to solidify and sets the base, making it firm enough to hold the chocolate topping.
Small tip: While the base is chilling, you can start preparing your chocolate topping ingredients to save time.
-
Step 6: Prepare the Chocolate Topping
In a microwave-safe bowl or a heatproof bowl set over a saucepan of simmering water (double boiler method), combine the chocolate chips, heavy cream, optional butter, and a pinch of salt. Heat gently, stirring occasionally, until the chocolate is fully melted and the mixture is smooth and glossy. Remove from heat once melted.
Small tip: Do not overheat the chocolate, as it can seize. Melt slowly and gently for the best consistency.
-
Step 7: Pour the Chocolate Topping
Remove the chilled coconut base from the refrigerator. Pour the warm, melted chocolate topping evenly over the coconut layer. Use an offset spatula or the back of a spoon to spread it smoothly to the edges of the pan, creating a beautiful, uniform chocolate layer.
Small tip: Work relatively quickly while the chocolate is still warm and pourable.
-
Step 8: Chill the Bars Completely
Return the pan to the refrigerator and chill for at least 2-3 hours, or until the chocolate topping is completely set and firm to the touch. For best results, an overnight chill is even better. This ensures clean cuts and perfectly firm bars.
Small tip: If you’re in a hurry, you can place the bars in the freezer for about 30-45 minutes to speed up the setting process.
-
Step 9: Cut and Serve
Once fully chilled, use the parchment paper overhang to lift the entire slab of bars out of the pan. Place it on a cutting board. Using a sharp knife, cut the slab into 12-16 squares or rectangles, wiping the knife clean between cuts for neat edges. Serve immediately and enjoy!
Small tip: For super clean cuts, run your knife under hot water and wipe it dry before each slice.
Tips & Variations
- Gluten-Free Option: Easily make these bars gluten-free by substituting the graham cracker crumbs with gluten-free graham cracker crumbs or finely ground oat flour. Ensure your oats are certified gluten-free if needed.
- Vegan/Dairy-Free Option: For a completely vegan treat, use full-fat coconut milk (canned, not from a carton) instead of heavy cream for the chocolate topping, and swap the unsalted butter for refined coconut oil in both the base and topping. Use vegan chocolate chips.
- Boosted Nutrition: For an extra nutritional punch, consider adding 2-3 tablespoons of chia seeds or ground flax seeds to the coconut base mixture. You can also mix in a scoop of your favorite plant-based protein powder for added protein.
- Spicy Chocolate Kick: If you love a little heat, add a tiny pinch (⅛ teaspoon) of cayenne pepper or chili powder to your chocolate topping mixture. It enhances the chocolate flavor and provides an exciting, subtle warmth.
- Flavor Variations: Experiment with different extracts! Add a splash of almond extract to the coconut base for a marzipan-like flavor, or a few drops of peppermint extract to the chocolate for a refreshing twist. A sprinkle of toasted coconut flakes or sea salt on top of the unset chocolate layer also adds extra flavor and texture.
Nutritional Information
Approximate values per serving (based on 16 servings):
- Calories: 280-310 kcal
- Protein: 3-4 g
- Carbohydrates: 28-32 g
- Fat: 18-22 g
Note: These values are approximate and can vary based on specific ingredients used (e.g., sweetened vs. unsweetened coconut, type of chocolate, etc.).
Health Benefits
While these are indeed a delightful dessert, some of the main ingredients offer surprising health benefits:
Coconut: Desiccated coconut provides dietary fiber, which is important for digestive health. It also contains medium-chain triglycerides (MCTs), a type of fat that can be quickly metabolized by the body for energy. Coconut is a good source of minerals like manganese, copper, and iron, which support various bodily functions.
Dark Chocolate: Opting for semi-sweet or dark chocolate (with a higher cocoa content) brings a wealth of antioxidants, particularly flavonoids. These compounds can help protect your cells from damage and may contribute to heart health. Dark chocolate also contains important minerals such as magnesium, iron, and zinc.
Homemade Advantage: By making these bars at home, you have complete control over the quality of ingredients and the amount of sugar. You can choose high-quality chocolate and adjust the sweetness to your preference, making it a more mindful treat compared to store-bought options.
Enjoying these bars in moderation allows you to savor the delicious flavors while potentially benefiting from the nutrients packed into coconut and chocolate.
Serving Suggestions
- Coffee or Tea Companion: These bars are the perfect accompaniment to your morning coffee, afternoon tea, or as a sweet treat after dinner.


