
Introduction
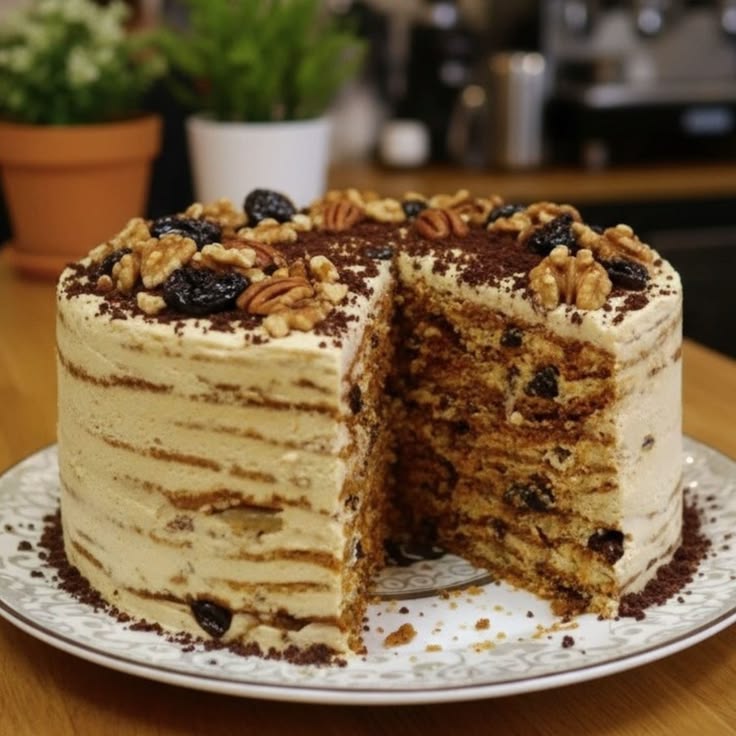
Get ready to discover a truly magical dessert: Layered Honey Cake, also known as Medovik! This stunning cake features many thin, tender cake layers infused with golden honey. Each layer is generously spread with a luscious, tangy sour cream frosting. The result is a cake that is incredibly moist, rich, and melts in your mouth with every single bite. It’s a showstopper that tastes even better than it looks.
You might think a layered cake is complicated, but this recipe is surprisingly straightforward. The beauty of the Layered Honey Cake is in its simplicity. Each step is easy to follow, and the ingredients are common pantry staples. While it requires a bit of patience for chilling, the hands-on time is very manageable. It’s a labor of love that rewards you with an unforgettable dessert.
So, why not treat yourself and your loved ones to something truly special? This Layered Honey Cake is perfect for celebrations, holidays, or just a cozy weekend treat. Follow along, and you’ll create a dessert that will earn you rave reviews. Let’s bake something wonderful!
Cooking Time & Prep Time
- Prep Time: 60 minutes
- Cooking Time: 35 minutes
- Total Time: 95 minutes (plus at least 8 hours chilling time)
Small tip: The chilling time is crucial for the cake layers to soften and for the flavors to fully meld. Do not rush this step!
Ingredients
This recipe makes 10-12 generous servings.
For the Honey Cake Layers:
- 3 cups (360g) all-purpose flour, plus more for dusting
- 1 cup (200g) granulated sugar
- 1/2 cup (113g) unsalted butter
- 1/2 cup (120ml) honey
- 2 large eggs
- 1 teaspoon baking soda
- 1/2 teaspoon salt
For the Sour Cream Frosting:
- 4 cups (960g) full-fat sour cream (at least 20% fat)
- 1 1/2 cups (180g) powdered sugar (confectioners’ sugar)
- 2 teaspoons vanilla extract
For Garnish:
- Reserved cake crumbs (from trimming layers)
Step-by-Step Instructions
-
Step 1: Prepare the Honey Dough Base
In a heatproof bowl set over a saucepan of simmering water (a double boiler), combine the granulated sugar, unsalted butter, and honey. Stir occasionally until the butter is melted and the sugar is mostly dissolved. This should take about 5-7 minutes.
Small tip: Ensure the bottom of the bowl does not touch the simmering water to prevent scorching.
-
Step 2: Add Eggs and Baking Soda
Remove the bowl from the heat. Whisk the eggs lightly in a separate small bowl, then gradually whisk them into the warm honey mixture. Stir in the baking soda and salt. The mixture will foam up and lighten in color, which is exactly what you want.
Small tip: Adding eggs slowly prevents them from scrambling due to the heat.
-
Step 3: Form the Dough
Gradually add the flour to the honey mixture, about a cup at a time, stirring until a soft, shaggy dough forms. Once it’s too thick to stir, turn it out onto a lightly floured surface. Knead briefly, just until it comes together into a smooth ball. Do not over-knead.
Small tip: The dough will be slightly sticky but manageable. Use minimal extra flour.
-
Step 4: Chill the Dough
Divide the dough into 8 equal pieces. Shape each piece into a small disc, wrap them individually in plastic wrap, and refrigerate for at least 30 minutes. Chilling makes the dough much easier to roll out.
Small tip: If you’re short on fridge space, you can stack the wrapped discs between parchment paper.
-
Step 5: Roll and Bake Cake Layers
Preheat your oven to 350°F (175°C). Line two baking sheets with parchment paper. On a lightly floured surface, roll out one dough disc very thinly, about 8-9 inches in diameter. Use an 8-inch plate or cake pan as a guide to cut out a perfect circle. Place the circle and the trimmings on a prepared baking sheet.
Small tip: Roll the dough directly on parchment paper for easy transfer to the baking sheet.
-
Step 6: Continue Baking Layers
Bake each cake layer for 5-7 minutes, or until golden brown and slightly firm to the touch. They bake very quickly! Remove from the oven and transfer the baked layer to a wire rack to cool completely. Repeat with the remaining dough discs, collecting all the trimmings. Once cooled, crush the trimmings into fine crumbs for garnish.
Small tip: Keep an eye on the layers, as oven temperatures can vary and they can burn quickly due to the honey.
-
Step 7: Prepare the Sour Cream Frosting
In a large bowl, combine the full-fat sour cream, powdered sugar, and vanilla extract. Whisk until smooth, light, and fluffy. Do not overmix, as sour cream can thin out if beaten too vigorously.
Small tip: For best results, ensure your sour cream is very cold before mixing.
-
Step 8: Assemble the Cake
Place one cooled cake layer on your serving plate or cake stand. Spread about 1/4 cup of the sour cream frosting evenly over the top, almost to the edges. Repeat with the remaining cake layers, stacking them neatly. You should have about 8 layers.
Small tip: A small offset spatula works wonders for spreading the frosting smoothly.
-
Step 9: Crumb Coat and Final Frosting
Once all layers are stacked, use the remaining frosting to generously cover the top and sides of the cake. Aim for a smooth, even coating. This also acts as a crumb coat, sealing in any loose crumbs.
Small tip: Don’t worry too much about perfection at this stage; the crumbs will cover any imperfections.
-
Step 10: Garnish and Chill
Press the reserved, crushed cake crumbs onto the sides and top of the cake. Gently pat them on to ensure they stick. Cover the cake loosely with plastic wrap and refrigerate for at least 8 hours, or preferably overnight. This allows the cake layers to soften and absorb the frosting, creating that signature moist texture.
Small tip: Chilling overnight makes a significant difference in taste and texture, so plan ahead!
Tips & Variations
- Gluten-Free Option: Substitute the all-purpose flour with a 1:1 gluten-free baking flour blend. Ensure your blend contains xanthan gum for best texture.
- Dairy-Free/Vegan Option: Use a high-quality vegan butter substitute, flax eggs (1 tbsp ground flaxseed + 3 tbsp water per egg), and a thick, full-fat vegan sour cream alternative or coconut cream for the frosting.
- Enhanced Flavor/Texture: Add 1/2 teaspoon of ground cinnamon or a pinch of ground ginger to the cake dough for a warm spice note. You can also sprinkle finely chopped toasted walnuts or pecans between a few layers for added crunch.
- Citrus Zest Variation: For a brighter flavor, add the zest of one orange or lemon to the sour cream frosting. This complements the honey beautifully and adds a lovely freshness.
- Coffee Infusion: Dissolve 1-2 teaspoons of instant coffee or espresso powder in a tablespoon of hot water, let it cool, and then mix it into the sour cream frosting for a delicious coffee-honey combination.
Nutritional Information
Approximate values per serving (based on 12 servings):
- Calories: 450-500 kcal
- Protein: 7-9 g
- Carbohydrates: 60-70 g
- Fat: 20-25 g
Note: These values are approximate and may vary depending on the specific brands and quantities of ingredients used.
Health Benefits
While Layered Honey Cake is a delightful treat, some of its key ingredients offer beneficial properties.
Honey: This natural sweetener is more than just sugar. It contains antioxidants, which help protect your body from cell damage. Honey also has natural antibacterial and anti-inflammatory properties, making it a wonderful ingredient to include in moderation.
Eggs: A fantastic source of high-quality protein, eggs provide all nine essential amino acids. They are also rich in vitamins like B12 and D, and minerals such as selenium and choline, which is important for brain health and metabolism.
Sour Cream (Full-Fat): When consumed in moderation, full-fat dairy products like sour cream can provide fat-soluble vitamins such as A, D, E, and K2. Some sour cream varieties also contain beneficial probiotics, which support gut health.
Flour: As a primary source of carbohydrates, flour provides essential energy for your body’s functions. While refined flour has fewer nutrients, it still serves as a fuel source.
Serving Suggestions
- Serve a slice of this beautiful cake with a hot cup of tea or freshly brewed coffee for a perfect afternoon treat.
- Elevate the dessert experience by serving it alongside fresh berries like raspberries or blueberries, or a light dollop of unsweetened whipped cream.
- This cake is substantial enough to be the star of any dessert table. It’s ideal for birthdays, holidays, or any special gathering where you want to impress.
Storage Tips
This Layered Honey Cake keeps wonderfully in the refrigerator. Store it in an airtight container or covered loosely with plastic wrap for up to 3-5 days. The flavors actually deepen and the layers become even more tender over time. While the assembled cake can be frozen for up to 1 month, it’s best to freeze the individual un-frosted cake layers wrapped tightly


