
Introduction
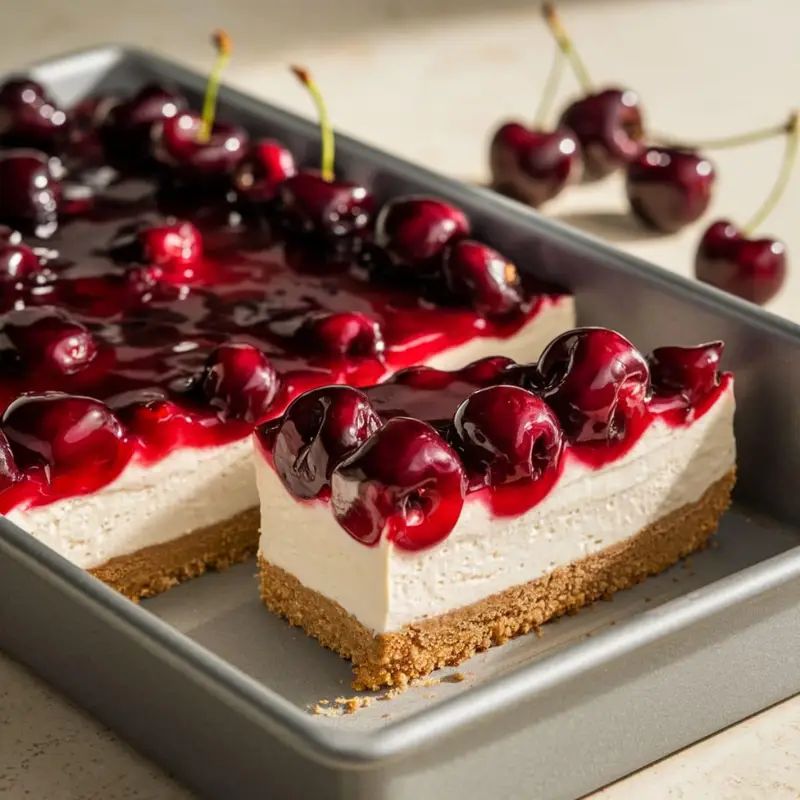
Get ready to discover your new favorite dessert: No Bake Cherry Cheesecake! This delightful treat is a true showstopper, combining a buttery graham cracker crust with a rich, creamy, and tangy cheesecake filling, all crowned with a vibrant, sweet cherry topping. It’s an explosion of flavors and textures that will have everyone asking for seconds, making it perfect for any gathering or just a special weeknight indulgence.
The best part? You don’t even need to turn on your oven! This recipe is incredibly simple and quick to assemble, making it ideal for busy days or when you want a delicious dessert without all the fuss. With just a few basic ingredients and minimal effort, you can create a dessert that tastes like it came from a fancy bakery.
So, whether you’re a seasoned baker or a complete beginner, this No Bake Cherry Cheesecake recipe is for you. It’s foolproof, fun to make, and utterly delicious. Let’s dive in and create some sweet magic together!
Cooking Time & Prep Time
- Prep Time: 30 minutes
- Cooking Time: 0 minutes
- Total Time: 30 minutes (plus a minimum of 4-6 hours chilling time)
Small tip: The chilling time is crucial for the cheesecake to set properly. Don’t rush this step if you want perfectly firm slices!
Ingredients
This recipe makes 8-10 generous servings.
For the Crust
- 1 ½ cups (about 10-12 full sheets) graham cracker crumbs
- ¼ cup granulated sugar
- ½ cup (1 stick) unsalted butter, melted
For the Filling
- 2 (8-ounce) packages full-fat cream cheese, softened
- 1 cup powdered sugar, sifted
- 1 teaspoon pure vanilla extract
- 1 tablespoon fresh lemon juice
- 1 ½ cups heavy cream, very cold
For the Topping
- 1 (21-ounce) can cherry pie filling
Step-by-Step Instructions
-
Step 1: Prepare the Crust
Start by crushing your graham crackers. You can do this by placing them in a Ziploc bag and crushing them with a rolling pin, or by using a food processor. In a medium bowl, combine the graham cracker crumbs with the granulated sugar.
Small tip: A food processor makes quick work of crushing crackers and ensures a fine, even crumb.
-
Step 2: Mix and Press the Crust
Pour the melted butter over the graham cracker mixture. Stir well until all the crumbs are moistened and resemble wet sand. Press this mixture firmly into the bottom of a 9-inch pie plate or springform pan.
Small tip: Use the bottom of a flat glass or measuring cup to evenly and firmly press the crust into the pan. This helps it set beautifully.
-
Step 3: Chill the Crust
Place the crust in the refrigerator while you prepare the filling. This helps it firm up and prevents it from crumbling when you add the filling.
-
Step 4: Make the Cream Cheese Base
In a large mixing bowl, beat the softened cream cheese with an electric mixer on medium speed until it’s smooth and creamy. Gradually add the sifted powdered sugar, beating until fully incorporated and lump-free.
Small tip: Ensure your cream cheese is truly at room temperature. This prevents lumps and makes for a smoother filling.
-
Step 5: Add Flavorings to the Filling
Stir in the vanilla extract and fresh lemon juice into the cream cheese mixture. Mix until just combined. The lemon juice adds a lovely subtle tang that balances the sweetness.
-
Step 6: Whip the Heavy Cream
In a separate, very cold bowl (preferably a metal one that has been chilled), whip the cold heavy cream with an electric mixer on high speed until stiff peaks form. Be careful not to overbeat, or it will turn grainy.
Small tip: Chilling your mixing bowl and beaters for 10-15 minutes before whipping cream helps it whip faster and achieve better volume.
-
Step 7: Combine the Filling
Gently fold the whipped cream into the cream cheese mixture using a spatula. Do this in two additions to maintain the airiness of the whipped cream. Mix until just combined and no streaks of cream cheese or whipped cream remain.
-
Step 8: Assemble and Chill
Pour the creamy cheesecake filling over the chilled graham cracker crust. Spread it evenly with a spatula. Cover the cheesecake loosely with plastic wrap and refrigerate for at least 4-6 hours, or ideally overnight, until it is completely set.
Small tip: An overnight chill truly makes a difference in the texture and stability of your cheesecake. Patience is key!
-
Step 9: Add Topping and Serve
Just before serving, spoon the cherry pie filling evenly over the top of the chilled cheesecake. You can spread it out or leave it in a delightful mound. Slice and serve your beautiful No Bake Cherry Cheesecake!
Tips & Variations
- Gluten-Free Option: Easily make this dessert gluten-free by using gluten-free graham crackers for the crust. The rest of the ingredients are naturally gluten-free.
- Vegan or Vegetarian Option: For a vegan version, substitute dairy cream cheese with a good quality vegan cream cheese, use plant-based butter, and replace heavy cream with full-fat coconut cream (chilled overnight, use the thick cream from the top).
- More Fruit & Fiber: For added freshness and fiber, gently fold fresh mixed berries (like raspberries or blueberries) into the cherry pie filling just before serving, or scatter them around the base of each slice.
- Different Flavor Profile: Get creative with your toppings! Swap the cherry pie filling for blueberry, strawberry, or even a lemon curd. You can also add a teaspoon of lemon zest to the cream cheese filling for an extra citrusy kick.
- Spiced Delight: For a warmer, cozier flavor, add a pinch of cinnamon or nutmeg to your graham cracker crust mixture. This adds a subtle, aromatic depth that pairs wonderfully with the creamy filling.
Nutritional Information
Approximate values per serving (based on 8 servings):
- Calories: 550 kcal
- Protein: 7g
- Carbohydrates: 60g
- Fat: 35g
Note: These values are approximate and may vary depending on the specific brands and exact quantities of ingredients used.
Health Benefits
While this is a decadent dessert, some of its components offer surprising benefits:
- Cherries: The star of our topping, cherries are packed with antioxidants, particularly anthocyanins, which give them their vibrant red color. These compounds are known for their anti-inflammatory properties and may help with muscle recovery and sleep regulation. They also provide a good dose of Vitamin C and fiber.
- Cream Cheese: As a dairy product, cream cheese contributes calcium, which is essential for strong bones and teeth. It also provides some protein and Vitamin A, important for vision and immune function.
- Graham Crackers: Many graham cracker brands are made with whole wheat flour, offering some dietary fiber. Fiber is crucial for digestive health, helping to regulate bowel movements and contribute to a feeling of fullness.
- Overall Enjoyment: Sometimes the best health benefit comes from the sheer joy and satisfaction a delicious treat brings. Enjoying a dessert like this in moderation can be a wonderful way to boost mood and create happy memories!
Serving Suggestions
- Serve each slice with an extra dollop of freshly whipped cream for an even more luxurious experience.
- Garnish with a few fresh mint leaves or chocolate shavings to elevate the presentation.
- For a delightful contrast, serve alongside a small scoop of vanilla bean ice cream.
- This cheesecake is perfect as the grand finale to any meal, from a casual family dinner to a festive holiday gathering.
Storage Tips
Your No Bake Cherry Cheesecake will keep beautifully in the refrigerator, covered loosely with plastic wrap, for up to 3-5 days. It can also be frozen for longer storage; wrap individual slices tightly in plastic wrap, then in foil, and store in an airtight container for up to 1 month. To enjoy from frozen, simply thaw in the refrigerator for several hours or overnight. No reheating is necessary, as this cheesecake is meant to be served chilled.
Conclusion
There you have it – a truly irresistible No Bake Cherry Cheesecake that’s as easy to make as it is delicious to eat! This dessert proves that you don’t need complicated steps or an oven to create something truly spectacular. Its creamy texture, sweet-tart cherry topping, and crunchy crust make it a crowd-pleaser every single time.
We hope you feel inspired to whip up this fantastic recipe in your own kitchen. It’s a wonderful way to treat yourself, your family, or your friends to something special without all the stress. Plus, the compliments you’ll receive will be well worth the minimal effort!
So go ahead, gather your ingredients, and get ready to create some sweet memories. This No Bake Cherry Cheesecake is waiting to become your new go-to dessert. Happy no-baking!


