
Introduction
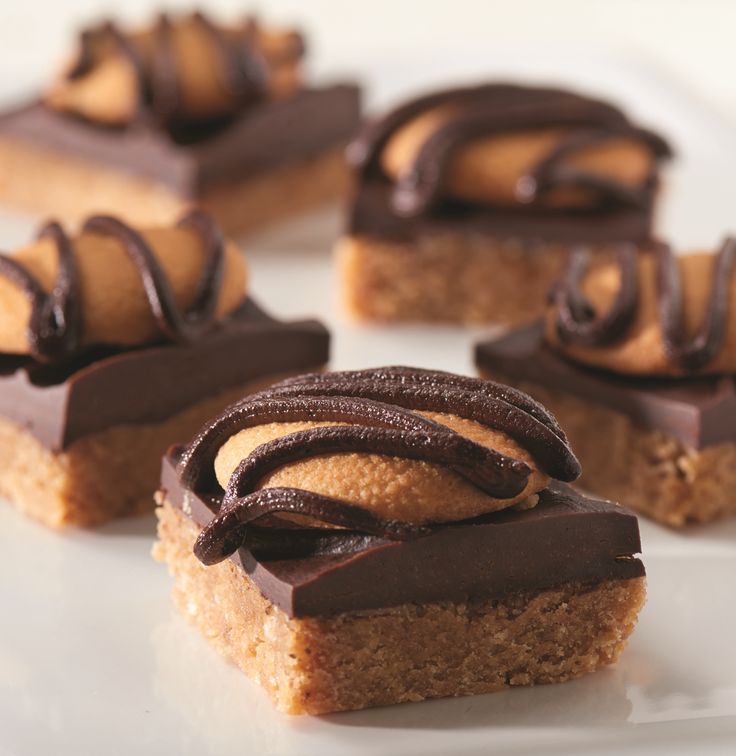
Get ready to discover your new favorite no-bake treat! These No Bake Banana Peanut Butter Dessert Squares are an absolute dream come true. Imagine a buttery graham cracker crust, topped with a luscious, creamy peanut butter filling, and generously layered with fresh banana slices. Every bite is a perfect harmony of sweet, salty, and incredibly satisfying flavors that will have you coming back for more.
What makes this dessert truly special is just how incredibly simple it is to whip up. There’s no oven required, no complicated techniques, and minimal cleanup. It’s the perfect recipe for those busy days when you crave something decadent but don’t have hours to spend in the kitchen. Just a few everyday ingredients and a little chill time transform into a show-stopping dessert that tastes like it came from a fancy bakery.
So, whether you’re looking for an easy weeknight dessert, a crowd-pleasing potluck contribution, or just a delightful treat for yourself, these squares are the answer. Dive in and experience the magic of banana and peanut butter coming together in this unbelievably delicious, stress-free dessert. You’ll be so glad you did!
Cooking Time & Prep Time
- Prep Time: 25 minutes
- Chilling Time: 4 hours (minimum)
- Total Time: 4 hours 25 minutes
Small tip: The chilling time is crucial for the squares to set properly, so plan ahead! Making them the night before is a great idea.
Ingredients
This recipe makes approximately 9 generous servings.
For the Crust:
- 1 ½ cups (about 10-12 full sheets) graham cracker crumbs
- ¼ cup granulated sugar
- ½ cup unsalted butter, melted
For the Creamy Peanut Butter Filling:
- 8 ounces (1 block) cream cheese, softened
- 1 cup powdered sugar
- 1 teaspoon pure vanilla extract
- 1 cup creamy peanut butter (smooth, not crunchy)
- 1 cup heavy cream, cold
For the Banana Layer & Topping:
- 2-3 ripe but firm bananas, sliced into ¼-inch rounds
- ¼ cup mini chocolate chips or chopped roasted peanuts (optional, for garnish)
Step-by-Step Instructions
-
Prepare the Baking Pan
Line an 8×8 inch square baking pan with parchment paper, leaving an overhang on two sides. This will make it super easy to lift the entire dessert out later. A light spray with cooking oil under the parchment can help it stick.
-
Make the Graham Cracker Crust
In a medium bowl, combine the graham cracker crumbs and granulated sugar. Pour in the melted butter and mix well until all the crumbs are moistened. It should resemble wet sand.
Small tip: You can crush graham crackers in a food processor or by placing them in a Ziploc bag and crushing with a rolling pin.
-
Press the Crust into the Pan
Pour the crumb mixture into the prepared baking pan. Use the back of a spoon or the bottom of a flat-bottomed glass to press the crust firmly and evenly into the bottom of the pan. Make sure it’s packed tightly. Place the pan in the refrigerator to chill while you prepare the filling.
-
Beat the Cream Cheese Mixture
In a large mixing bowl, using an electric mixer, beat the softened cream cheese until it’s smooth and creamy. Add the powdered sugar and vanilla extract, beating until fully combined and no lumps remain. Scrape down the sides of the bowl as needed.
-
Incorporate the Peanut Butter
Add the creamy peanut butter to the cream cheese mixture. Beat on medium speed until the peanut butter is fully incorporated and the mixture is light and fluffy. This will be the base for our delicious filling.
-
Whip the Heavy Cream
In a separate, clean, cold bowl, pour the cold heavy cream. Using an electric mixer (with clean beaters), whip the cream on high speed until stiff peaks form. Be careful not to over-whip, or it can turn grainy. Stiff peaks mean the cream holds its shape when you lift the beaters.
Small tip: Chilling your mixing bowl and beaters for 10-15 minutes before whipping cream can help it whip faster and achieve stiffer peaks.
-
Gently Fold the Whipped Cream
Add about one-third of the whipped cream to the peanut butter mixture and gently fold it in with a spatula to lighten the base. Then, add the remaining whipped cream and fold it in until just combined. Be gentle to keep the filling light and airy. Do not overmix.
-
Assemble the Layers
Retrieve the chilled crust from the refrigerator. Evenly spread about half of the peanut butter filling over the crust. Arrange a single layer of sliced bananas over the filling. Then, gently spread the remaining peanut butter filling over the bananas, creating a smooth top layer.
Small tip: To prevent bananas from browning too quickly, you can toss them lightly in a tiny amount of lemon juice, but this is usually not necessary if serving within a day or two.
-
Chill to Set Firmly
Cover the pan loosely with plastic wrap. Place the dessert squares in the refrigerator and chill for at least 4 hours, or preferably overnight. This chilling time is essential for the filling to firm up and for the flavors to meld beautifully.
-
Slice and Serve
Once thoroughly chilled, use the parchment paper overhangs to carefully lift the entire dessert out of the pan and onto a cutting board. Slice into 9 even squares. Garnish with mini chocolate chips or chopped peanuts, if desired, just before serving. Enjoy your delicious creation!
Tips & Variations
- Gluten-Free Option: Easily make this recipe gluten-free by using gluten-free graham crackers for the crust. Alternatively, you can make a nut-based crust using finely ground almond flour or pecans mixed with melted butter and a touch of sweetener.
- Vegan Option: To make this dessert vegan, substitute dairy cream cheese with a plant-based cream cheese alternative, use a vegan butter substitute for the crust, and swap heavy cream for a plant-based whipping cream (like coconut cream, chilled overnight, with the solid part scooped out and whipped). Ensure your peanut butter is also vegan.
- Boost Protein or Fiber: For an extra health kick, you can stir 1-2 tablespoons of chia seeds or ground flax seeds into the peanut butter filling. You could also experiment with adding a scoop of unflavored or vanilla protein powder to the filling, though this might slightly alter the texture.
- Spicy Kick: For an adventurous twist, add a tiny pinch (⅛ teaspoon) of cayenne pepper or a small amount of finely chopped candied ginger to the peanut butter filling. The heat provides a surprising and delicious contrast to the sweet and creamy flavors.
- Flavor Variations: Experiment with different nut butters like almond butter or cashew butter. You can also add a layer of chocolate ganache on top, sprinkle with shredded coconut, or drizzle with caramel sauce before serving for extra indulgence.
Nutritional Information
Approximate values per serving (based on 9 servings):
- Calories: 420-480 kcal
- Protein: 10-14g
- Carbohydrates: 40-50g
- Fat: 25-35g
Please note: These values are approximate and may vary depending on the specific brands and exact quantities of ingredients used.
Health Benefits
These No Bake Banana Peanut Butter Dessert Squares offer more than just deliciousness; they bring some great health benefits too!
Bananas: Our star fruit is packed with potassium, essential for heart health and blood pressure regulation. They also provide dietary fiber, aiding digestion, and are a good source of Vitamin B6 and Vitamin C, which support immune function and skin health.
Peanut Butter: A fantastic source of plant-based protein, peanut butter helps keep you feeling full and satisfied. It also provides healthy monounsaturated and polyunsaturated fats, which are beneficial for heart health. Plus, it contains magnesium, phosphorus, zinc, and Vitamin E, all crucial for various bodily functions.
Whole Grains (Graham Crackers): While these squares are a treat, using whole grain graham crackers for the crust can add a small boost of dietary fiber. Fiber is important for digestive health and can help regulate blood sugar levels.
When enjoyed in moderation, this dessert provides energy, satiety, and a delightful way to incorporate nutrient-rich ingredients into your diet.
Serving Suggestions
- Serve these squares chilled, straight from the refrigerator, for the best texture and flavor.
- They are perfect as a satisfying dessert after any meal, or as an afternoon pick-me-up with a cup of coffee or tea.
- These squares are a fantastic option for potlucks, picnics, or backyard BBQs because they don’t require an oven and transport well.
- For an extra touch, dust with a little cocoa powder or a sprinkle of flaky sea salt just before serving to enhance the flavors.
Storage Tips
Store any leftover No Bake Banana Peanut Butter Dessert Squares in an airtight container in the refrigerator for up to 3-4 days. The bananas may brown slightly over time, but the flavor will still be delicious. While the squares can be frozen, the texture of the bananas might become a bit mushy upon thawing. If you choose to freeze, wrap individual squares tightly in plastic wrap and then foil, and store in a freezer-safe bag for up to 1 month. Thaw in the refrigerator overnight before serving. Reheating is not recommended for this dessert.
Conclusion
There you have it – a truly irresistible and incredibly simple recipe for No Bake Banana Peanut Butter Dessert Squares! This dessert proves that you don’t need a lot of fuss or complicated steps to create something truly spectacular. The combination of the crisp crust, the velvety peanut butter filling, and the fresh bananas is a match made in dessert heaven.
We hope you’re inspired to give these squares a try. They’re quick


