
Introduction
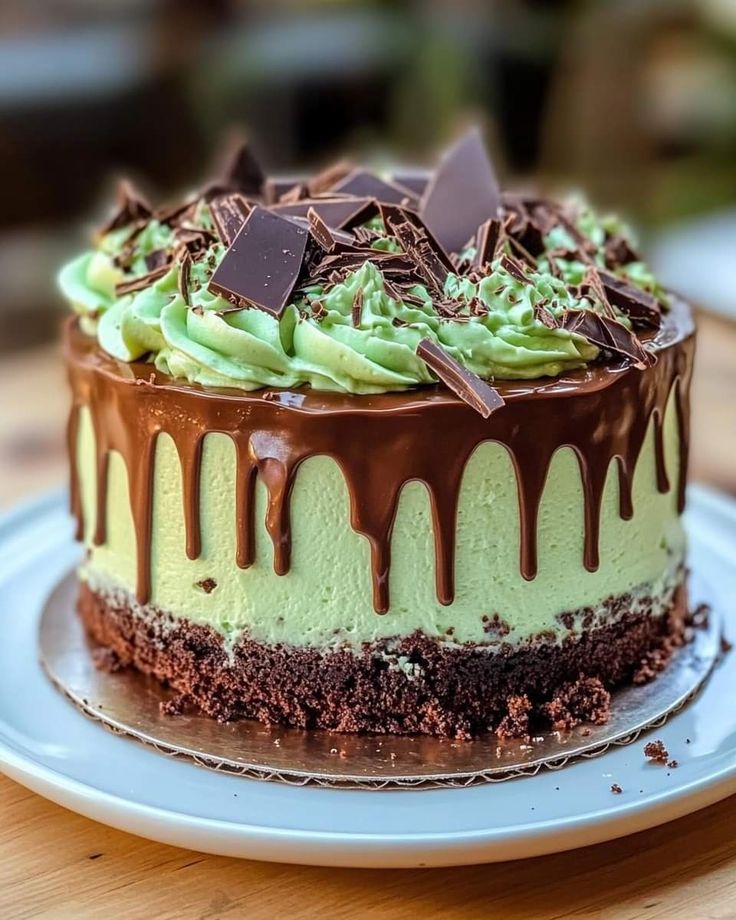
Get ready for a dessert that will truly dazzle your taste buds! Our Mint Chocolate Cheesecake is a dreamy combination of refreshing mint, rich dark chocolate, and a silky-smooth cream cheese filling. It’s a showstopper that tastes like a gourmet treat from your favorite bakery, but it’s made right in your own kitchen.
You might think cheesecake is complicated, but this recipe makes it simple and enjoyable. We’ve broken down every step to ensure your success, even if you’re new to baking. With clear instructions and helpful tips, you’ll find yourself whipping up this delightful dessert with confidence and ease.
So, why wait? Gather your ingredients and prepare to impress yourself and everyone you share it with. This Mint Chocolate Cheesecake is more than just a dessert; it’s an experience. Let’s get baking!
Cooking Time & Prep Time
- Prep Time: 40 minutes
- Cooking Time: 60 minutes
- Chilling Time: 4 hours (minimum)
- Total Time: Approximately 5 hours (including chilling)
Small tip: The chilling time is crucial for the cheesecake to set properly and achieve its perfect texture, so don’t rush this step!
Ingredients
This recipe makes 10-12 servings.
For the Oreo Cookie Crust:
- 1 ½ cups (about 18-20 whole) Oreo cookies, finely crushed (about 180g)
- ¼ cup (56g) unsalted butter, melted
For the Mint Chocolate Cheesecake Filling:
- 24 oz (680g) cream cheese, softened
- 1 cup (200g) granulated sugar
- 3 large eggs
- 1 teaspoon pure vanilla extract
- ½ teaspoon pure peppermint extract (start with less if sensitive to mint)
- 2-3 drops green food coloring (optional, for vibrant color)
- ¼ cup (60ml) heavy cream
- ½ cup (85g) semi-sweet chocolate chips, finely chopped or mini chips
For the Chocolate Ganache Topping:
- ½ cup (85g) semi-sweet chocolate chips
- ½ cup (120ml) heavy cream
For Garnish (Optional):
- Whipped cream
- Fresh mint leaves
- Additional chocolate shavings or mini chocolate chips
Step-by-Step Instructions
-
Step 1: Prepare the Crust
Preheat your oven to 325°F (160°C). Lightly grease a 9-inch springform pan. In a medium bowl, combine the finely crushed Oreo cookies and melted butter. Mix until the crumbs are evenly moistened. Press the mixture firmly into the bottom of the prepared springform pan. You can use the bottom of a glass to help create an even layer.
Small tip: Make sure your Oreo crumbs are very fine for a solid crust. A food processor works wonders for this!
-
Step 2: Bake the Crust
Bake the crust for 8-10 minutes. This helps to set it and prevent it from becoming soggy. Remove from the oven and let it cool completely while you prepare the filling. Keep the oven on for the cheesecake.
Small tip: Cooling the crust prevents the cheesecake filling from melting the butter and making the crust greasy.
-
Step 3: Prepare the Cheesecake Filling Base
In a large mixing bowl, using an electric mixer, beat the softened cream cheese on medium speed until smooth and creamy, about 2-3 minutes. Gradually add the granulated sugar, beating until just combined and no lumps remain. Don’t overmix at this stage.
Small tip: Ensure your cream cheese is truly at room temperature. This is key for a smooth, lump-free cheesecake.
-
Step 4: Add Eggs and Flavorings
Add the eggs one at a time, beating on low speed after each addition just until incorporated. Overmixing eggs can add too much air, which can cause cracks in your cheesecake. Stir in the vanilla extract, peppermint extract, and green food coloring (if using). Mix until the color is evenly distributed.
Small tip: For a subtle mint flavor, start with ½ teaspoon peppermint extract. You can always add another drop or two if you prefer a stronger mint.
-
Step 5: Incorporate Heavy Cream and Chocolate Chips
Gently fold in the heavy cream until just combined. Then, carefully fold in the finely chopped semi-sweet chocolate chips. Pour the cheesecake filling over the cooled Oreo crust in the springform pan. Gently tap the pan on the counter a few times to release any air bubbles.
Small tip: Use mini chocolate chips or finely chop regular ones so they distribute evenly and don’t sink to the bottom.
-
Step 6: Bake the Cheesecake
Place the springform pan on a baking sheet to catch any potential drips. Bake for 50-60 minutes, or until the edges are set but the center still has a slight jiggle (about 2-3 inches). Turn off the oven, crack the door open slightly, and let the cheesecake cool in the oven for 1 hour. This slow cooling helps prevent cracking.
Small tip: A water bath can also help prevent cracks, but slow cooling in the oven is often sufficient and less fuss.
-
Step 7: Chill the Cheesecake
Remove the cheesecake from the oven and let it cool completely on a wire rack at room temperature. Once cool, cover it loosely with plastic wrap and refrigerate for at least 4 hours, or preferably overnight. Chilling is essential for the cheesecake to firm up and for the flavors to meld.
Small tip: Don’t try to remove the cheesecake from the pan until it’s fully chilled, or it might lose its shape.
-
Step 8: Prepare the Chocolate Ganache Topping
Once the cheesecake is chilled, prepare the ganache. In a small microwave-safe bowl, combine the chocolate chips and heavy cream. Microwave on high for 30-45 seconds, then let sit for 1 minute. Stir until smooth and glossy. If needed, microwave for another 15 seconds and stir again.
Small tip: You can also heat the cream on the stovetop until simmering, then pour it over the chocolate chips in a heatproof bowl and let it sit before stirring.
-
Step 9: Assemble and Garnish
Carefully run a thin knife around the edge of the cheesecake before releasing the springform pan sides. Pour the slightly cooled ganache over the top of the cheesecake, spreading it evenly. Garnish with whipped cream, fresh mint leaves, and extra chocolate shavings or mini chips just before serving. Slice with a hot, clean knife for perfect pieces.
Small tip: Dip your knife in hot water and wipe it clean between each slice for the cleanest cuts.
Tips & Variations
- Gluten-Free Option: Simply swap the regular Oreo cookies for gluten-free chocolate sandwich cookies in the crust. The rest of the recipe is naturally gluten-free.
- Vegetarian Option: This recipe is already vegetarian! For a vegan option, use a plant-based cream cheese alternative, vegan butter for the crust, and an egg replacer (like a flax egg or commercial egg substitute) for the eggs. Ensure your chocolate chips are dairy-free.
- Enriched Crust Variation: For a boost of fiber and protein, add ¼ cup of finely chopped pecans or walnuts to your Oreo crust mixture. This adds a lovely nutty flavor and texture.
- Spicy Chocolate Kick: For an adventurous twist, add a tiny pinch (⅛ teaspoon) of cayenne pepper or chili powder to your chocolate ganache. It enhances the chocolate flavor with a subtle warmth that’s surprisingly delicious with mint.
- Extra Minty Swirl: For an even more intense mint flavor, you can swirl a small amount of melted mint chocolate (like Andes Mints) into the cheesecake batter just before baking, or drizzle it over the top with the ganache.
Nutritional Information
Approximate values per serving (based on 12 servings):
- Calories: 450 kcal
- Protein: 7g
- Carbohydrates: 40g
- Fat: 30g
Note: These values are approximate and may vary depending on the specific brands and exact quantities of ingredients used.
Health Benefits
While this is a decadent dessert, some of its star ingredients offer surprising benefits!
- Dark Chocolate: Rich in antioxidants called flavonoids, dark chocolate can help protect your cells from damage. It’s also known to improve blood flow and may even boost mood.
- Mint: Fresh mint isn’t just for flavor! It’s known for its digestive benefits, helping to soothe upset stomachs and relieve indigestion. It also contains small amounts of vitamins A and C, and iron.
- Cream Cheese: As a dairy product, cream cheese provides calcium, which is essential for strong bones and teeth. It also contains vitamin A, important for vision and immune function, and some protein.
- Eggs: Eggs are a fantastic source of high-quality protein, essential for muscle repair and growth. They also contain choline, important for brain health, and various vitamins like D and B12.
Serving Suggestions
- Serve chilled with a dollop of fresh whipped cream and a sprinkle of chocolate shavings for an elegant presentation.
- This cheesecake is a perfect dessert for special occasions, holiday gatherings, or any time you want to treat yourself and your loved ones.
- Pair a slice with a hot cup of coffee or a refreshing glass of milk for the ultimate indulgence.
Storage Tips
This Mint Chocolate Cheesecake keeps beautifully! Store any leftovers tightly covered in the refrigerator for up to 4-5 days. For longer storage, slices can be individually wrapped in plastic wrap, then aluminum foil, and frozen for up to 1 month. Thaw frozen slices in the refrigerator overnight before serving. There’s no need to reheat cheesecake; it’s best served chilled.
Conclusion
There you have it – a truly delicious and surprisingly simple Mint Chocolate Cheesecake that’s bound to become a new favorite! The refreshing burst of mint perfectly complements the rich, deep chocolate, all nestled in a creamy, dreamy cheesecake. It’s the ideal balance of flavors and textures.
Don’t be intimidated by the idea of baking a cheesecake. With our clear, step-by-step guide, you’re set up for success. The effort is absolutely worth it for the incredible taste and the proud feeling of creating something so spectacular.
So go ahead, give this Mint Chocolate Cheesecake a try. Bake it for a special occasion, a family dinner, or just because you deserve a treat. Share it with friends and family, and watch their faces light up with every delightful bite!


