
Introduction
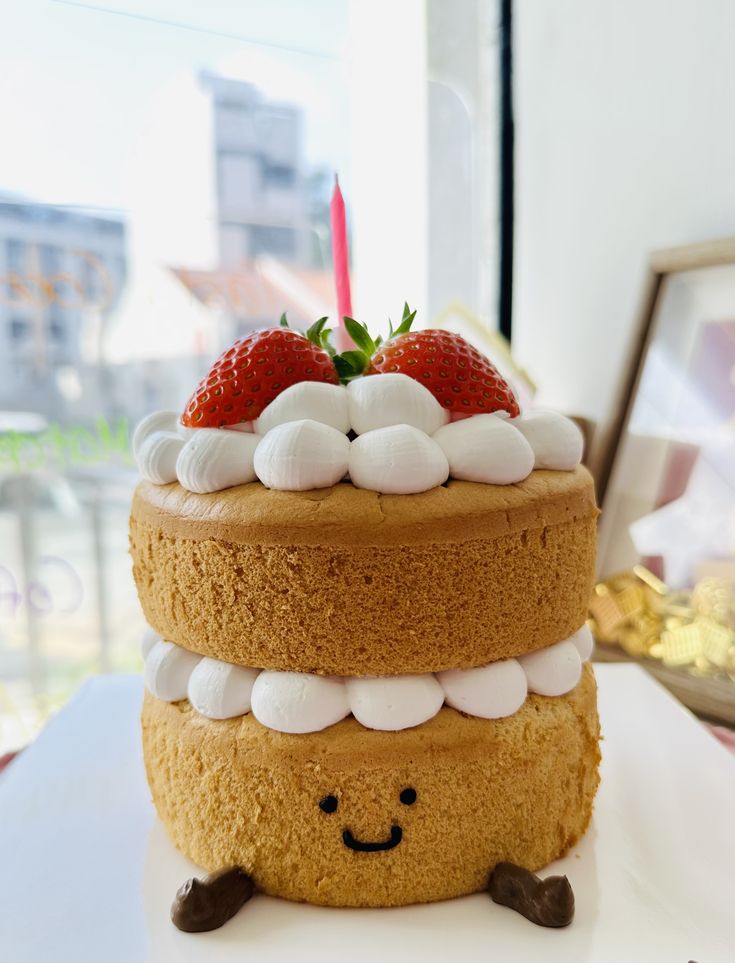
Get ready to bake a burst of pure joy with our delightful “Jellycat Birthday Cake”! This isn’t just any cake; it’s a celebration in every slice, inspired by the whimsical charm and soft colors of everyone’s favorite plush friends. Imagine fluffy vanilla cake layers, studded with colorful sprinkles, and generously frosted with a creamy, dreamy buttercream. It’s a treat that looks as happy as it tastes, perfect for any special occasion or just to brighten your day!
You might think baking a show-stopping layer cake is complicated, but I promise you, this recipe is incredibly approachable. We’ve broken down every step into simple, easy-to-follow instructions. With common pantry ingredients and a little love, you’ll create a stunning masterpiece. No fancy equipment needed, just your mixing bowl and a sprinkle of enthusiasm!
So, why not bring a little Jellycat magic into your kitchen? This cake is a fantastic project for bakers of all skill levels. Gather your ingredients, put on some cheerful music, and let’s create something truly special. Your taste buds (and your friends!) will thank you for this wonderfully delicious and visually charming cake.
Cooking Time & Prep Time
- Prep Time: 45 minutes
- Cooking Time: 30-35 minutes
- Total Time: 75-80 minutes
Small tip: To make your baking experience smoother, measure out all your ingredients before you start mixing. This is called “mise en place” and it helps prevent any last-minute rushes!
Ingredients
This recipe makes 12-16 generous servings.
For the Cake Layers:
- 2 ¾ cups (330g) all-purpose flour
- 1 tablespoon baking powder
- ½ teaspoon salt
- 1 cup (226g) unsalted butter, softened
- 2 cups (400g) granulated sugar
- 4 large eggs, at room temperature
- 1 tablespoon pure vanilla extract
- 1 ½ cups (360ml) whole milk, at room temperature
- ½ cup (100g) rainbow sprinkles (jimmie style work best!)
For the Dreamy Buttercream Frosting:
- 1 ½ cups (340g) unsalted butter, softened
- 6 cups (720g) powdered sugar, sifted
- ½ teaspoon salt
- 2 teaspoons pure vanilla extract
- 4-6 tablespoons whole milk or heavy cream
- Gel food coloring (optional, for whimsical colors)
For Decoration:
- Extra rainbow sprinkles
- Edible glitter (optional, for extra sparkle)
Step-by-Step Instructions
-
Step 1: Get Ready to Bake!
Preheat your oven to 350°F (175°C). Grease and flour two 8-inch round cake pans, or line them with parchment paper circles at the bottom. This step ensures your beautiful cakes won’t stick!
Small tip: You can also use baking spray with flour for an easy release.
-
Step 2: Whisk the Dry Ingredients.
In a medium bowl, whisk together the flour, baking powder, and salt. Make sure everything is well combined. Set this bowl aside for now.
Small tip: Sifting your flour can make your cake even lighter and fluffier!
-
Step 3: Cream Butter and Sugar.
In a large bowl, using an electric mixer, cream together the softened butter and granulated sugar until light and fluffy. This usually takes about 3-5 minutes. Scrape down the sides of the bowl often.
Small tip: Softened butter should be pliable, but not melted. It should indent easily when pressed.
-
Step 4: Add Eggs and Vanilla.
Beat in the eggs one at a time, mixing well after each addition. Then, stir in the vanilla extract. The mixture might look a little curdled at this point, but don’t worry, it will come together.
Small tip: Adding eggs one at a time helps them incorporate better into the batter.
-
Step 5: Combine Wet and Dry.
With the mixer on low speed, gradually add the dry ingredients to the wet ingredients, alternating with the milk. Start and end with the dry ingredients. Mix until just combined, being careful not to overmix.
Small tip: Overmixing can develop the gluten in the flour, leading to a tough cake. Mix until just smooth.
-
Step 6: Fold in the Sprinkles.
Gently fold in the rainbow sprinkles by hand with a spatula. Do this quickly to prevent the colors from bleeding too much into the batter. We want those cheerful pops of color!
Small tip: Use “jimmie” style sprinkles (rod-shaped) as they tend to bleed less than nonpareils.
-
Step 7: Bake Your Cake Layers.
Divide the batter evenly between your two prepared cake pans. Bake for 30-35 minutes, or until a wooden skewer inserted into the center comes out clean. The cakes should be lightly golden and spring back when gently touched.
Small tip: Avoid opening the oven door too often during baking, as this can cause the cakes to sink.
-
Step 8: Cool Down.
Let the cakes cool in their pans on a wire rack for about 10-15 minutes. Then, carefully invert them onto the wire rack to cool completely. This is crucial before frosting!
Small tip: Frosting a warm cake will cause the buttercream to melt and slide right off. Patience is key here!
-
Step 9: Make the Dreamy Buttercream.
While the cakes cool, prepare your frosting. In a large bowl with an electric mixer, beat the softened butter until creamy. Gradually add the sifted powdered sugar, salt, and vanilla extract. Beat until smooth.
Small tip: Sifting powdered sugar prevents lumps in your frosting for a super smooth finish.
-
Step 10: Perfect the Frosting Consistency.
Gradually add the milk or cream, one tablespoon at a time, until your frosting reaches a light, fluffy, and spreadable consistency. If desired, divide the frosting into smaller bowls and tint with gel food coloring for a multi-colored Jellycat effect!
Small tip: Add a tiny bit of extra milk if it’s too thick, or a spoonful of powdered sugar if it’s too thin.
-
Step 11: Assemble Your Jellycat Masterpiece.
Place one cooled cake layer on your serving plate or cake stand. Spread about 1 cup of frosting evenly over the top. Place the second cake layer on top. Apply a thin “crumb coat” of frosting all over the cake. This traps any loose crumbs. Chill the cake in the fridge for 15-20 minutes.
Small tip: The crumb coat is a secret weapon for a professional-looking, crumb-free final frosting layer!
-
Step 12: The Grand Finale!
Remove the cake from the fridge. Apply the remaining frosting generously over the top and sides of the cake. Decorate with extra rainbow sprinkles and edible glitter, if using. Slice, serve, and enjoy your beautiful “Jellycat Birthday Cake”!
Small tip: Use an offset spatula or a bench scraper for smooth sides on your cake.
Tips & Variations
- Gluten-Free Option: Easily make this cake gluten-free by substituting the all-purpose flour with a 1:1 gluten-free baking flour blend. Ensure your blend contains xanthan gum for best results.
- Vegan/Vegetarian Option: For a vegan version, swap butter for a plant-based butter alternative, use a flax egg (1 tbsp ground flaxseed + 3 tbsp water per egg), and choose a plant-based milk (like almond or oat milk). Ensure your sprinkles are vegan too!
- Healthier Twist (Protein Boost): To add a touch more protein, you can swap a portion of the milk in the cake batter for plain Greek yogurt. For the frosting, consider a cream cheese frosting (using light cream cheese) which offers more protein than traditional buttercream.
- Citrusy Zest: For a delightful flavor variation, add the zest of one lemon or orange to both the cake batter and the buttercream. This brightens the flavor beautifully and adds a lovely aroma.
- Cupcake Fun: Turn this recipe into adorable cupcakes! Line cupcake tins with paper liners and fill each about two-thirds full. Bake for 18-22 minutes. Adjust frosting amounts as needed for individual decorating.
Nutritional Information
Approximate values per serving (based on 16 servings):
- Calories: 480 kcal
- Protein: 5g


