
Introduction
There’s a secret ingredient that elevates almost every sweet treat, turning good into absolutely unforgettable: vanilla extract! But not just any vanilla extract – we’re talking about the rich, aromatic, and deeply flavorful homemade kind. Imagine baking with an extract so pure and fragrant, it fills your kitchen with the most comforting scent. This isn’t just an ingredient; it’s a little bottle of magic.
Making your own vanilla extract is surprisingly simple, yet incredibly rewarding. You only need two main ingredients and a little patience. There’s no complicated cooking, no special equipment beyond a bottle, and absolutely no stress. It’s truly one of the easiest “recipes” you’ll ever tackle, and the results are far superior to most store-bought options, often at a fraction of the cost.
So, are you ready to unlock a new level of flavor in your baking and create a pantry staple that will impress everyone? Dive into this simple guide, and soon you’ll have your very own golden elixir. Your cakes, cookies, and custards will thank you!
Cooking Time & Prep Time
- Prep Time: 15 minutes
- Cooking Time: 0 minutes
- Total Time: 15 minutes (plus 6-12 months for infusion)
Small tip: While the hands-on time is minimal, remember that patience is key for the best flavor. Start your extract at least 6 months before you plan to use it heavily!
Ingredients
This recipe makes approximately 2 cups (16 ounces) of homemade vanilla extract.
- Vanilla Beans: 10-15 whole vanilla beans (Grade B are excellent for extract, Grade A also works)
- Alcohol: 2 cups (16 oz) of 80-proof (40% alcohol by volume) liquor, such as vodka, bourbon, rum, or brandy
- Bottles: 2 x 8 oz dark glass bottles or 1 x 16 oz dark glass bottle with airtight lids
- Funnel: (Optional, but helpful) for pouring alcohol
Step-by-Step Instructions
-
Step 1: Prepare Your Bottles
Start by making sure your bottles are sparkling clean and sterilized. Wash them thoroughly with hot, soapy water, then rinse well. You can also run them through a dishwasher on a hot cycle. Allow them to air dry completely, or dry them in a low oven (around 200°F / 95°C) for 10-15 minutes to ensure no moisture remains.
Small tip: Sterilizing your bottles helps prevent any unwanted bacteria or mold from growing, ensuring your extract is pure and lasts indefinitely.
-
Step 2: Prepare the Vanilla Beans
Lay your vanilla beans flat on a clean cutting board. Using a sharp knife, carefully slice each bean lengthwise down the middle, from just below the stem to about half an inch from the bottom. You want to expose the tiny vanilla seeds inside without cutting all the way through the bean. This “splitting” helps release the maximum flavor.
Small tip: If your beans are very long, you can cut them in half crosswise after splitting them lengthwise. This makes them fit better into smaller bottles.
-
Step 3: Add Beans to Bottles
Carefully place the prepared vanilla beans into your clean, dry bottles. Aim for approximately 5-7 beans per 8-ounce bottle, or 10-15 beans for a 16-ounce bottle. The more beans you use per ounce of alcohol, the stronger and richer your extract will be.
Small tip: Don’t worry if the beans don’t perfectly fill the bottle. They will soften and sink as they infuse.
-
Step 4: Pour in the Alcohol
Using a funnel if desired, slowly pour your chosen alcohol over the vanilla beans in each bottle. Make sure the beans are completely submerged in the liquor. Fill the bottle to the neck, leaving a small amount of headspace.
Small tip: Vodka is a popular choice because of its neutral flavor, allowing the vanilla to shine. However, bourbon, rum, or brandy add delightful undertones.
-
Step 5: Seal and Store
Seal the bottles tightly with their airtight lids. Give each bottle a gentle shake to help distribute the beans. Label your bottles with the date you started them and the type of alcohol used. Store your vanilla extract in a cool, dark place, like a pantry or cupboard, away from direct sunlight.
Small tip: Dark glass bottles help protect the extract from light degradation, preserving its flavor and potency.
-
Step 6: Infuse and Shake
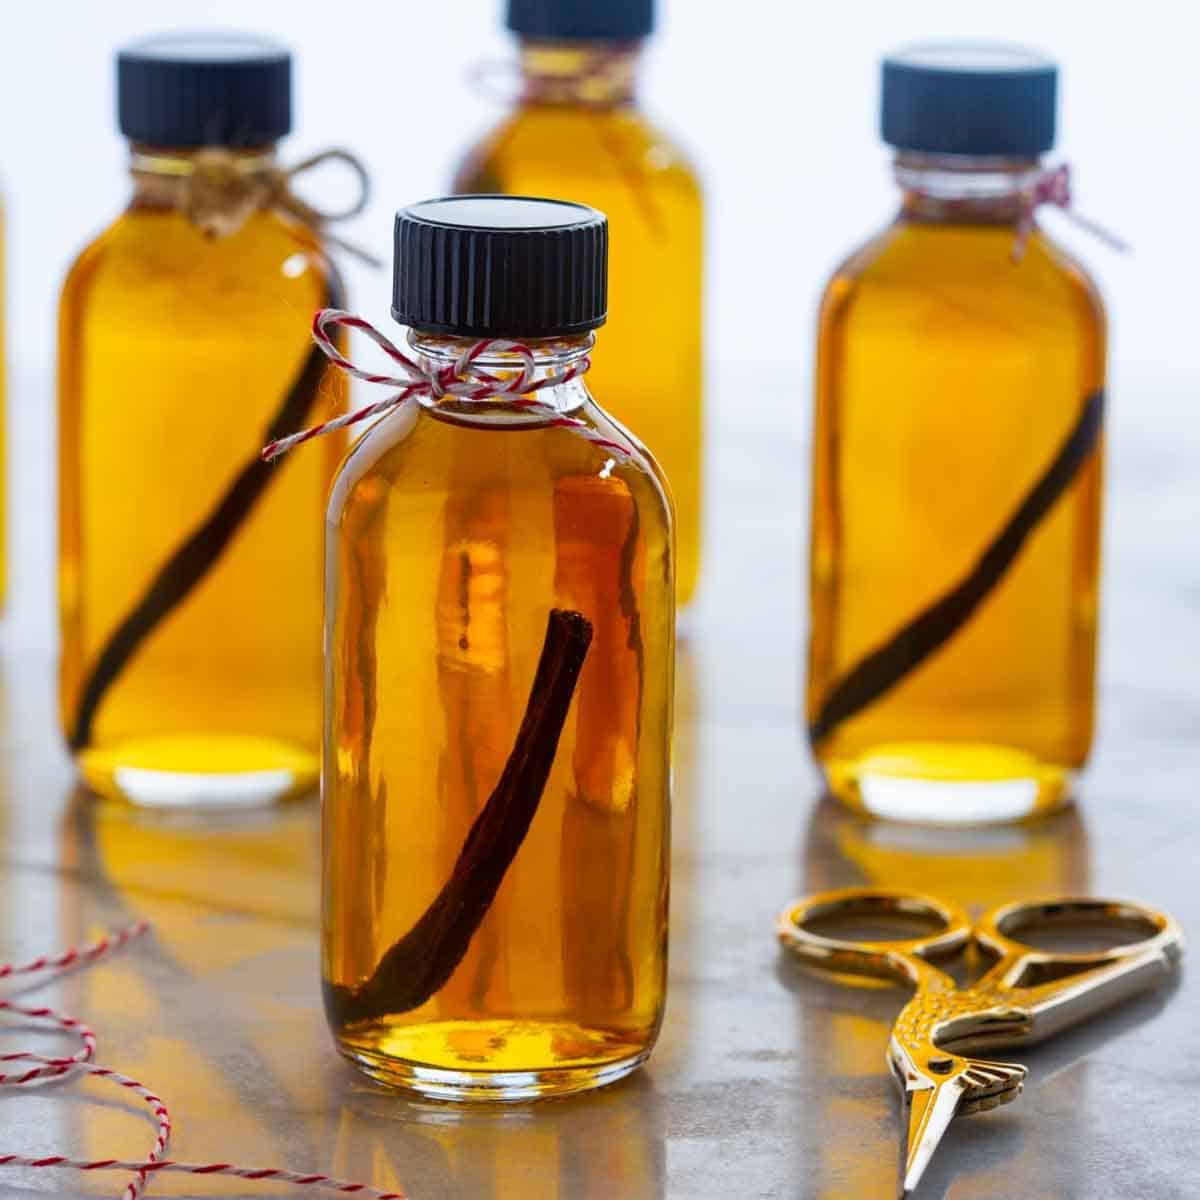
Now comes the hardest part: waiting! The vanilla beans need time to infuse their flavor into the alcohol. Shake the bottles gently every week or two during the first few months. You’ll start to notice the alcohol slowly changing color, deepening into a beautiful amber hue.
Small tip: For the best flavor, let your extract infuse for at least 6 months, but 12 months is even better. The longer it sits, the more complex and robust the flavor will become.
-
Step 7: Enjoy and Replenish
Once your extract has reached your desired strength (taste test a tiny drop to check!), it’s ready to use. You can leave the beans in the bottle indefinitely, or remove them if you prefer. As you use the extract, you can “top off” the bottle with more alcohol, adding a new bean or two every few refills to maintain strength. This is called a “continuous extract”!
Small tip: The used beans still hold flavor! Don’t throw them away. Rinse them, dry them, and place them in a jar of sugar to make vanilla sugar, or grind them into a powder for baking.
Tips & Variations
- Gluten-Free Option: Most vodkas are naturally gluten-free as they are distilled, even if made from wheat. However, for absolute certainty, choose an alcohol explicitly labeled as gluten-free, such as potato, corn, or grape-based vodka.
- Vegan or Vegetarian Option: Homemade vanilla extract is naturally 100% vegan and vegetarian! It contains no animal products, making it a perfect plant-based ingredient for all your baking needs.
- Adding Vegetables or Protein: Homemade vanilla extract doesn’t directly incorporate vegetables or protein into the extract itself. However, it is a foundational ingredient for many recipes that *do* feature them, such as carrot cake, sweet potato pie, or protein-packed smoothies and baked goods, where its rich flavor enhances the overall profile. Its pure essence elevates every dish it touches.
- Spicy Version: For a unique twist, add a small piece (about 1 inch) of dried red chili pepper, a few black peppercorns, or even a star anise pod to your bottle along with the vanilla beans. This creates an intriguing, warm, and subtly spicy vanilla extract perfect for chocolate desserts or savory glazes.
- Other Useful Variation or Flavor Tip: Experiment with different types of vanilla beans! Madagascar (Bourbon) beans offer a classic, creamy, rich flavor. Tahitian beans are more floral and fruity. Mexican beans have a smoky, spicy note. You can also mix and match for a custom blend, or use different alcohols like dark rum for a deeper, molasses-like vanilla or brandy for a fruity, sweet extract.
Nutritional Information
Approximate values per serving (based on 16 servings of 1 tablespoon each):
- Calories: ~35-45
- Protein: ~0g
- Carbohydrates: ~0g
- Fat: ~0g
Note: These values are approximate and primarily reflect the alcohol content. The nutritional contribution from the vanilla bean itself is negligible. Values may vary depending on the specific alcohol used.
Health Benefits
Homemade vanilla extract offers more than just incredible flavor; it brings a touch of natural goodness to your kitchen.
Vanilla beans themselves are rich in antioxidants, particularly vanillin. Antioxidants help protect your body’s cells from damage caused by free radicals, contributing to overall health and well-being. By making your own extract, you’re ensuring a pure product without artificial colors or flavors often found in imitation vanilla.
The aroma of vanilla is also known to have a calming and mood-lifting effect. Studies suggest that the scent of vanilla can reduce stress and promote relaxation. So, every time you open a bottle of your homemade extract, you’re not just getting ready to bake; you’re also treating your senses to a little aromatherapy.
Furthermore, using real vanilla extract means you’re benefiting from the natural compounds of the vanilla bean, which are complex and contribute to its unique flavor profile. Unlike synthetic vanillin, real vanilla extract contains hundreds of compounds that work synergistically to create its unparalleled depth of taste.
Choosing to make your own extract puts you in control of the ingredients, ensuring you’re using high-quality vanilla beans and pure alcohol. This means you avoid any unwanted additives or corn syrup often found in cheaper, mass-produced extracts, making your baking not only tast


