
Introduction
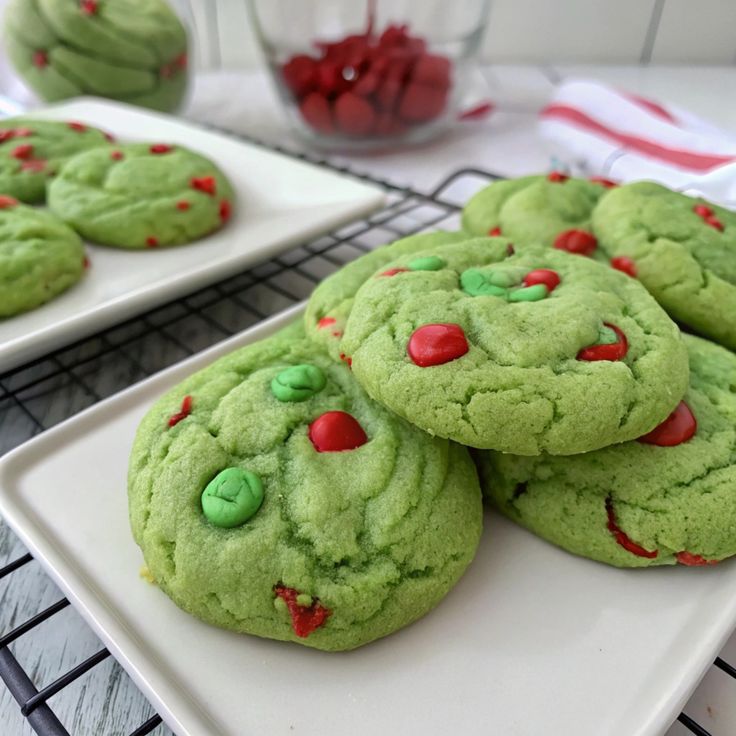
Get ready to steal the show this holiday season with the most adorable and delicious treat: Grinch Cookies Hershey Kiss Delight! These vibrant green cookies, topped with a sweet Hershey’s Kiss, are a festive nod to everyone’s favorite green grumpy guy. They are incredibly soft, chewy, and melt-in-your-mouth delightful, perfect for spreading cheer.
What makes these cookies truly special is how simple and quick they are to whip up. You don’t need any fancy baking skills or special equipment. With just a few basic ingredients and a little bit of green magic, you’ll have a batch of these charming cookies ready in no time. They’re perfect for busy holiday schedules!
Imagine the smiles on faces when these bright, cheerful cookies appear on your dessert table. They are fantastic for holiday parties, cookie exchanges, or just a cozy evening treat with family. So, grab your apron and let’s bring a little bit of Whoville joy into your kitchen!
Cooking Time & Prep Time
- Prep Time: 20 minutes
- Cooking Time: 10-12 minutes per batch
- Total Time: Approximately 45 minutes (including chilling time for dough)
Small tip: To save time, you can prepare the dough a day in advance and keep it chilled in the refrigerator. This allows the flavors to meld beautifully.
Ingredients
This recipe makes approximately 36 delicious cookies.
- For the Cookies:
- 2 ¼ cups (270g) all-purpose flour
- 1 teaspoon baking soda
- ½ teaspoon salt
- 1 cup (226g) unsalted butter, softened
- ¾ cup (150g) granulated sugar
- ¾ cup (160g) packed light brown sugar
- 2 large eggs
- 1 teaspoon vanilla extract
- ½ – 1 teaspoon green gel food coloring (adjust for desired shade)
- For the Topping:
- 36 Hershey’s Kisses, unwrapped
Step-by-Step Instructions
-
Step 1: Whisk Dry Ingredients
In a medium bowl, whisk together the all-purpose flour, baking soda, and salt. Make sure these dry ingredients are well combined. Set this bowl aside for now.
Small tip: Sifting your flour can make your cookies even lighter and fluffier.
-
Step 2: Cream Wet Ingredients
In a large bowl, using an electric mixer, cream together the softened unsalted butter, granulated sugar, and light brown sugar until the mixture is light and fluffy. This usually takes about 2-3 minutes. Scrape down the sides of the bowl as needed.
Small tip: Ensure your butter is truly softened, not melted, for the best texture. It should be pliable but still hold its shape.
-
Step 3: Add Eggs and Vanilla
Beat in the eggs one at a time, mixing well after each addition. Then, stir in the vanilla extract. Make sure everything is fully incorporated before moving on.
-
Step 4: Add Green Food Coloring
Now for the fun part! Add the green gel food coloring to the wet mixture. Start with ½ teaspoon and add more if you want a deeper green. Mix until the color is evenly distributed throughout the dough. It should look bright and festive!
Small tip: Gel food coloring gives a more vibrant color without thinning out the dough like liquid food coloring can.
-
Step 5: Combine Wet and Dry Ingredients
Gradually add the dry ingredient mixture to the wet mixture, mixing on low speed until just combined. Be careful not to overmix the dough. Overmixing can lead to tough cookies.
-
Step 6: Chill the Dough
Cover the dough with plastic wrap and refrigerate for at least 30 minutes. Chilling helps the cookies hold their shape better and prevents them from spreading too much during baking.
Small tip: If you’re in a hurry, you can place the dough in the freezer for 10-15 minutes instead of the fridge.
-
Step 7: Preheat Oven and Prepare Baking Sheets
While the dough is chilling, preheat your oven to 375°F (190°C). Line two baking sheets with parchment paper or silicone baking mats. This prevents sticking and makes cleanup a breeze.
-
Step 8: Form Cookie Balls
Scoop rounded tablespoons of dough and roll them into smooth balls. Place them about 2 inches apart on the prepared baking sheets. They will spread a little.
Small tip: Use a cookie scoop for uniform-sized cookies, which helps them bake evenly.
-
Step 9: Bake the Cookies
Bake for 10-12 minutes, or until the edges are lightly golden and the centers are set but still look soft. Do not overbake them, as they will continue to cook slightly on the baking sheet.
-
Step 10: Add Hershey’s Kisses
Immediately after removing the cookies from the oven, gently press one unwrapped Hershey’s Kiss into the center of each warm cookie. The residual heat will slightly melt the chocolate, making it stick beautifully.
-
Step 11: Cool and Enjoy
Let the cookies cool on the baking sheets for 5 minutes before transferring them to a wire rack to cool completely. This helps them firm up. Once cooled, they are ready to be devoured!
Tips & Variations
- Gluten-Free Option: Simply substitute the all-purpose flour with a 1:1 gluten-free baking flour blend that contains xanthan gum. The texture will be very similar.
- Vegan/Vegetarian Option: For a vegan version, use a plant-based butter substitute (like Earth Balance sticks) and replace the eggs with flax eggs (1 tablespoon ground flaxseed meal + 3 tablespoons water per egg, let sit for 5 minutes). Use vegan-friendly chocolate kisses or chunks.
- Healthier Add-ins: While cookies are a treat, you can boost nutrients by adding ½ cup of finely ground walnuts or almonds to the dough. You could also try using half whole wheat flour for a slightly nuttier flavor and more fiber.
- Spicy (Warm) Version: Add ½ teaspoon of ground ginger or ¼ teaspoon of ground cardamom to the dry ingredients for a warm, festive spice kick. This complements the chocolate wonderfully.
- Other Flavor Tips: Experiment with different extracts! A touch of almond extract instead of vanilla, or even a hint of peppermint extract (use sparingly!) could create a new holiday favorite. You can also roll the dough balls in festive sprinkles before baking for extra sparkle.
Nutritional Information
Approximate values per serving (based on 36 servings):
- Calories: 150 kcal
- Protein: 2g
- Carbohydrates: 20g
- Fat: 7g
Note: These values are approximate and may vary depending on the specific brands and quantities of ingredients used.
Health Benefits
While Grinch Cookies are definitely a delightful treat, there are still some positive aspects to consider, especially when baking at home.
Baking at home gives you complete control over the ingredients. You can choose high-quality butter and eggs, which contribute healthy fats and protein respectively. Eggs are a good source of choline, important for brain health, and contain essential amino acids.
If you opt for whole wheat flour in a variation, you’ll increase the fiber content, which aids digestion and can help with satiety. Even in small amounts, ingredients like vanilla extract offer antioxidants, though their contribution is minimal in a cookie.
Beyond the ingredients, the act of baking itself can be therapeutic and a wonderful way to connect with family. Creating something delicious from scratch brings a sense of accomplishment and joy, which are benefits for mental well-being. Sharing these homemade treats can also foster community and happiness.
Ultimately, these cookies are a celebration. Enjoying them in moderation as part of a balanced diet allows you to savor the joy and festive spirit they bring without guilt.
Serving Suggestions
- Serve these Grinch Cookies on a festive platter at your holiday parties or cookie exchanges. They are guaranteed to be a conversation starter!
- Pair them with a warm mug of hot cocoa, milk, or coffee for a cozy winter treat.
- Package them in cute holiday bags with ribbons as thoughtful homemade gifts for friends, neighbors, or teachers.
- They make a fantastic dessert after a holiday meal, adding a pop of color and sweetness.
Storage Tips
Store Grinch Cookies in an airtight container at room temperature for up to 3-4 days to maintain their freshness and chewiness. If you want them to last longer, you can freeze the baked cookies. Place them in a single layer on a baking sheet to flash freeze for an hour, then transfer them to a freezer-safe bag or container for up to 2-3 months. To reheat, simply let them thaw at room temperature or warm them gently in the microwave for a few seconds until soft.
Conclusion
There you have it – a recipe for the most charming and delicious Grinch Cookies Hershey Kiss Delight! These cookies are more than just a sweet treat; they’re a little piece of holiday magic, easy to make and guaranteed to bring smiles. Their vibrant green hue and chocolatey kiss topping make them absolutely irresistible.
Don’t wait to try this fantastic recipe. It’s perfect for bakers of all skill levels and a wonderful way to get into the festive spirit. Imagine the joy of pulling these beauties out of the oven, filling your home with the sweet scent of holiday cheer.
So go ahead, whip up a batch (or two!) and share the delight with your family and friends. These Grinch Cookies are sure to be a beloved addition to your holiday traditions for years to come. Happy baking!


