
Introduction
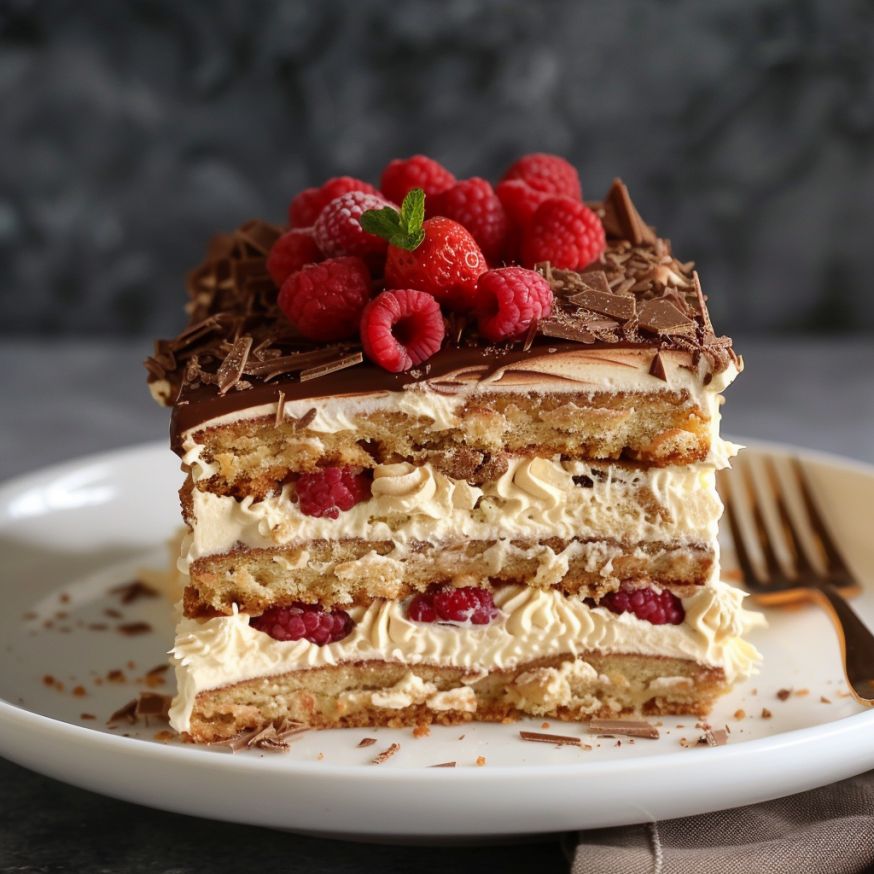
Get ready for a dessert that’s pure magic! Today, we’re diving into the wonderful world of Graham Cracker Icebox Cake. This delightful treat is a true classic, known for its incredible simplicity and mouth-watering taste. Imagine layers of crisp graham crackers transforming into a tender, cake-like texture, nestled between clouds of rich, creamy filling. It’s a symphony of textures and sweet flavors that will bring a smile to everyone’s face.
The best part? This cake requires absolutely no baking! That’s right, no oven needed. It’s an “icebox” cake because the refrigerator does all the hard work, allowing the flavors to meld and the graham crackers to soften beautifully. It’s incredibly easy to assemble, making it perfect for busy weeknights, last-minute gatherings, or when you just want a delicious dessert without the fuss.
So, if you’re looking for a dessert that delivers on taste, nostalgia, and ease, look no further. This Graham Cracker Icebox Cake is about to become your new favorite. Let’s get started and create something truly special together!
Cooking Time & Prep Time
- Prep Time: 25 minutes
- Cooking Time: 0 minutes (no-bake!)
- Chill Time: 4-6 hours (or overnight for best results)
- Total Time: 4 hours 25 minutes (includes minimum chill time)
Small tip: The longer this cake chills, the better its texture and flavor will be. Overnight chilling is highly recommended!
Ingredients
This recipe makes about 8-10 generous servings.
- For the Creamy Filling:
- 2 cups (470ml) heavy cream, very cold
- 8 ounces (226g) cream cheese, softened
- 1/2 cup (60g) powdered sugar (confectioners’ sugar)
- 1 teaspoon pure vanilla extract
- 1-2 tablespoons milk (if needed to thin cream cheese)
- For the Layers:
- 12-14 full sheets graham crackers (about 2 sleeves), plus extra for garnish
- For Garnish (Optional):
- 2 tablespoons cocoa powder
- Chocolate shavings or mini chocolate chips
- Fresh berries (strawberries, raspberries)
Step-by-Step Instructions
-
Step 1: Soften the Cream Cheese
Take your cream cheese out of the fridge at least 30 minutes before you start. It needs to be nice and soft. This makes it much easier to mix smoothly, preventing any lumps in your creamy filling. A soft cream cheese is key for a silky texture.
Small tip: If you forget to soften it, unwrap it and microwave it for 10-15 seconds on low power. Be careful not to melt it!
-
Step 2: Prepare the Cream Cheese Mixture
In a large mixing bowl, combine the softened cream cheese, powdered sugar, and vanilla extract. Use an electric mixer on medium speed to beat them together until the mixture is completely smooth and creamy. Scrape down the sides of the bowl as needed to ensure everything is well incorporated. If the mixture seems too thick, add a tablespoon of milk at a time until it reaches a spreadable consistency.
Small tip: Don’t overmix at this stage; just get it smooth. Overmixing can incorporate too much air, which we’ll do later with the cream.
-
Step 3: Whip the Heavy Cream
In a separate, very clean and cold mixing bowl, pour the very cold heavy cream. Using an electric mixer (with clean beaters), whip the cream on high speed until stiff peaks form. This means when you lift the beaters, the cream stands up firmly. Be careful not to over-whip, or it might turn into butter!
Small tip: For even faster whipping, chill your mixing bowl and beaters in the freezer for 10-15 minutes before starting.
-
Step 4: Combine the Creamy Filling
Gently fold about one-third of the whipped cream into the cream cheese mixture. Use a spatula and a light hand to combine them. Once mostly mixed, add the remaining whipped cream and fold until just combined and no streaks of cream cheese remain. You want to keep the mixture light and airy. This creates the delicious, fluffy texture of your cake’s filling.
Small tip: Folding gently helps maintain the airiness of the whipped cream, giving your cake a lighter texture.
-
Step 5: Assemble the First Layer
Choose an 8×8 or 9×9-inch square baking dish or a similarly sized loaf pan. Spread a thin layer of your creamy filling on the bottom of the dish. This acts like glue for your first layer of graham crackers. Arrange a single layer of graham cracker sheets over the cream, breaking them as needed to fit snugly into the dish. Try to cover the entire bottom.
Small tip: Breaking graham crackers can be messy. Do it over the dish or a cutting board to catch crumbs.
-
Step 6: Build the Layers
Now, spread about one-third of the remaining creamy filling evenly over the graham crackers. Use an offset spatula or the back of a spoon to get a smooth layer. Repeat this process: a layer of graham crackers, then a layer of creamy filling. You should aim for about 3-4 layers of graham crackers and 3-4 layers of cream, ending with a final layer of cream on top. Make sure to save a little cream for the very top.
Small tip: Don’t press down too hard on the graham crackers, as they will soften naturally during chilling.
-
Step 7: Chill the Cake
Once all your layers are assembled, cover the dish tightly with plastic wrap. Place the cake in the refrigerator for at least 4-6 hours. For the best results, letting it chill overnight is truly ideal. This allows the graham crackers to absorb moisture from the cream and soften beautifully, transforming into a tender, cake-like consistency.
Small tip: Ensure the plastic wrap touches the surface of the cake to prevent a skin from forming on the cream.
-
Step 8: Garnish and Serve
Before serving, remove the cake from the refrigerator. If desired, you can dust the top with cocoa powder using a fine-mesh sieve, add some chocolate shavings, or arrange fresh berries on top for a pop of color and freshness. Slice the cake into squares and serve immediately. Enjoy your delicious, no-bake creation!
Small tip: To get clean slices, dip your knife in hot water and wipe it clean between each cut.
Tips & Variations
- Gluten-Free Option: Simply swap out regular graham crackers for your favorite brand of gluten-free graham crackers. The texture and taste will be just as wonderful!
- Vegan/Vegetarian Option: For a vegan version, use full-fat coconut cream (chilled, scoop out the thick cream only) instead of heavy cream, and a plant-based cream cheese alternative. Ensure your graham crackers are also vegan.
- Add More Fruit: Layer sliced fresh fruit like bananas, strawberries, or raspberries between the cream and graham cracker layers for extra flavor, texture, and a touch of natural sweetness. You could even add a thin layer of fruit preserves.
- Spicy (and Sweet!) Kick: For a unique twist, try adding a tiny pinch of cayenne pepper or a dash of ground cinnamon to the cream cheese mixture. It creates a subtle warmth that beautifully complements the sweetness, especially if you add a chocolate drizzle.
- Coffee Lover’s Dream: Dissolve 1-2 teaspoons of instant espresso powder in a tablespoon of hot water, then let it cool completely. Fold this into your creamy filling for a delicious coffee-flavored icebox cake.
- Lemon Zest Brightness: Add 1-2 teaspoons of fresh lemon zest to the cream cheese mixture for a bright, tangy flavor that cuts through the richness beautifully.
Nutritional Information
Approximate values per serving (based on 8 servings):
- Calories: 420 kcal
- Protein: 4g
- Carbohydrates: 35g
- Fat: 30g
Note: These values are approximate and may vary depending on the specific brands and quantities of ingredients used.
Health Benefits
While this is a dessert, some of its ingredients do offer a few health perks!
- Graham Crackers: Many graham crackers are made with whole wheat flour, which means they can contribute some dietary fiber. Fiber is important for digestive health and can help you feel full. They also provide some B vitamins, essential for energy metabolism.
- Dairy (Heavy Cream & Cream Cheese): Dairy products are well-known for being excellent sources of calcium, which is crucial for strong bones and teeth. They also provide protein, important for muscle repair and growth, and some vitamins like Vitamin A.
- Vanilla Extract: Pure vanilla extract contains small amounts of antioxidants. Antioxidants help protect your body’s cells from damage caused by free radicals. It also adds a wonderful, comforting flavor without extra sugar.
- Fresh Fruit (if added): If you choose to add fresh berries or other fruits as a variation, you’ll boost the cake’s vitamin content significantly. Berries are packed with Vitamin C and various antioxidants, supporting overall immune health and fighting inflammation.
Serving Suggestions
- Classic Pairing: Serve a slice of your Graham Cracker Icebox Cake with a hot cup of coffee, tea, or a glass of cold milk. The simplicity allows the cake’s flavors to shine.
- Fruity Delight: Enhance the dessert with a side of fresh mixed berries or a simple fruit compote. The tartness of the fruit beautifully balances the cake’s sweetness.
- Chocolate Lover’s Dream: Drizzle extra chocolate syrup or a warm ganache over each slice just before serving. A scoop of vanilla bean ice cream on the side is also a fantastic addition.
- Party Perfect: This cake is ideal for potlucks, picnics, and family gatherings. It’s easy to transport and always a crowd-pleaser, especially on a warm day.
Storage Tips
Your Graham Cracker Icebox Cake will keep beautifully in an airtight container in the refrigerator for up to 3-4 days. While you can technically freeze it, the texture of the cream can become a bit grainy upon thawing, and the graham crackers might get a little soggy. It’s best enjoyed chilled from the fridge. This cake is meant to be served cold, so no reheating is necessary or recommended.
Conclusion
And there you have it – a truly delightful and incredibly easy Graham Cracker Icebox Cake! This recipe proves that you don’t need a hot oven or complicated techniques to create a dessert that tastes absolutely heavenly. Its layers of tender, cake-like graham crackers and luscious, creamy filling are simply irresistible, offering a sweet escape with every bite.
We encourage you to try making this wonderful no-bake cake. It’s the perfect project for a relaxed afternoon, and the reward is a truly memorable dessert that will impress everyone. Plus, watching the graham crackers transform from crisp to tender is a little bit of kitchen magic you’ll love.
So go ahead, gather your ingredients, and whip up this fantastic icebox cake. Share it with your family, bring it to a gathering, or simply enjoy a quiet slice all to yourself. You deserve this easy, delicious treat!


