
Introduction
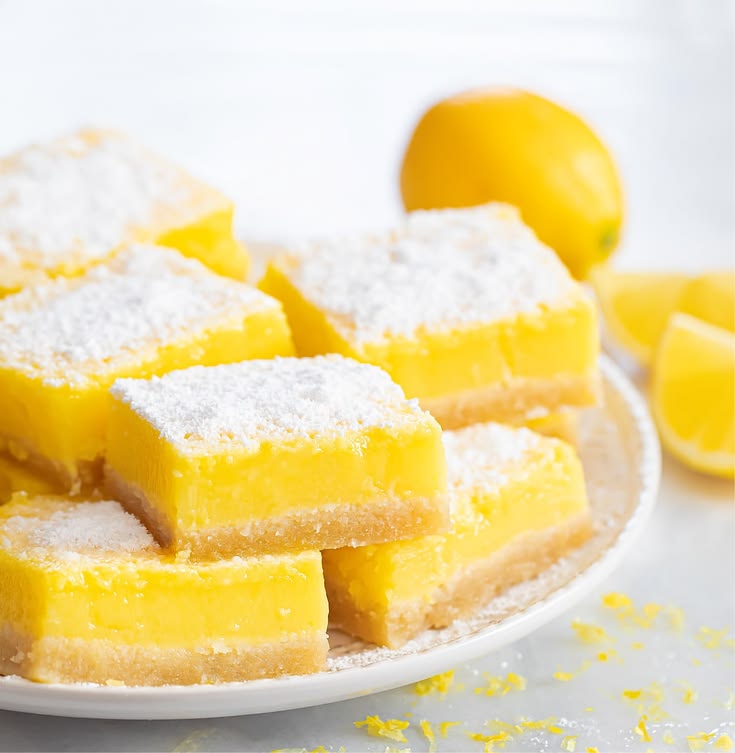
Get ready to brighten your day with the most delightful treat: Gluten-Free Lemon Bars! These sunny squares are a perfect balance of sweet and tart, with a buttery, crisp crust and a smooth, zesty lemon filling that simply melts in your mouth. They’re a classic for a reason, offering a burst of refreshing flavor that’s impossible to resist.
You might think baking gluten-free is complicated, but these lemon bars prove otherwise. This recipe is wonderfully straightforward, using simple ingredients and easy-to-follow steps. It’s a fantastic option for both seasoned bakers and beginners, promising a delicious result with minimal fuss. Plus, they come together quicker than you might expect, making them ideal for last-minute gatherings or a spontaneous sweet craving.
So, whether you’re looking for a crowd-pleasing dessert, a special treat for a gluten-sensitive friend, or just a little ray of sunshine for yourself, these Gluten-Free Lemon Bars are calling your name. Roll up your sleeves, gather your ingredients, and let’s bake some pure joy together!
Cooking Time & Prep Time
- Prep Time: 20 minutes
- Cooking Time: 40 minutes
- Total Time: 60 minutes
Small tip: To save time, you can prepare the crust mixture while your oven preheats, ensuring a smooth transition to baking.
Ingredients
This recipe makes about 16 servings (2-inch squares).
For the Crust:
- 1 cup (2 sticks) unsalted butter, softened
- 1/2 cup granulated sugar
- 2 cups gluten-free all-purpose flour blend (with xanthan gum)
- 1/4 teaspoon salt
For the Lemon Filling:
- 4 large eggs
- 1 1/2 cups granulated sugar
- 1/4 cup gluten-free all-purpose flour blend (with xanthan gum)
- 1/2 cup fresh lemon juice (from 3-4 lemons)
- 1 tablespoon lemon zest (from 1-2 lemons)
- 1/4 teaspoon salt
For Dusting:
- 2 tablespoons powdered sugar
Step-by-Step Instructions
-
Step 1: Preheat Oven and Prepare Pan
Preheat your oven to 350°F (175°C). Line a 9×13 inch baking pan with parchment paper, leaving an overhang on the sides. This will make it easy to lift the bars out later. Lightly grease the parchment paper.
-
Step 2: Prepare the Crust Dough
In a large bowl, cream together the softened butter and 1/2 cup granulated sugar until light and fluffy. Gradually add the 2 cups gluten-free flour blend and 1/4 teaspoon salt. Mix until the mixture resembles coarse crumbs and starts to come together.
Small tip: Don’t overmix the crust dough; stop as soon as it forms a cohesive mixture to keep it tender.
-
Step 3: Press and Bake the Crust
Press the crust mixture evenly into the bottom of the prepared baking pan. Use the back of a spoon or your fingers to create a firm, flat layer. Bake for 18-20 minutes, or until the edges are lightly golden brown. Remove from the oven and set aside while you prepare the filling.
-
Step 4: Whisk the Lemon Filling
While the crust is baking, prepare the lemon filling. In a medium bowl, whisk together the 4 large eggs and 1 1/2 cups granulated sugar until well combined and slightly frothy. Gradually whisk in the 1/4 cup gluten-free flour blend, ensuring there are no lumps.
-
Step 5: Add Lemon Flavor
Stir in the fresh lemon juice, lemon zest, and 1/4 teaspoon salt into the egg mixture. Whisk until everything is thoroughly combined and smooth. The zest adds an extra layer of bright lemon flavor and beautiful flecks.
Small tip: For the best flavor, use fresh lemons and avoid bottled lemon juice. You’ll taste the difference!
-
Step 6: Pour Filling Over Crust
Carefully pour the lemon filling over the warm, pre-baked crust in the pan. Distribute the filling evenly to cover the entire crust. Be gentle to avoid disturbing the crust layer.
-
Step 7: Bake the Lemon Bars
Return the pan to the oven and bake for another 20-25 minutes. The filling should be set and the edges lightly golden. A slight jiggle in the very center is okay, as it will continue to set as it cools.
Small tip: If the edges start to brown too quickly, you can loosely tent the pan with foil for the last few minutes of baking.
-
Step 8: Cool Completely
Remove the pan from the oven and let the lemon bars cool completely on a wire rack. This is a crucial step! The filling needs to set up fully, which takes at least 2-3 hours, or even longer at room temperature. For best results, chill them in the refrigerator for at least 1 hour after cooling at room temperature.
-
Step 9: Dust and Serve
Once completely cooled and chilled, use the parchment paper overhang to lift the entire slab of lemon bars out of the pan. Place it on a cutting board. Dust generously with powdered sugar using a fine-mesh sieve. Cut into 16 squares using a sharp knife. Clean the knife between cuts for neat edges. Serve and enjoy!
Tips & Variations
- Gluten-Free Flour Blend: While any good gluten-free all-purpose flour blend with xanthan gum will work, a blend containing rice flour, potato starch, and tapioca starch tends to yield the best texture for this recipe.
- Vegan Option: To make these vegan, substitute the butter with a high-quality plant-based butter alternative. For the filling, use a flax egg (1 tbsp ground flaxseed + 3 tbsp water per egg) or a commercial egg replacer, and consider using a vegan condensed milk-based lemon filling for a similar creamy texture.
- Add a Touch of Protein or Fruit: Serve these lemon bars with a side of fresh mixed berries for added antioxidants and fiber. A sprinkle of finely chopped pistachios or almonds on top before baking can also add a delightful crunch and a touch of healthy fats.
- Spicy Twist: For a surprisingly delicious kick, add 1/4 teaspoon of ground ginger or a tiny pinch of cayenne pepper to the lemon filling mixture. It complements the tartness beautifully without overpowering it.
- Citrus Swap: Experiment with other citrus fruits! You can use half lime juice and half lemon juice for a Key Lime Pie-like flavor, or even orange juice for a sweeter, milder bar. Adjust sugar to taste if using sweeter fruits.
Nutritional Information
Approximate values per serving (based on 16 servings):
- Calories: 250 kcal
- Protein: 3g
- Carbohydrates: 35g
- Fat: 11g
Please note: These values are approximate and may vary depending on the specific brands and quantities of ingredients used.
Health Benefits
While these are a sweet treat, homemade Gluten-Free Lemon Bars offer some lovely benefits thanks to their key ingredients.
Lemons are superstars when it comes to nutrition. They are an excellent source of Vitamin C, a powerful antioxidant that supports your immune system and helps protect your cells from damage. Vitamin C is also crucial for healthy skin, aiding in collagen production.
Eggs contribute valuable protein, which is essential for muscle repair and growth, and for keeping you feeling full and satisfied. They also contain important vitamins like B12 and D, and minerals like selenium, all vital for overall health.
Choosing a gluten-free flour blend can be beneficial for those with celiac disease or gluten sensitivity, preventing digestive discomfort and other related health issues. Many gluten-free flours are made from whole grains or starches that can offer different nutritional profiles, sometimes including more fiber than traditional refined wheat flour.
Making your lemon bars at home gives you complete control over the ingredients. You can choose high-quality butter and fresh lemons, avoiding artificial flavors, preservatives, and excessive amounts of sugar often found in store-bought desserts. This allows you to enjoy a delicious treat that you know is made with care.
Serving Suggestions
- Serve these bright lemon bars as a refreshing dessert after a hearty meal.
- They make a fantastic addition to a brunch spread or an afternoon tea party.
- Cut into smaller squares for a delightful bite-sized treat at potlucks or picnics.
- For meal prep, bake a batch and store them in the fridge. They’re perfect for a grab-and-go sweet snack throughout the week.
Storage Tips
Store leftover Gluten-Free Lemon Bars in an airtight container in the refrigerator for up to 5-7 days. They taste wonderful chilled! You can also freeze them: wrap individual bars tightly in plastic wrap, then place them in a freezer-safe bag or container for up to 2-3 months. To enjoy, simply thaw them in the refrigerator for a few hours or at room temperature for about 30 minutes. Reheating is not usually necessary or recommended, as they are best served cool.
Conclusion
There you have it – a recipe for truly spectacular Gluten-Free Lemon Bars that are sure to become a new favorite! The combination of the crumbly, buttery crust and the intensely tangy, sweet lemon filling is pure magic. They are simple to make, yet elegant enough to impress anyone.
Don’t let the “gluten-free” label intimidate you; these bars are bursting with flavor and have an amazing texture that everyone will love. Baking them yourself means you get to enjoy a wholesome, homemade treat that’s free from common allergens, without sacrificing an ounce of deliciousness.
So go ahead, give this recipe a try! Whip up a batch for your family, bring them to a gathering, or simply treat yourself. These sunny, zesty squares are guaranteed to bring a smile to every face and a burst of sunshine to any day. Happy baking!


