
Introduction
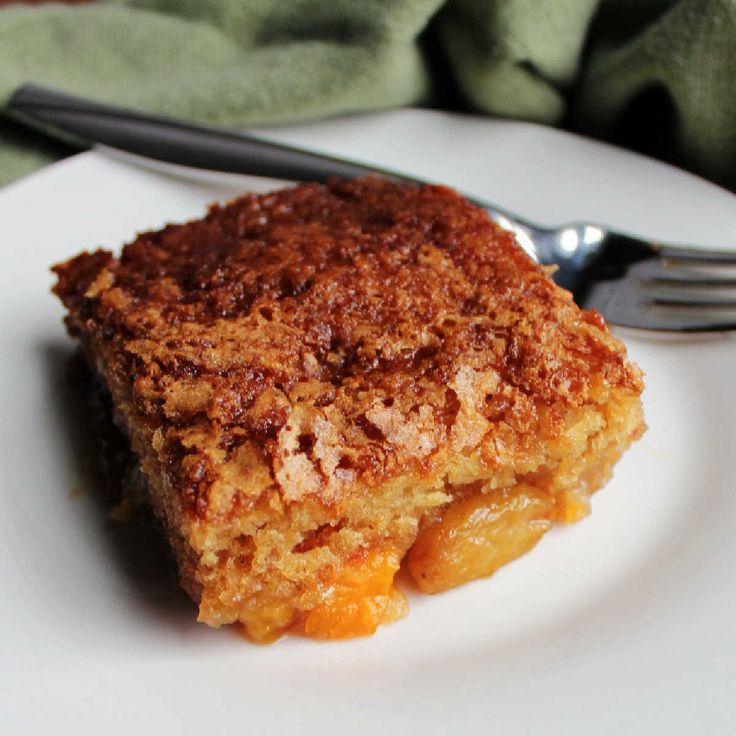
Get ready to discover the easiest, most delightful dessert you’ll ever bake: Cuppa Cuppa Cake! This Southern shortcut is pure magic. It transforms simple pantry staples into a warm, gooey, sweet slice of heaven. Imagine tender fruit bubbling under a golden, buttery cake topping – it’s comfort food at its very best, guaranteed to bring smiles.
What makes Cuppa Cuppa Cake so special? It’s all in the name! It’s a “dump cake” style dessert, meaning you simply “dump” the ingredients into a baking dish. No fancy mixing, no multiple bowls, no complicated steps. It’s incredibly forgiving and perfect for those days when you crave something sweet but are short on time and energy. It comes together in minutes, leaving you more time to enjoy life.
Whether you’re a seasoned baker or just starting your kitchen adventures, this recipe is for you. It’s foolproof, delicious, and utterly satisfying. So, tie on your apron, gather a few basic items, and prepare to be amazed by how effortlessly you can create this beloved Southern treat. Your taste buds will thank you!
Cooking Time & Prep Time
- Prep Time: 10 minutes
- Cooking Time: 45-50 minutes
- Total Time: 55-60 minutes
Small tip: Have all your ingredients measured and ready before you start. This makes assembly even quicker!
Ingredients
This recipe makes 8-10 generous servings.
- 2 cans (15 ounces each) sliced peaches in light syrup, undrained
- 1 box (15.25 ounces) yellow cake mix (standard size)
- 1 cup (2 sticks) unsalted butter, melted
- ½ cup chopped pecans (optional, but highly recommended for a Southern touch)
- 1 teaspoon ground cinnamon (optional, for extra warmth)
- Whipped cream or vanilla ice cream, for serving (optional)
Step-by-Step Instructions
-
Step 1: Preheat and Prepare Your Dish
Preheat your oven to 350°F (175°C). Lightly grease a 9×13-inch baking dish with butter or non-stick cooking spray. This step ensures easy cleanup and prevents sticking.
Small tip: A glass baking dish works wonderfully for this cake, allowing you to see the beautiful bubbling fruit.
-
Step 2: Spread the Peaches
Open both cans of sliced peaches. Pour the peaches and their syrup directly into the prepared baking dish. Spread them out evenly across the bottom of the dish. If you’re using canned fruit in heavy syrup, you might want to drain about half of the syrup for a less sweet result.
Small tip: Don’t drain the peaches completely! The syrup is crucial for creating that wonderful gooey texture and moist cake layer.
-
Step 3: Sprinkle the Cake Mix
Evenly sprinkle the dry yellow cake mix over the peaches. Try to cover the entire surface of the fruit. Do not stir it in! This dry layer will absorb the moisture from the peaches and butter as it bakes, transforming into a delicious cake topping.
Small tip: Use a spoon or your clean hands to gently spread the cake mix to the edges, ensuring complete coverage for an even crust.
-
Step 4: Add the Cinnamon and Pecans (Optional)
If using, sprinkle the ground cinnamon evenly over the dry cake mix. Then, scatter the chopped pecans over the cinnamon. The pecans will toast beautifully in the oven, adding a lovely crunch and nutty flavor.
Small tip: Toast your pecans lightly in a dry pan for a few minutes before adding them to the cake for an even deeper flavor. Let them cool first.
-
Step 5: Pour the Melted Butter
Melt the unsalted butter until it’s fully liquid. Carefully pour the melted butter evenly over the entire surface of the cake mix and pecans. Make sure to cover as much of the dry mix as possible. The butter will soak into the cake mix, creating a rich, golden crust.
Small tip: Don’t worry if there are a few dry spots of cake mix showing. They will usually bake out or add a nice crispy texture.
-
Step 6: Bake to Gooey Perfection
Place the baking dish in your preheated oven. Bake for 45-50 minutes, or until the top is golden brown and the fruit filling is bubbly around the edges. A slight jiggle in the center is okay, as it will firm up a bit as it cools.
Small tip: If the top starts to brown too quickly, you can loosely tent the dish with aluminum foil for the last 10-15 minutes of baking.
-
Step 7: Cool and Serve
Once baked, carefully remove the Cuppa Cuppa Cake from the oven. Let it cool for at least 10-15 minutes before serving. This cooling time allows the gooey fruit to set a little and makes it easier to scoop. Serve warm with a dollop of whipped cream or a scoop of vanilla ice cream for an extra special treat!
Small tip: A warm Cuppa Cuppa Cake with cold ice cream is an absolute delight – the contrast in temperatures and textures is heavenly!
Tips & Variations
- Gluten-Free Option: Easily make this cake gluten-free by simply substituting a gluten-free yellow cake mix. The rest of the recipe remains the same, delivering the same delicious results.
- Vegan/Vegetarian Option: This cake is inherently vegetarian. To make it vegan, choose a vegan-friendly yellow cake mix (check ingredients for milk/eggs) and use a plant-based butter substitute. The peaches are naturally vegan.
- Add More Goodness: While not “vegetables,” you can boost the nutritional value by adding a handful of chia seeds or ground flax seeds to the fruit layer for extra fiber and omega-3s. For more protein, serve with a sprinkle of extra nuts or a dollop of Greek yogurt (if not vegan).
- Spicy Version: For a subtle kick, add a pinch (¼ teaspoon) of cayenne pepper to the cinnamon and fruit layer. The heat will be very mild and will enhance the sweetness and warmth of the spices without overpowering the dessert.
- Flavor Variations: Experiment with different canned fruits! Pineapple chunks, cherry pie filling, or mixed berry pie filling all work wonderfully. You can also add a teaspoon of vanilla extract to the melted butter for an extra layer of flavor.
- Citrus Zest: For a brighter flavor, grate the zest of one orange or lemon over the peaches before adding the cake mix. It adds a lovely aromatic lift to the sweetness.
Nutritional Information
Approximate values per serving (based on 8 servings):
- Calories: 450-500
- Protein: 3-5g
- Carbohydrates: 60-70g
- Fat: 20-25g
Please note: These values are approximate and may vary depending on the specific brands of ingredients used and exact serving sizes.
Health Benefits
While Cuppa Cuppa Cake is a delightful indulgence, it does offer some inherent benefits, mainly from its star fruit ingredient:
- Rich in Fruit: Peaches are a good source of vitamins, particularly Vitamin C, which is an antioxidant important for immune health, and Vitamin A, essential for vision.
- Dietary Fiber: Peaches also provide dietary fiber, which aids in digestion and can contribute to a feeling of fullness. While some fiber is lost in processing, canned peaches still offer this benefit.
- Antioxidants: The natural compounds in peaches, like carotenoids and phenolic compounds, act as antioxidants, helping to protect your body’s cells from damage.
- Mental Well-being: The simple act of baking and enjoying a comforting dessert can significantly boost mood and reduce stress. Food brings joy, and sharing a homemade treat fosters connection and happiness.
Serving Suggestions
- Classic Pairing: Serve warm with a generous scoop of premium vanilla bean ice cream or a dollop of freshly whipped cream. The cold, creamy topping beautifully contrasts the warm, gooey cake.
- Breakfast Treat: Believe it or not, a small portion with a side of plain Greek yogurt makes for a decadent weekend breakfast or brunch item. The yogurt adds a nice tang and protein.
- Dessert Platter: Cut into smaller squares and serve alongside other mini desserts like brownies or cookies for a festive party spread.
Storage Tips
Store any leftover Cuppa Cuppa Cake covered tightly with plastic wrap or in an airtight container in the refrigerator for up to 3-4 days. While it’s best enjoyed fresh and warm, it still tastes great cold. You can freeze individual portions of the cooled cake for up to 1 month. Thaw in the refrigerator overnight. To reheat, warm individual servings in the microwave for 30-60 seconds, or heat the entire dish in an oven preheated to 300°F (150°C) for 15-20 minutes, until heated through and bubbly.
Conclusion
And there you have it – the incredible Cuppa Cuppa Cake! It’s truly a testament to how simple ingredients can create something so profoundly delicious and comforting. This recipe proves that you don’t need to be a pastry chef or spend hours in the kitchen to whip up a dessert that feels utterly gourmet. It’s gooey, sweet, warm, and utterly irresistible.
We encourage you to try this Southern shortcut. It’s the perfect recipe for busy weeknights, last-minute gatherings, or just when you need a little sweet pick-me-up. The joy of pulling a bubbling, golden-brown Cuppa Cuppa Cake from the oven is a special kind of magic that everyone deserves to experience.
So go ahead, give it a try! Share this delightful creation with your family and friends, and watch their faces light up with every spoonful. This Cuppa Cuppa Cake isn’t just a dessert; it’s a warm hug in a dish, bringing a little bit of sweet, gooey heaven right to your table.


