
Introduction
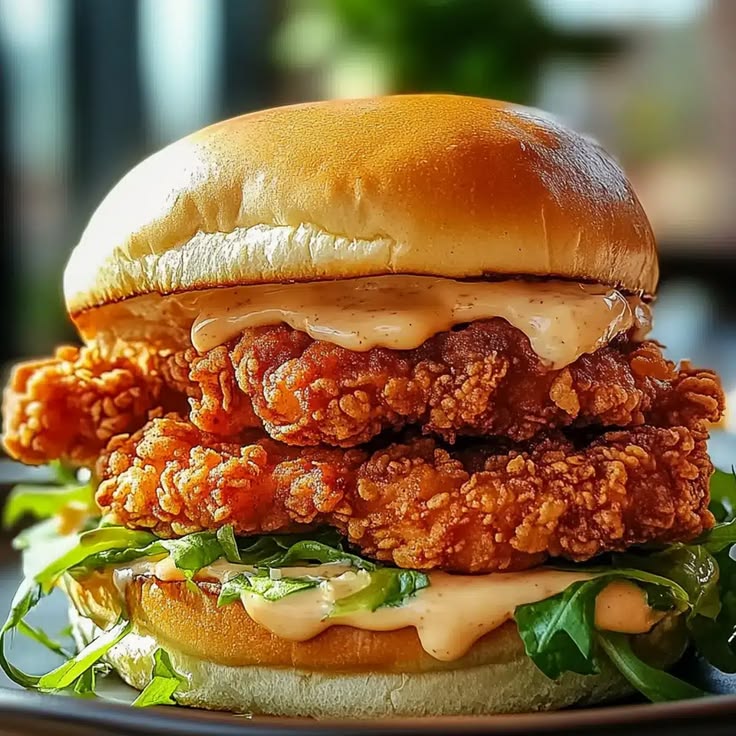
Get ready for the ultimate comfort food experience! Our Crispy Spicy Buttermilk Fried Chicken is a true showstopper. Imagine perfectly juicy chicken, marinated in tangy buttermilk, coated in a seasoned, crunchy crust, and finished with a wonderful spicy kick. Every bite is an explosion of flavor and texture that will make your taste buds sing.
You might think fried chicken is complicated, but this recipe makes it surprisingly simple. The key is a good marinade and a few easy steps. We’ll guide you through creating a restaurant-quality meal right in your own kitchen. It’s a fantastic dish for family dinners or impressing guests, and the preparation is straightforward enough for any home cook.
So, why wait? Grab your apron and prepare to make some magic. This recipe is designed to give you consistently delicious results every time. We promise, once you try this crispy, spicy, and incredibly flavorful fried chicken, it will become a new favorite in your recipe collection. Let’s get cooking!
Cooking Time & Prep Time
- Prep Time: 20 minutes (plus 4-12 hours marinating)
- Cooking Time: 25-30 minutes
- Total Time: 45-50 minutes (plus marinating)
Small tip: The marinating time is crucial for tender, flavorful chicken. Plan ahead and start the process the night before for the best results!
Ingredients
This recipe makes 6-8 servings.
For the Chicken Marinade
- 2.5-3 lbs (about 1.1-1.4 kg) bone-in, skin-on chicken pieces (drumsticks, thighs, wings, breasts cut in half)
- 3 cups (720 ml) buttermilk
- 2 tablespoons hot sauce (like Frank’s RedHot)
- 1 tablespoon salt
- 1 teaspoon black pepper
- 1 teaspoon garlic powder
- 1 teaspoon onion powder
- 1/2 teaspoon cayenne pepper (add more for extra spice)
For the Dry Coating
- 2 cups (240g) all-purpose flour
- 1/2 cup (60g) cornstarch
- 2 tablespoons paprika
- 1 tablespoon salt
- 1 tablespoon black pepper
- 1 tablespoon garlic powder
- 1 tablespoon onion powder
- 1 teaspoon cayenne pepper (adjust to your spice preference)
- 1 teaspoon dried thyme
- 1 teaspoon dried oregano
For Frying
- 6-8 cups (about 1.5-2 liters) vegetable oil, canola oil, or peanut oil, for deep frying
For Serving (Optional)
- Extra hot sauce
- Fresh parsley, chopped, for garnish
Step-by-Step Instructions
-
Step 1: Prepare the Marinade and Chicken
In a large bowl or a sturdy resealable plastic bag, combine the buttermilk, hot sauce, salt, black pepper, garlic powder, onion powder, and cayenne pepper for the marinade. Whisk everything together until well combined. Add the chicken pieces to the marinade, ensuring all pieces are fully submerged. If using a bowl, cover it tightly with plastic wrap.
Small tip: Use a bag for marinating if you want to minimize cleanup and ensure even coating without needing to stir.
-
Step 2: Marinate the Chicken
Place the bowl or bag with the chicken in the refrigerator. Let the chicken marinate for at least 4 hours, but ideally 8-12 hours, or even overnight. This long marinating time is key for tenderizing the chicken and infusing it with flavor.
Small tip: The longer the marination, the more tender and flavorful your chicken will be. Don’t skip this step!
-
Step 3: Prepare the Dry Coating
In a separate large, shallow dish or bowl, whisk together the all-purpose flour, cornstarch, paprika, salt, black pepper, garlic powder, onion powder, cayenne pepper, dried thyme, and dried oregano. Make sure all the spices are evenly distributed throughout the flour mixture. This will be your crispy coating.
Small tip: The cornstarch helps achieve extra crispiness, so don’t leave it out!
-
Step 4: Set Up the Frying Station
Before you start coating, set up your frying station. Place a wire rack over a baking sheet near your stove. This will be for draining the fried chicken. Also, have your prepared dry coating dish ready and the marinated chicken easily accessible.
Small tip: Having everything organized before you start frying makes the process smoother and safer.
-
Step 5: Coat the Chicken
Remove the chicken from the marinade, allowing any excess buttermilk to drip off. Do not rinse the chicken. Dredge each piece thoroughly in the dry coating mixture, pressing firmly to ensure the flour adheres well. You want a thick, shaggy coating. Place the coated chicken pieces on a clean plate or tray, not touching each other.
Small tip: For an extra-crispy crust, let the coated chicken rest for 10-15 minutes before frying. This allows the coating to adhere better.
-
Step 6: Heat the Oil
Pour the frying oil into a large, heavy-bottomed pot or Dutch oven. The oil should be at least 3-4 inches deep. Heat the oil over medium-high heat until it reaches 350°F (175°C). Use a deep-fry thermometer to monitor the temperature accurately.
Small tip: If you don’t have a thermometer, you can test the oil by dropping a pinch of flour in. If it sizzles immediately, the oil is ready.
-
Step 7: Fry the Chicken
Carefully lower 3-4 pieces of coated chicken into the hot oil, making sure not to overcrowd the pot. Overcrowding will lower the oil temperature and result in greasy, less crispy chicken. Fry for about 6-8 minutes per side, turning occasionally, until the chicken is golden brown and cooked through. The internal temperature should reach 165°F (74°C).
Small tip: Adjust the heat as needed to maintain a consistent oil temperature of 325-350°F (160-175°C) throughout the frying process.
-
Step 8: Rest the Chicken
Once cooked, carefully remove the chicken from the oil using tongs and place it on the wire rack over the baking sheet to drain excess oil. Sprinkle lightly with a pinch of salt if desired. Repeat with the remaining chicken, ensuring the oil returns to temperature between batches.
Small tip: Resting allows the crust to stay crispy and prevents the chicken from getting soggy.
-
Step 9: Serve
Serve your Crispy Spicy Buttermilk Fried Chicken hot and fresh! Garnish with chopped fresh parsley, if you like. It’s delicious on its own or with your favorite side dishes. Enjoy every glorious, crunchy bite!
Small tip: Offer extra hot sauce on the side for those who love an even bigger kick!
Tips & Variations
- Gluten-Free Option: Simply substitute the all-purpose flour with a 1:1 gluten-free flour blend. Ensure your spices are also gluten-free.
- Vegan/Vegetarian Option: This recipe can be adapted! Use large slices of cauliflower, oyster mushrooms, or plant-based chicken pieces instead of regular chicken. Marinate and coat them the same way, then fry until golden and crispy.
- Add More Vegetables or Protein: Serve your fried chicken alongside a fresh green salad, steamed green beans, or a vibrant coleslaw for a balanced meal. You can also fry chicken breast tenders for a quicker cooking option.
- Spicier Version: For an extra fiery kick, double the amount of cayenne pepper in both the marinade and the dry coating. You can also add a pinch of chili flakes to the coating or drizzle with an extra-spicy hot sauce after frying.
- Herbaceous Twist: Experiment with different dried herbs in the coating, such as rosemary or sage, for a different aromatic profile. A little zest from a lemon in the marinade can also brighten the flavors.
Nutritional Information
Approximate values per serving (based on 6 servings, using a mix of dark and white meat):
- Calories: 650-750 kcal
- Protein: 40-45g
- Carbohydrates: 35-40g
- Fat: 40-50g
Note: Nutritional values may vary significantly depending on the specific chicken pieces used (skin on/off, bone-in/out), the exact amount of oil absorbed during frying, and brands of ingredients.
Health Benefits
While fried chicken is a treat, its main ingredients offer some valuable nutrients.
- Chicken: A fantastic source of lean protein, essential for muscle repair, growth, and overall body function. It also provides important B vitamins (like B6 and B12) which are vital for energy metabolism and nervous system health.
- Buttermilk: This tangy dairy product contains probiotics, beneficial bacteria that support gut health and digestion. It’s also a good source of calcium, important for strong bones and teeth, and riboflavin, another B vitamin.
- Spices (Paprika, Cayenne, Garlic, Onion, Thyme, Oregano): These aren’t just for flavor! Paprika is rich in antioxidants. Cayenne pepper contains capsaicin, which has been studied for its metabolism-boosting and pain-relieving properties. Garlic and onion powders offer compounds known for their potential immune-boosting and anti-inflammatory effects. Thyme and oregano are also packed with antioxidants.
Enjoying this dish in moderation as part of a balanced diet allows you to savor the flavors while still benefiting from these wholesome ingredients.
Serving Suggestions
- Classic Sides: This fried chicken pairs perfectly with creamy mashed potatoes, tangy coleslaw, warm cornbread, or a comforting mac and cheese.
- Fresh & Light: Balance the richness with a crisp green salad tossed in a light vinaigrette or some steamed seasonal vegetables.
- Picnic Perfect: Pack it up for a picnic or a backyard barbecue! It tastes great at room temperature too.
- Sandwich Star: Shred leftover chicken and make delicious fried chicken sandwiches with pickles and a spicy mayo.
Storage Tips
Leftover fried chicken can be stored in an airtight container in the refrigerator for 3-4 days. For longer storage, you can freeze individual pieces for up to 3 months. To reheat, place the chicken on a wire rack over a baking sheet in a preheated oven at 375°F (190°C) for 15-20 minutes, or until heated through and crispy again. Avoid the microwave if you want to retain that lovely crispy texture!
Conclusion
There you have it – your guide to making the most incredible Crispy Spicy Buttermilk Fried Chicken! This dish is truly a labor of love, but every step is worth the effort. The juicy interior, the perfectly seasoned crunch, and that delightful spicy kick make it an unforgettable meal that everyone will rave about.
Don’t be intimidated by deep frying; with a little care and attention, you’ll master it in no time. The reward of sinking your teeth into a piece of homemade fried chicken that’s better than anything you can buy is immense. You’ll feel like a true culinary hero!
So go ahead, gather your ingredients, follow these steps, and create some delicious memories. Share this fantastic fried chicken with your family and friends, and watch their faces light up with pure joy. Happy cooking, and enjoy every single bite!


