
Introduction
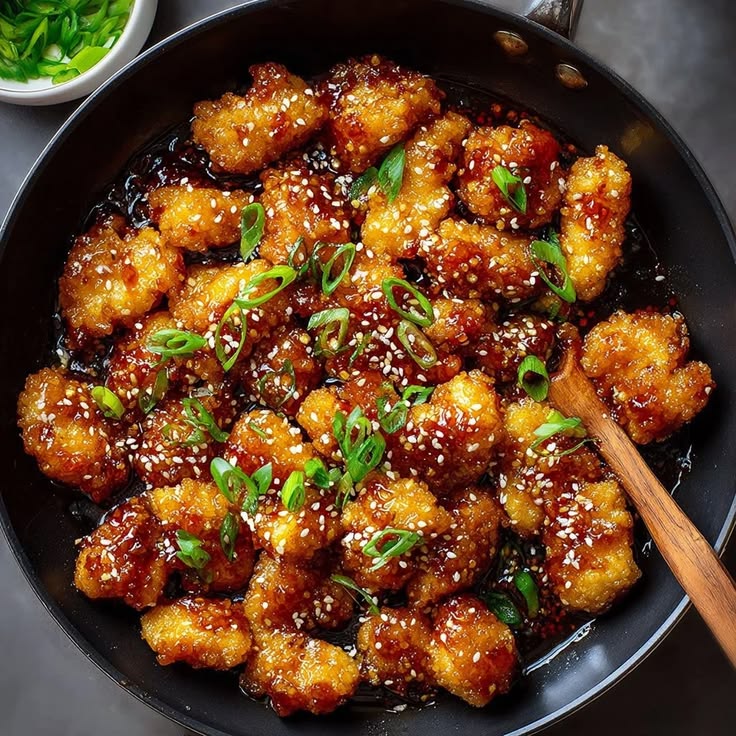
Get ready for a truly irresistible meal! Today, we’re diving into the wonderful world of Crispy Honey Garlic Chicken. Imagine tender, juicy chicken pieces, coated in a light, crispy crust, all drenched in a sticky, sweet, and savory honey garlic sauce. It’s a flavor explosion that will make your taste buds sing!
This dish might sound fancy, but it’s incredibly easy to make right in your own kitchen. We’ll use simple ingredients and straightforward steps to achieve restaurant-quality results. It’s perfect for a weeknight dinner when you want something special without spending hours slaving over the stove. Plus, it comes together quicker than you might think!
So, whether you’re a seasoned chef or just starting your cooking journey, this Crispy Honey Garlic Chicken recipe is for you. Gather your ingredients, put on your apron, and let’s create some magic. Your family and friends will absolutely love this one, and you’ll be proud to serve it!
Cooking Time & Prep Time
- Prep Time: 20 minutes
- Cooking Time: 25 minutes
- Total Time: 45 minutes
Small tip: To save time, you can chop your chicken and measure out all sauce ingredients while your oil is heating up.
Ingredients
This recipe makes 4 generous servings.
- For the Chicken:
- 1.5 lbs boneless, skinless chicken thighs or breasts, cut into 1-inch pieces
- 1/2 cup all-purpose flour
- 1/4 cup cornstarch
- 1 teaspoon salt
- 1/2 teaspoon black pepper
- 1/2 teaspoon garlic powder
- 1/4 teaspoon paprika
- 2 large eggs, beaten
- 2 cups vegetable oil (or other neutral oil) for frying
- For the Honey Garlic Sauce:
- 1/2 cup honey
- 1/4 cup soy sauce (low sodium preferred)
- 2 tablespoons rice vinegar
- 1 tablespoon brown sugar (packed)
- 1 tablespoon sesame oil
- 4 cloves garlic, minced
- 1 teaspoon fresh ginger, grated
- 1 tablespoon cornstarch
- 2 tablespoons cold water
- For the Garnish (Optional):
- 1 tablespoon sesame seeds
- 2 tablespoons chopped green onions
Step-by-Step Instructions
-
Step 1: Prepare the Chicken Coating
In a shallow dish, whisk together the flour, cornstarch, salt, black pepper, garlic powder, and paprika. In another shallow dish, beat the two eggs until well combined. Pat your chicken pieces dry with paper towels. This helps the coating stick better.
Small tip: Drying the chicken ensures a crispier coating. Don’t skip this step!
-
Step 2: Coat the Chicken
Dip each chicken piece first into the beaten eggs, letting any excess drip off. Then, dredge it thoroughly in the flour mixture, ensuring it’s fully coated. Place the coated chicken on a clean plate or wire rack. Repeat with all chicken pieces.
Small tip: For extra crispy chicken, you can double-coat by dipping it in egg and flour again.
-
Step 3: Heat the Oil
Pour the vegetable oil into a large, heavy-bottomed skillet or Dutch oven. Heat the oil over medium-high heat until it reaches 350-375°F (175-190°C). If you don’t have a thermometer, a small piece of chicken coating should sizzle immediately when dropped in.
Small tip: Use enough oil so the chicken pieces are at least partially submerged for even cooking.
-
Step 4: Fry the Chicken
Carefully add the coated chicken pieces to the hot oil in batches. Do not overcrowd the pan, as this will lower the oil temperature and make the chicken less crispy. Fry for 4-6 minutes per batch, turning occasionally, until golden brown and cooked through. The internal temperature should reach 165°F (74°C).
Small tip: Fry in batches to maintain a consistent oil temperature and achieve maximum crispiness.
-
Step 5: Drain the Chicken
Once cooked, use a slotted spoon or tongs to remove the chicken from the oil. Place the fried chicken on a wire rack set over a baking sheet lined with paper towels. This allows excess oil to drain off and keeps the chicken crispy.
Small tip: Keep the chicken warm in a low oven (around 200°F/95°C) while you fry the remaining batches.
-
Step 6: Prepare the Honey Garlic Sauce
While the chicken is frying, whisk together the honey, soy sauce, rice vinegar, brown sugar, sesame oil, minced garlic, and grated ginger in a medium bowl. In a separate small bowl, combine the cornstarch and cold water to create a slurry. Set aside.
Small tip: Use fresh ginger and garlic for the best flavor in your sauce!
-
Step 7: Cook the Sauce
Once all chicken is fried and drained, carefully pour out most of the oil from the skillet, leaving about 1 tablespoon. Return the skillet to medium heat. Pour in the honey garlic sauce mixture. Bring it to a gentle simmer, stirring occasionally.
Small tip: Be careful when handling hot oil. If unsure, let it cool slightly before pouring.
-
Step 8: Thicken and Combine
Once the sauce is simmering, give the cornstarch slurry a quick stir and slowly pour it into the simmering sauce while whisking constantly. Continue to whisk until the sauce thickens to your desired consistency, usually 1-2 minutes. It should be thick enough to coat a spoon.
Small tip: If the sauce gets too thick, add a tablespoon of water at a time until it reaches the right consistency.
-
Step 9: Toss the Chicken
Add the crispy fried chicken pieces directly into the thickened honey garlic sauce. Toss gently to coat every piece evenly. Make sure each piece is beautifully glazed with the sticky, flavorful sauce.
Small tip: Serve immediately after tossing for the crispiest texture!
-
Step 10: Garnish and Serve
Transfer the Crispy Honey Garlic Chicken to a serving platter. Garnish with a sprinkle of sesame seeds and fresh chopped green onions, if desired. Serve hot and enjoy the incredible flavors!
Small tip: A sprinkle of red pepper flakes can add a little kick if you like heat!
Tips & Variations
- Gluten-Free Option: Easily make this recipe gluten-free by substituting the all-purpose flour with a gluten-free all-purpose flour blend. Ensure your soy sauce is gluten-free (look for Tamari) and double-check all other ingredient labels.
- Vegan/Vegetarian Option: This dish is fantastic with plant-based alternatives! Replace the chicken with firm tofu or tempeh, cut into cubes. Press the tofu well to remove excess water before coating and frying. You can also use cauliflower florets for a delicious “Crispy Honey Garlic Cauliflower.”
- Add More Vegetables or Protein: Boost your meal by adding steamed broccoli, snap peas, or bell peppers to the sauce in the last minute of cooking, just before tossing the chicken. You could also stir in some edamame for extra protein.
- Spicy Version: For a delightful kick, add 1/2 to 1 teaspoon of red pepper flakes to the sauce mixture. You can also drizzle a bit of Sriracha over the finished dish. Adjust to your preferred level of heat!
- Flavor Boost: A squeeze of fresh lime juice over the finished dish can brighten the flavors beautifully. For an extra umami punch, add a tiny splash of fish sauce (about 1/2 teaspoon) to the sauce.
Nutritional Information
Approximate values per serving (based on 4 servings):
- Calories: 620
- Protein: 35g
- Carbohydrates: 55g
- Fat: 30g
Please note: Nutritional values are approximate and may vary depending on specific ingredients used, brands, and cooking methods. This calculation does not account for all the oil absorbed during frying.
Health Benefits
This Crispy Honey Garlic Chicken, while being a delicious treat, offers several nutritional benefits from its key ingredients.
Chicken, especially lean chicken breast, is an excellent source of high-quality protein. Protein is vital for building and repairing tissues, making enzymes and hormones, and supporting overall muscle health. It also helps you feel full and satisfied, which can aid in weight management.
Garlic is a powerhouse of flavor and health benefits. It’s known for its immune-boosting properties and contains compounds like allicin, which have been studied for their potential to reduce blood pressure and cholesterol levels. Ginger, another key ingredient, is a potent anti-inflammatory and antioxidant, often used to aid digestion and relieve nausea.
Soy sauce, when chosen low-sodium, can contribute to flavor without excessive salt. Honey provides natural sweetness and contains antioxidants, along with trace amounts of vitamins and minerals. While it’s a sugar, it’s a less processed option compared to refined sugars.
Incorporating dishes like this, alongside plenty of vegetables, can be part of a balanced diet. The combination of protein, healthy fats (from the cooking oil), and complex carbohydrates (if served with rice) provides sustained energy.
Serving Suggestions
- Serve over a bed of fluffy white or brown rice to soak up all that delicious sauce.
- Pair with a side of steamed or roasted vegetables like broccoli, green beans, or asparagus for a balanced meal.
- Create a quick and easy stir-fry by adding some sautéed bell peppers, carrots, and snap peas to the dish just before serving.
- Use it as a filling for lettuce wraps for a lighter, refreshing meal.
- For meal prep, portion out the chicken and rice into individual containers for quick lunches throughout the week.
Storage Tips: Leftovers can be stored in an airtight container in the refrigerator for up to 3-4 days. While you can freeze the cooked chicken, the texture might change slightly after thawing and reheating, becoming less crispy. To reheat, warm gently in a skillet over medium-low heat or in the microwave until heated through. For best crispiness, reheat in an oven or air fryer.
Conclusion
And there you have it – your very own batch of incredibly delicious Crispy Honey Garlic Chicken! This dish truly delivers on flavor, texture, and pure comfort. The perfect balance of sweet, savory, and a little tang, all coating perfectly crispy chicken, makes it a guaranteed crowd-pleaser.
It’s amazing how quickly you can transform simple ingredients into something so spectacular. This recipe proves that you don’t need a gourmet kitchen or extensive skills to create memorable meals. Just a little time and a lot of love!
So, go ahead and give this recipe a try. Share it with your family, invite some friends over, or simply treat yourself to a fantastic meal. We’re confident that this Crispy Honey Garlic Chicken will become a beloved staple in your recipe rotation. Happy cooking!


