
Introduction
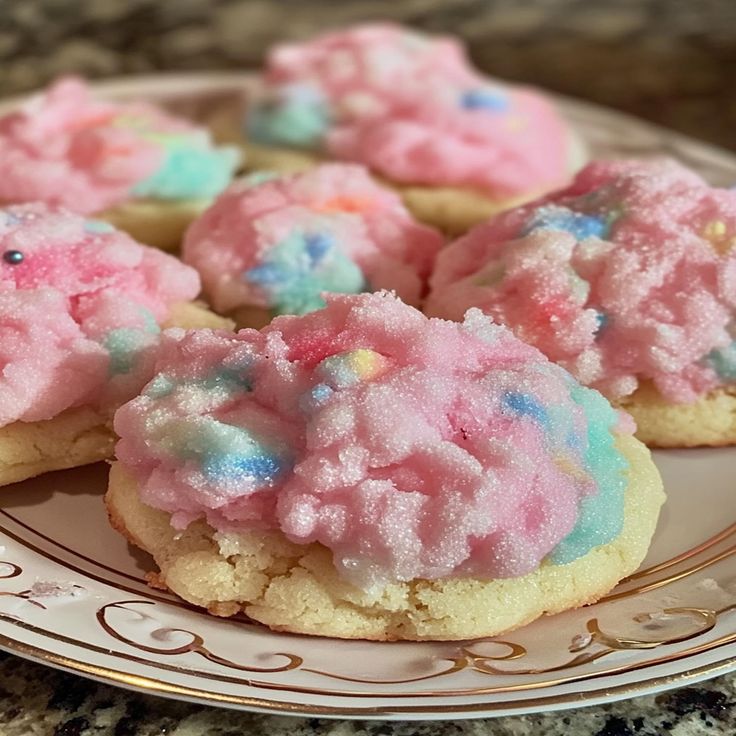
Get ready to unleash a burst of pure joy with our incredible Cotton Candy Cookies! These delightful treats capture all the whimsy and sweetness of your favorite carnival snack in a soft, chewy cookie form. Imagine tender sugar cookies, infused with a delicate cotton candy flavor, and swirled with vibrant, magical colors. They don’t just taste amazing; they look absolutely enchanting!
You might think something this beautiful and delicious would be complicated to make, but you’d be wrong! Our recipe uses a straightforward sugar cookie base, making it surprisingly easy and quick to whip up. With just a few simple ingredients and a fun coloring technique, you’ll have a batch of these magical cookies ready to dazzle in no time. It’s a perfect baking project for beginners and seasoned pros alike.
So, whether you’re looking for a show-stopping dessert for a party, a special treat for the kids, or just want to bring a little extra sweetness into your day, these Cotton Candy Cookies are your answer. Prepare to fill your kitchen with the irresistible aroma of sugary dreams and create some truly unforgettable edible art. Let’s bake some magic today!
Cooking Time & Prep Time
- Prep Time: 25 minutes
- Chill Time: 30 minutes
- Cooking Time: 10-12 minutes (per batch)
- Total Time: Approximately 65-70 minutes (excluding chill time for multiple batches)
Small tip: The chill time for the dough is crucial! It helps prevent the cookies from spreading too much and ensures a perfectly chewy texture. Don’t skip it!
Ingredients
This recipe makes approximately 24 delightful cookies.
For the Cotton Candy Cookies:
- 2 ½ cups (300g) all-purpose flour
- 1 teaspoon baking powder
- ½ teaspoon salt
- 1 cup (226g) unsalted butter, softened
- 1 ½ cups (300g) granulated sugar
- 1 large egg
- 1 teaspoon vanilla extract
- 1 teaspoon cotton candy extract
- Pink gel food coloring
- Blue gel food coloring
- Purple gel food coloring
Optional Decorations:
- Rainbow sprinkles
- Extra cotton candy for garnish (add just before serving)
Step-by-Step Instructions
-
Preheat Oven & Prepare Dry Ingredients
Start by preheating your oven to 375°F (190°C). Line two baking sheets with parchment paper or silicone mats. In a medium bowl, whisk together the all-purpose flour, baking powder, and salt. Set this aside for a moment.
Small tip: Parchment paper makes cleanup a breeze and prevents sticking.
-
Cream Butter and Sugar
In a large bowl, using an electric mixer, cream together the softened unsalted butter and granulated sugar until the mixture is light and fluffy. This usually takes about 2-3 minutes. Scrape down the sides of the bowl as needed to ensure everything is well combined.
Small tip: Ensure your butter is truly softened, not melted, for the best creamy texture.
-
Add Wet Ingredients
Beat in the large egg until it is fully incorporated into the butter and sugar mixture. Then, add the vanilla extract and the cotton candy extract. Mix until just combined. The cotton candy extract is where the magic begins!
Small tip: Don’t overmix after adding the egg; just combine until smooth.
-
Combine Wet and Dry Ingredients
Gradually add the dry flour mixture to the wet ingredients, mixing on low speed until a soft dough forms. Be careful not to overmix the dough, as this can make the cookies tough. Stop mixing as soon as no dry streaks of flour remain.
Small tip: Overmixing develops gluten, which can lead to a less tender cookie.
-
Divide and Color Dough
Divide the cookie dough into three equal portions. Place each portion into a separate bowl. Add a few drops of pink gel food coloring to one bowl, blue to another, and purple to the third. Mix each portion gently until the color is evenly distributed. You can use a spoon or wear gloves to mix by hand.
Small tip: Gel food coloring provides more vibrant colors without thinning the dough.
-
Swirl and Shape
Take small, roughly equal pieces from each colored dough (about ½ tablespoon of each color). Gently press them together and lightly roll them into a ball, about 1 ½ inches in diameter. The goal is a marbled, swirled effect, not a fully blended color. Place the dough balls onto your prepared baking sheets, leaving about 2 inches between each cookie. Gently flatten each ball slightly with the palm of your hand. If desired, sprinkle with rainbow sprinkles now.
Small tip: Don’t overwork the dough when swirling; a light touch creates beautiful marbling.
-
Chill the Dough
Once all your cookies are shaped and placed on the baking sheets, transfer the baking sheets to the refrigerator. Chill the dough for at least 30 minutes. This step is essential for the cookies to hold their shape and achieve the perfect texture.
Small tip: Chilling prevents excessive spreading in the oven, ensuring thicker, chewier cookies.
-
Bake the Magic
Bake the chilled cookies for 10-12 minutes, or until the edges are lightly golden and the centers are set. They will still look soft in the middle, but will firm up as they cool. Avoid overbaking to keep them soft and chewy.
Small tip: For even baking, rotate your baking sheets halfway through the cooking time.
-
Cool and Enjoy
Once baked, remove the cookies from the oven and let them cool on the baking sheets for 5 minutes. Then, carefully transfer them to a wire rack to cool completely. Enjoy these magical cookies with a glass of milk or your favorite beverage!
Small tip: Cooling on the baking sheet briefly helps prevent them from breaking when transferred.
Tips & Variations
- Gluten-Free Option: Easily make these cookies gluten-free by swapping the all-purpose flour for a 1:1 gluten-free baking flour blend. Ensure your chosen blend contains xanthan gum for best results.
- Vegan Option: For a delicious vegan version, use plant-based butter (like a stick vegan butter) and a flax egg (1 tablespoon ground flaxseed mixed with 3 tablespoons water, let sit for 5 minutes to thicken) instead of a regular egg.
- Add More Protein: While these are sweet treats, you could experiment by replacing 1/4 cup of the flour with unflavored or vanilla protein powder for a slight protein boost. Be aware that this might slightly alter the texture.
- Spicy Twist: For an unexpected flavor adventure, add a tiny pinch (1/8 teaspoon) of cayenne pepper or chili powder to the dry ingredients. The subtle heat will create a fascinating contrast with the sweet cotton candy flavor.
- Flavor Fun: Experiment with other extracts! Try birthday cake, strawberry, or even bubblegum extract for different playful flavors. You can also mix in white chocolate chips for an extra layer of sweetness and texture.
Nutritional Information
Approximate values per serving (based on 24 servings):
- Calories: 180 kcal
- Protein: 2g
- Carbohydrates: 28g
- Fat: 8g
Note: These values are estimates and may vary depending on the specific brands and exact amounts of ingredients used.
Health Benefits
While Cotton Candy Cookies are undeniably a sweet treat, there are some underlying benefits from their core ingredients, especially when made at home.
The main ingredient, flour, provides carbohydrates, which are our body’s primary source of energy. Choosing to bake at home means you control the quality of your ingredients, avoiding many of the artificial preservatives and high-fructose corn syrup often found in store-bought cookies.
Eggs are a fantastic source of high-quality protein, essential for muscle repair and growth. They also contain important vitamins like B12, vitamin D, and choline, which supports brain health. Even in a cookie, these nutrients contribute to the overall nutritional profile.
Butter, when consumed in moderation, provides fat-soluble vitamins such as A, E, and K2. These vitamins play crucial roles in vision, immune function, and bone health. Opting for good quality unsalted butter can make a difference.
Beyond the nutritional aspects, baking and sharing homemade treats can have wonderful psychological benefits. The act of creating something delicious can be a stress reliever, and sharing these vibrant cookies with loved ones fosters connection and joy. Sometimes, a little bit of happiness is the best medicine!
Serving Suggestions
- Serve these magical cookies with a tall, cold glass of milk for the ultimate classic treat.
- They make a fantastic dessert for parties, birthdays, or baby showers. Arrange them on a platter for a stunning visual display.
- For an extra special dessert, serve them alongside a scoop of vanilla bean ice cream, allowing the cookie’s flavors to melt into the creamy goodness.
- These cookies are primarily a dessert or a sweet snack. They are perfect as a delightful finish to any meal or as a pick-me-up during the day.
- They are excellent for meal prep! Bake a batch on the weekend and store them for delicious lunchbox treats or after-school snacks throughout the week.
Storage Tips
Store your Cotton Candy Cookies in an airtight container at room temperature for up to 3-5 days. To extend their freshness, you can freeze the baked cookies for up to 3 months. Wrap them individually in plastic wrap, then place them in a freezer-safe bag or container. To reheat, simply let them thaw at room temperature, or warm them briefly in a microwave for 10-15 seconds for a soft, fresh-baked feel. They are also delicious enjoyed at room


