
Introduction
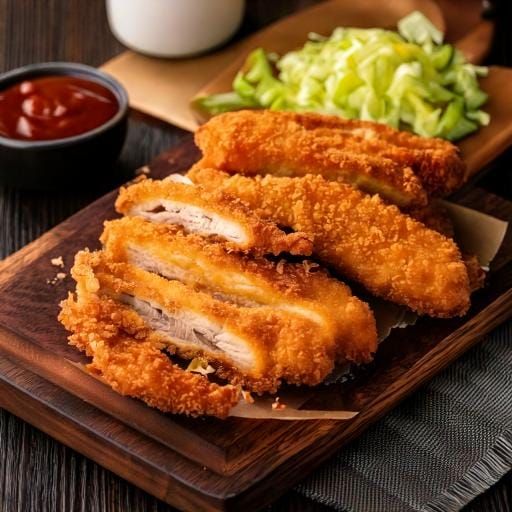
Get ready to discover your new favorite snack or meal: Chicken Katsu Musubi! This delightful dish brings together crispy, golden-fried chicken katsu, fluffy seasoned rice, and a sweet-savory sauce, all wrapped in a neat package of nori seaweed. It’s a wonderful fusion of Hawaiian and Japanese flavors, creating a bite-sized piece of comfort that’s incredibly satisfying and utterly delicious.
You might think making something so appealing would be complicated, but it’s actually quite straightforward! We break down each step, making it easy for even beginner cooks to achieve perfect results. With a few simple ingredients and a little bit of love, you can create these portable, flavor-packed treats in your own kitchen. They are fantastic for lunchboxes, picnics, or a quick, delicious dinner.
So, why wait? Dive into this recipe and experience the joy of homemade Chicken Katsu Musubi. Your taste buds will thank you, and your friends and family will be asking for more! Let’s get cooking and bring some aloha spirit to your table.
Cooking Time & Prep Time
- Prep Time: 35 minutes
- Cooking Time: 25 minutes
- Total Time: 60 minutes
Small tip: To save time, you can cook the rice while you prepare the chicken, or even cook the rice a day ahead and store it in the fridge.
Ingredients
This recipe makes 4 generous servings.
For the Chicken Katsu
- 2 boneless, skinless chicken breasts (about 1 lb total)
- 1/2 cup all-purpose flour
- 2 large eggs, beaten
- 1 1/2 cups panko breadcrumbs
- 1/2 teaspoon salt
- 1/4 teaspoon black pepper
- 3-4 cups vegetable oil, for frying
For the Katsu Sauce
- 1/4 cup soy sauce (low sodium preferred)
- 2 tablespoons granulated sugar
- 2 tablespoons mirin (sweet rice wine)
- 1 tablespoon sake (optional, for deeper flavor)
- 1/4 cup water
- 1 teaspoon cornstarch mixed with 1 tablespoon cold water (cornstarch slurry)
For the Seasoned Rice
- 2 cups uncooked short-grain sushi rice
- 2 cups water
- 2 tablespoons rice vinegar
- 1 tablespoon granulated sugar
- 1/2 teaspoon salt
For Assembly
- 4 sheets nori (dried seaweed), cut lengthwise into thirds (you’ll need 12 strips total)
- 1 musubi mold (optional, but highly recommended for perfect shape)
Step-by-Step Instructions
-
Step 1: Cook the Rice
Rinse the short-grain sushi rice under cold water until the water runs clear. This removes excess starch. Combine the rinsed rice and 2 cups of water in a medium saucepan. Bring to a boil, then reduce heat to low, cover, and simmer for 15 minutes. Remove from heat and let stand, covered, for another 10 minutes. Do not lift the lid.
Small tip: While the rice cooks, prepare the seasoning. In a small bowl, whisk together the rice vinegar, sugar, and salt until dissolved.
-
Step 2: Prepare the Chicken
Place each chicken breast between two sheets of plastic wrap. Using a meat mallet or a heavy pan, pound the chicken until it is about 1/2 inch thick. This ensures even cooking and tenderness. Season both sides of the pounded chicken with salt and pepper.
Small tip: Pounding the chicken uniformly helps it cook quickly and evenly, preventing dry spots.
-
Step 3: Bread the Chicken Katsu
Set up a breading station. Place the flour in one shallow dish, the beaten eggs in a second, and the panko breadcrumbs in a third. Dredge each chicken breast in the flour, shaking off any excess. Dip it into the beaten egg, allowing any extra to drip off. Finally, press the chicken firmly into the panko breadcrumbs, ensuring it’s fully coated. Repeat for the second chicken breast.
Small tip: Pressing the panko firmly helps create a thick, crispy crust that won’t fall off during frying.
-
Step 4: Fry the Chicken Katsu
Heat 3-4 cups of vegetable oil in a large, deep skillet or Dutch oven over medium-high heat to 350-375°F (175-190°C). Carefully place one breaded chicken breast into the hot oil. Fry for 4-6 minutes per side, or until golden brown and cooked through (internal temperature of 165°F/74°C). Remove the chicken and place it on a wire rack set over a paper towel-lined baking sheet to drain excess oil. Repeat with the second chicken breast.
Small tip: Do not overcrowd the pan; fry one piece of chicken at a time to maintain oil temperature and ensure even crispiness.
-
Step 5: Make the Katsu Sauce
In a small saucepan, combine the soy sauce, sugar, mirin, sake (if using), and 1/4 cup water. Bring to a gentle simmer over medium heat, stirring until the sugar dissolves. Whisk in the cornstarch slurry and continue to stir until the sauce thickens to your desired consistency, about 1-2 minutes. Remove from heat.
Small tip: If the sauce becomes too thick, add a tiny splash of water. If it’s too thin, make a little more slurry and whisk it in.
-
Step 6: Season the Rice and Slice the Chicken
Once the cooked rice has rested, transfer it to a large bowl. Pour the prepared rice vinegar mixture over the hot rice and gently fold it in with a rice paddle or spoon until evenly coated. Let it cool slightly. Slice the fried chicken katsu into strips, about 1/2 to 3/4 inch wide.
Small tip: Use a sharp knife for clean slices of katsu. Don’t press too hard, or you’ll crush the crispy coating.
-
Step 7: Assemble the Musubi
Lay one strip of nori seaweed on a clean surface. Place the musubi mold in the center of the nori. Fill the mold with about 1/4 to 1/3 cup of seasoned rice, pressing it down firmly with the mold’s press. Lay a few slices of chicken katsu on top of the rice, then drizzle generously with the katsu sauce. Add a second layer of rice, pressing firmly again. Remove the mold, then wrap the ends of the nori strip up and over the rice and chicken, sealing with a tiny bit of water if needed. Repeat for the remaining musubi.
Small tip: If you don’t have a musubi mold, you can use a clean, empty spam can lined with plastic wrap.
Tips & Variations
- Gluten-Free Option: Use gluten-free panko breadcrumbs and tamari (gluten-free soy sauce) for the sauce. Ensure your flour is also gluten-free.
- Vegan/Vegetarian Option: Replace chicken with thick slices of firm tofu, eggplant, or portobello mushrooms. Bread and fry them just like the katsu. Adjust sauce to be vegan (ensure mirin is vegan-friendly).
- Add More Vegetables or Protein: For extra freshness, add a thin slice of avocado or cucumber on top of the katsu before the second layer of rice. A fried egg can also be a delicious addition!
- Spicy Version: Stir a teaspoon of sriracha or a pinch of chili flakes into your katsu sauce for a fiery kick. You can also drizzle sriracha mayo on top of the chicken before wrapping.
- Flavor Boosters: Sprinkle some furikake (Japanese rice seasoning) on top of the rice layers for added texture and umami. A dash of toasted sesame seeds also works wonders.
Nutritional Information
Approximate values per serving (based on 4 servings):
- Calories: 580 kcal
- Protein: 35 g
- Carbohydrates: 65 g
- Fat: 22 g
Note: These values are approximate and may vary depending on specific ingredients used, cooking oil, and portion sizes.
Health Benefits
Chicken Katsu Musubi offers more than just incredible flavor; it provides some great health benefits too!
Chicken Breast: A lean source of protein, chicken breast is essential for muscle repair and growth. It’s also packed with B vitamins like niacin and B6, which are crucial for energy metabolism and nervous system health.
Rice: Short-grain rice provides complex carbohydrates, which are your body’s primary source of energy. It helps keep you feeling full and energized throughout the day. Opting for brown rice could add more fiber, though it changes the traditional texture.
Nori Seaweed: This thin, green wrapper is a nutritional powerhouse! Nori is rich in iodine, which is vital for thyroid function. It also contains vitamins A, C, and E, as well as minerals like calcium and iron, contributing to overall well-being and bone health.
While the frying adds calories, the combination of protein, carbohydrates, and essential nutrients makes Chicken Katsu Musubi a relatively balanced and satisfying meal. Enjoying it in moderation is key to a healthy diet!
Serving Suggestions
- As a Main Dish: Chicken Katsu Musubi is hearty enough to be a standalone meal, perfect for lunch or a casual dinner.
- With a Side: Pair it with a light, refreshing side like a simple cucumber salad, a bowl of miso soup, or some quick pickled ginger to cut through the richness.
- Picnic or Lunchbox Star: Its portable nature makes it ideal for packed lunches, picnics, or road trips. They hold up well and are easy to eat on the go.
- Party Appetizer: Cut each musubi into 2-3 smaller pieces for a fantastic finger food at gatherings.
Storage Tips
Store leftover Chicken Katsu Musubi in an airtight container in the refrigerator for up to 2-3 days. While it can be eaten cold, for best results, gently reheat in the microwave for 30-60 seconds until warmed through. Be careful not to overheat, as the rice can become dry and the nori can get tough. Freezing is not recommended as the rice texture and nori can become unpleasant after thawing.


