
Introduction
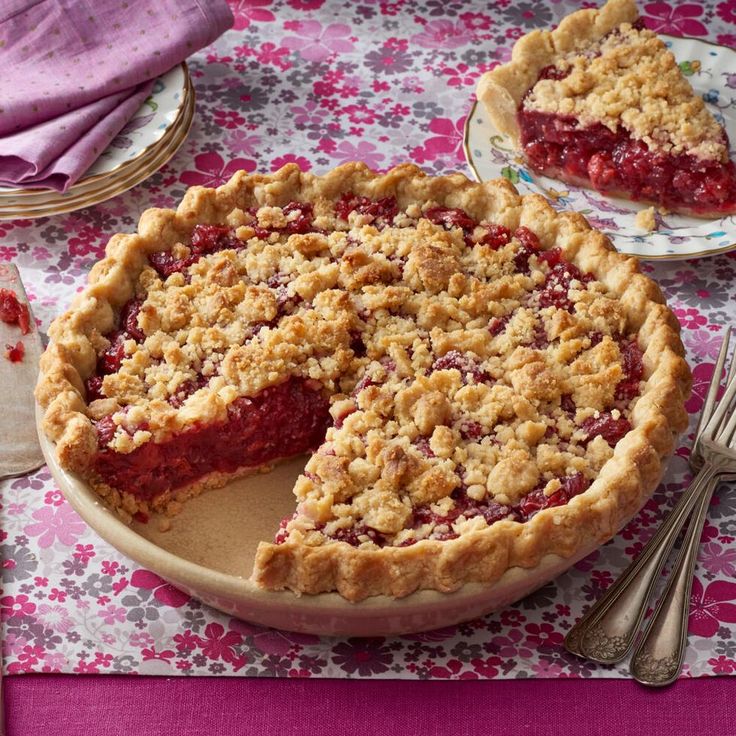
There’s nothing quite like a homemade cherry pie. It’s a truly classic dessert, bursting with a delightful balance of sweet and tart flavors. The tender, flaky crust cradles a juicy, vibrant cherry filling, making every bite pure comfort and joy. This pie is perfect for special occasions or simply as a comforting treat on a cozy evening.
You might think making a pie from scratch is a big task, but it’s easier than you imagine! With simple ingredients and clear steps, you’ll be amazed at how quickly this beautiful dessert comes together. We’ll guide you through each part, from preparing the luscious filling to achieving that golden, crisp crust. You don’t need to be a pastry chef to create something truly delicious.
So, get ready to fill your kitchen with the wonderful aroma of baking cherries and flaky pastry. This recipe is designed for everyone, whether you’re a seasoned baker or just starting out. Give it a try – your taste buds, family, and friends will thank you for this incredible homemade cherry pie!
Cooking Time & Prep Time
- Prep Time: 40 minutes
- Cooking Time: 55 minutes
- Total Time: 95 minutes
Small tip: To save time, you can prepare the pie filling the day before. Store it in an airtight container in the fridge until you are ready to assemble and bake the pie.
Ingredients
This recipe makes 8 generous servings.
For the Pie Crust (double crust pie)
- 2 ½ cups all-purpose flour, plus more for dusting
- 1 teaspoon salt
- 1 cup (2 sticks) unsalted butter, very cold and cut into ½-inch cubes
- ½ cup ice water, plus more if needed
For the Cherry Filling
- 6 cups fresh or frozen pitted sweet cherries (about 2 ½ pounds)
- ¾ cup granulated sugar (adjust to taste depending on cherry sweetness)
- ¼ cup cornstarch
- 1 tablespoon fresh lemon juice
- ½ teaspoon almond extract
- 2 tablespoons unsalted butter, cut into small pieces
For the Egg Wash (optional)
- 1 large egg
- 1 tablespoon water
- 1 tablespoon coarse sugar, for sprinkling (optional)
Step-by-Step Instructions
-
Step 1: Prepare the Pie Crust
In a large bowl, whisk together the flour and salt. Add the cold, cubed butter to the flour mixture. Use a pastry blender or your fingertips to cut the butter into the flour until it resembles coarse crumbs with some pea-sized pieces of butter remaining. Small tip: Work quickly to keep the butter as cold as possible, which helps create a flaky crust.
Gradually add the ice water, one tablespoon at a time, mixing until the dough just comes together. Do not overmix. Divide the dough in half, flatten each half into a disk, wrap tightly in plastic wrap, and refrigerate for at least 30 minutes.
-
Step 2: Make the Cherry Filling
In a large bowl, combine the pitted cherries, granulated sugar, cornstarch, and lemon juice. Stir gently until the cherries are evenly coated. Add the almond extract and mix well. Small tip: If using frozen cherries, do not thaw them completely before mixing; this helps prevent the filling from becoming too watery.
-
Step 3: Roll Out the Bottom Crust
Preheat your oven to 400°F (200°C). On a lightly floured surface, roll out one disk of pie dough into a 12-inch circle. Carefully transfer the dough to a 9-inch pie plate. Trim the edges, leaving about a ½-inch overhang. Small tip: Gently fold the dough in half or quarters to easily transfer it to the pie plate without tearing.
-
Step 4: Add the Filling
Pour the prepared cherry filling into the pie crust, spreading it evenly. Dot the top of the filling with the small pieces of butter. This adds richness and helps the filling become extra luscious. Small tip: Distribute the butter pieces evenly to ensure a consistent flavor throughout the pie.
-
Step 5: Add the Top Crust
Roll out the second disk of pie dough into another 12-inch circle. Carefully place it over the cherry filling. Trim the top crust to match the bottom crust overhang, then crimp the edges together to seal the pie. You can use your fingers or a fork to create a decorative edge. Small tip: For a beautiful finish, make sure to firmly press the edges together to prevent the filling from bubbling out during baking.
Cut several small slits or a decorative pattern in the top crust to allow steam to escape while baking. This prevents the crust from puffing up too much. You can use a small cookie cutter for fun shapes.
-
Step 6: Egg Wash and Bake
In a small bowl, whisk together the egg and water to create an egg wash. Brush the top crust evenly with the egg wash, then sprinkle with coarse sugar if desired. This will give your pie a beautiful golden-brown shine and a slightly crunchy topping. Small tip: The egg wash also helps the crust brown evenly and adds a professional touch to your homemade pie.
Place the pie on a baking sheet (to catch any drips) and bake for 20 minutes at 400°F (200°C). Then, reduce the oven temperature to 375°F (190°C) and continue baking for another 35-40 minutes, or until the crust is golden brown and the filling is bubbly. If the crust starts browning too quickly, you can loosely cover the edges with aluminum foil.
-
Step 7: Cool Completely
Once baked, carefully remove the pie from the oven. Let it cool completely on a wire rack for at least 3-4 hours before slicing and serving. This is crucial for the filling to set properly. Small tip: Patience is key! Cutting into a warm pie will result in a runny filling.
Tips & Variations
- Gluten-Free Option: Simply substitute the all-purpose flour in the crust recipe with your favorite gluten-free all-purpose flour blend (ensure it contains xanthan gum). Alternatively, use a store-bought gluten-free pie crust.
- Vegan Option: For a vegan pie, use a vegan butter substitute for the crust and filling. For the egg wash, brush the top crust with plant-based milk (like almond or soy milk) mixed with a pinch of sugar instead of egg.
- Add More Fruit or Flavor: Feel free to add a handful of other berries like raspberries or blueberries to the cherry filling for a mixed fruit pie. A pinch of cinnamon or a tiny grating of fresh nutmeg can also beautifully complement the cherry flavor.
- Spicy Version: For an unexpected twist, add a tiny pinch (about ⅛ teaspoon) of ground black pepper or a dash of cayenne pepper to the cherry filling. It won’t make it truly spicy, but it will subtly enhance the fruit’s natural sweetness and add depth.
- Streusel Topping: Instead of a full top crust, consider a streusel topping. Combine ½ cup flour, ½ cup rolled oats, ½ cup brown sugar, and ¼ cup cold butter, cut into pieces. Mix until crumbly, then sprinkle over the cherry filling before baking.
Nutritional Information
Approximate values per serving (based on 8 servings):
- Calories: 420 kcal
- Protein: 5g
- Carbohydrates: 65g
- Fat: 18g
Please note that these values are approximate and may vary depending on the specific brands and ingredients used.
Health Benefits
While cherry pie is a treat, the star ingredient, cherries, offers some wonderful health benefits! Cherries are packed with powerful antioxidants, especially anthocyanins, which give them their vibrant red color. These compounds are known for their anti-inflammatory properties, which can help reduce muscle soreness and inflammation in the body.
These delicious fruits are also a good source of several important vitamins and minerals. They provide Vitamin C, which is essential for immune function and skin health, and Vitamin A, important for vision. Cherries also contain potassium, which helps maintain healthy blood pressure and fluid balance.
Furthermore, cherries are a good source of dietary fiber. Fiber is crucial for digestive health, helping to keep things moving smoothly and contributing to a feeling of fullness. Including fiber-rich foods in your diet can also help manage blood sugar levels.
So, while you enjoy this delightful dessert, remember you’re also getting a dose of wholesome goodness from the cherries themselves!
Serving Suggestions
- Serve warm with a scoop of creamy vanilla bean ice cream. The contrast of hot pie and cold ice cream is simply divine!
- Top with a dollop of freshly whipped cream for a lighter, airy accompaniment.
- For a touch of sophistication, serve with a side of crème fraîche, which adds a lovely tangy note to balance the sweetness.
- Cherry pie is a perfect dessert to bring to potlucks, family gatherings, or holiday meals. It’s always a crowd-pleaser!
Storage Tips
Leftover cherry pie can be stored at room temperature for up to 2 days, loosely covered. For longer storage, wrap it tightly in plastic wrap or aluminum foil and refrigerate for up to 3-5 days. Cherry pie freezes beautifully! You can freeze the entire baked pie (once completely cooled) or individual slices for up to 3 months. Wrap it very well in plastic wrap and then foil. To reheat, thaw in the refrigerator overnight if frozen, then warm slices in a preheated oven at 350°F (175°C) for 15-20 minutes, or until heated through and the crust is crisp again.
Conclusion
And there you have it – a homemade cherry pie that’s simply irresistible! This classic dessert truly embodies comfort and joy, with its buttery, flaky crust and a sweet-tart cherry filling that bursts with flavor. It’s a timeless treat that brings smiles to every face and warmth to every gathering.
Don’t be shy about trying this recipe. The steps are straightforward, and the result is incredibly rewarding. There’s a unique satisfaction that comes from baking something so delicious from scratch. You’ll be proud to share this beautiful pie with everyone you love.
So go ahead, preheat your oven, gather your ingredients, and create some kitchen magic. This cherry pie is perfect for sharing with family and friends, making any occasion a little bit sweeter. Enjoy every delightful slice!


