
Introduction
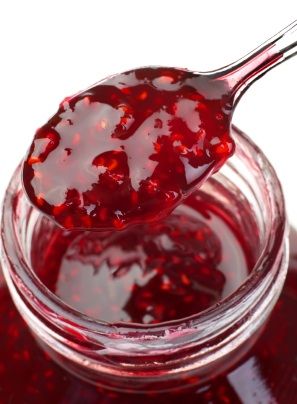
Get ready to discover a truly delightful treat: homemade Cherry Jelly! This isn’t just any jelly; it’s a burst of vibrant cherry flavor, sweet and tangy, with a beautiful ruby-red hue. It’s perfect for brightening up your breakfast, adding a sophisticated touch to dessert, or simply enjoying as a refreshing snack. The rich, deep taste of fresh cherries truly shines through, making every spoonful a little taste of summer.
You might think making jelly from scratch is complicated, but I promise you, it’s surprisingly easy! With just a few simple ingredients and straightforward steps, you’ll be able to create this stunning jelly in your own kitchen. There’s no need for special equipment, and most of the “cooking” time is actually just chilling time. It’s a rewarding project that yields delicious results with minimal fuss.
So, why not give it a try? Imagine the joy of spooning your very own homemade cherry jelly onto a warm piece of toast or pairing it with your favorite creamy dessert. It’s a fantastic way to capture the essence of cherries when they’re at their peak. Let’s dive in and create some magic together!
Cooking Time & Prep Time
- Prep Time: 20 minutes
- Cooking Time: 15 minutes
- Total Time: 35 minutes (plus at least 4 hours chilling time)
Small tip: To save time, you can pit the cherries a day in advance and store them in the fridge. This makes the preparation on jelly-making day even quicker!
Ingredients
This recipe makes approximately 8 servings of delicious cherry jelly.
For the Cherry Base
- 4 cups fresh cherries, pitted and halved (about 1.5 lbs)
- 1.5 cups granulated sugar
- 1 cup water
- 2 tablespoons fresh lemon juice
For the Jelly Setting
- 3 tablespoons unflavored gelatin powder (about 3 packets)
- 1/2 cup cold water (for blooming gelatin)
Optional Enhancements
- 1/2 teaspoon almond extract
- Pinch of salt
Step-by-Step Instructions
-
Step 1: Prepare the Cherries
First, wash your fresh cherries thoroughly. Carefully remove the pits using a cherry pitter or a small knife. You can halve the cherries if they are very large, but it’s not strictly necessary. Place the pitted cherries into a medium saucepan.
Small tip: A sturdy straw or a clean bottle opener can also be used to push out cherry pits if you don’t have a pitter.
-
Step 2: Cook the Cherry Base
To the saucepan with the cherries, add the granulated sugar, 1 cup of water, and the fresh lemon juice. Stir everything together gently. Bring the mixture to a simmer over medium heat, stirring occasionally until the sugar has fully dissolved and the cherries have softened, which usually takes about 10-12 minutes.
Small tip: Don’t boil too vigorously, as this can reduce the fresh fruit flavor. A gentle simmer is perfect.
-
Step 3: Prepare the Gelatin
While the cherries are simmering, prepare your gelatin. In a small bowl, sprinkle the unflavored gelatin powder over 1/2 cup of cold water. Let it sit for 5-10 minutes without stirring. This process is called “blooming” and allows the gelatin to absorb the water and swell, preventing lumps.
Small tip: Always add gelatin to cold water first, never hot, to ensure it dissolves smoothly without clumping.
-
Step 4: Combine and Dissolve
Once the cherry mixture has simmered and the cherries are soft, remove the saucepan from the heat. Add the bloomed gelatin directly into the warm cherry mixture. Stir continuously until the gelatin has completely dissolved. The warmth of the cherry mixture will help it melt seamlessly. If using, stir in the almond extract and a pinch of salt now.
Small tip: Make sure the gelatin is fully dissolved. You shouldn’t see any granules when you stir.
-
Step 5: Strain for Clear Jelly (Optional)
For a beautifully clear jelly, carefully strain the cherry mixture through a fine-mesh sieve into a clean bowl or pitcher. Press down on the cherry solids with the back of a spoon to extract as much juice and flavor as possible. Discard the solids, or save them for another use like a compote topping.
Small tip: If you prefer a rustic jelly with cherry pieces, you can skip this straining step entirely!
-
Step 6: Pour and Chill
Pour the liquid cherry jelly into your desired serving dishes, individual ramekins, or a larger mold. Make sure they are clean and dry. Let the jelly cool down at room temperature for about 15-20 minutes before transferring them to the refrigerator. Chill for at least 4 hours, or preferably overnight, until the jelly is completely set and firm.
Small tip: For easy removal from a mold, lightly grease the mold with a neutral oil before pouring, or briefly dip the mold in warm water before inverting.
-
Step 7: Serve and Enjoy
Once your cherry jelly is perfectly set, it’s ready to be enjoyed! Serve it chilled, either directly from the dish or unmolded onto a plate. Garnish with a fresh mint sprig or a few extra fresh cherries for a lovely presentation.
Small tip: A dollop of whipped cream or a scoop of vanilla ice cream makes a wonderful accompaniment to this fresh jelly.
Tips & Variations
- Gluten-Free Option: This cherry jelly recipe is naturally gluten-free! Just ensure that any specific brand of gelatin powder you use is certified gluten-free if you have severe sensitivities, though most unflavored gelatins are.
- Vegan/Vegetarian Option: To make this recipe completely plant-based, substitute the gelatin powder with an equal amount of agar-agar powder (usually 3 tablespoons). Dissolve the agar-agar powder in the cold water, then add it to the simmering cherry mixture and boil for 2-3 minutes to activate it before straining and chilling.
- Adding More Fruit or Fiber: While jelly is primarily liquid, you can boost its fruit content by adding finely diced berries (like raspberries or blueberries) to the mixture before chilling, creating a mixed fruit jelly. For fiber, serve the jelly alongside a fresh fruit salad or a sprinkle of chia seeds.
- Spicy Version: For a surprising kick, add a tiny pinch of red chili flakes or a very thin slice of jalapeño (remove before straining) to the cherry mixture while it simmers. The heat will infuse subtly, creating a sweet-spicy contrast.
- Flavor Variations: Experiment with other extracts like vanilla bean paste or a dash of cinnamon for a warmer flavor profile. You can also swap out a portion of the water for red wine (like a Merlot or Pinot Noir) for a sophisticated adult version.
Nutritional Information
Approximate values per serving (based on 8 servings):
- Calories: 160 kcal
- Protein: 4g
- Carbohydrates: 38g
- Fat: 0g
Please note: These values are approximate and may vary depending on the exact ingredients and brands used.
Health Benefits
Cherry jelly isn’t just delicious; it also offers some wonderful health benefits, mainly from its star ingredient:
- Rich in Antioxidants: Cherries, especially tart cherries, are packed with powerful antioxidants called anthocyanins. These compounds give cherries their vibrant red color and help fight free radicals in the body, which can reduce oxidative stress and inflammation.
- Anti-Inflammatory Properties: The anthocyanins in cherries are also known for their anti-inflammatory effects. Regular consumption may help reduce muscle soreness after exercise and ease symptoms of conditions like arthritis and gout.
- Source of Vitamins and Minerals: Cherries provide essential vitamins like Vitamin C, which is crucial for immune function and skin health. They also contain potassium, important for blood pressure regulation, and a small amount of fiber.
- Aids Sleep: Cherries are one of the few natural food sources of melatonin, a hormone that helps regulate sleep-wake cycles. Enjoying cherry jelly in the evening might contribute to a more restful night’s sleep.
- Gelatin for Gut and Joint Health: If using traditional gelatin, you’re also getting benefits from collagen. Collagen supports healthy skin, hair, and nails. It can also be beneficial for joint health and may aid in digestive wellness.
Serving Suggestions
- Classic Pairing: Serve chilled cherry jelly on warm toast, croissants, or scones for a delightful breakfast or brunch.
- Dessert Delight: It makes a fantastic light dessert on its own, perhaps garnished with fresh mint or a dollop of Greek yogurt. It’s also wonderful layered with panna cotta or alongside a creamy cheesecake.
- Savory Twist: Pair a small portion of cherry jelly with a cheese board, especially with soft, creamy cheeses like brie or goat cheese, for a sweet and tangy contrast.
- Breakfast Booster: Swirl a spoonful into your morning oatmeal, blend it into a smoothie, or spoon it over a bowl of granola and yogurt for an extra burst of flavor and natural sweetness.
Storage Tips: Store your homemade cherry jelly in an airtight container or covered jars in the refrigerator. It will keep beautifully for up to 1-2 weeks. While you can freeze jelly, the texture might become slightly grainy or watery upon thawing due to the water content. If you do freeze it, use freezer-safe containers and consume within 2-3 months. Reheating is not recommended for jelly; it is always best served chilled and firm.
Conclusion
And there you have it – your very own batch of exquisite Cherry Jelly! This recipe proves that making something truly special from scratch doesn’t have to be difficult. The vibrant color, the irresistible sweet-tart flavor, and the smooth, shimmering texture all come together to create a treat that’s both elegant and comforting.
I genuinely hope you’ll give this recipe a try. The process is simple, the ingredients are fresh, and the reward is absolutely delicious. There’s a unique satisfaction in knowing you’ve created something so lovely with your own hands. Plus, your kitchen will smell amazing while the cherries simmer!
Once you’ve mastered this cherry jelly, you’ll want to make it again and again. It’s perfect for sharing with family and friends, whether as a thoughtful homemade gift or as a delightful addition to any meal. Enjoy every spoonful!


