
Introduction
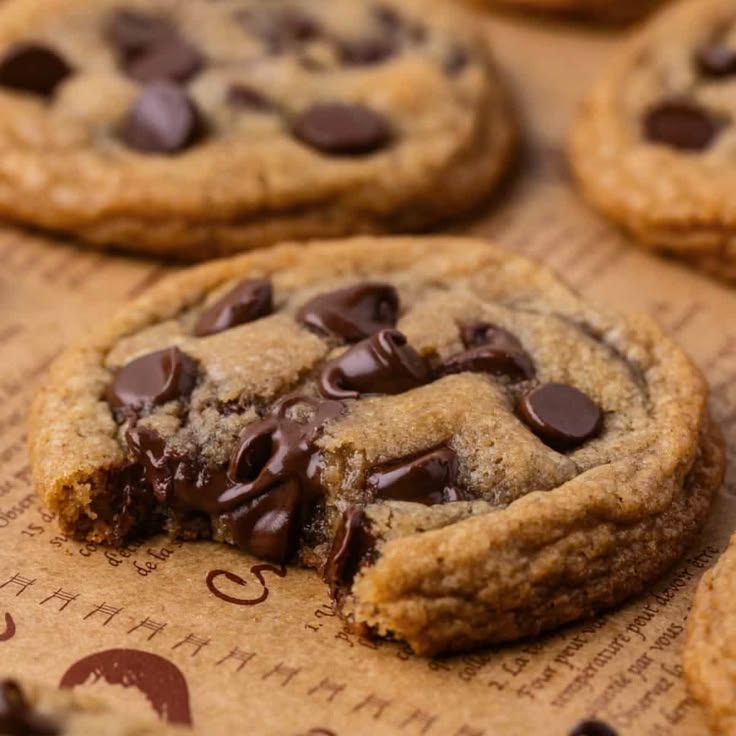
Get ready to bake the most incredible cookies you’ve ever tasted! We’re diving into the wonderful world of Brown Butter Chocolate Chip Cookies with Toasted Milk Powder. This isn’t just any chocolate chip cookie; it’s an elevated classic with deep, nutty flavors from the browned butter and a subtle, caramelized creaminess from the toasted milk powder. Each bite offers crispy edges, a chewy center, and pools of rich, melted chocolate – truly a treat for the senses.
You might think such a gourmet cookie would be complicated, but I promise you, it’s surprisingly simple to make. With straightforward steps and common pantry ingredients, you’ll be whipping up a batch of these beauties in no time. The process is fun, rewarding, and doesn’t require any fancy equipment. If you can make regular chocolate chip cookies, you can definitely master this recipe!
So, clear your counter, preheat your oven, and get ready to fill your home with the most irresistible aroma. This recipe is perfect for impressing guests, sharing with loved ones, or simply treating yourself to something extra special. Trust me, once you try these, your standard chocolate chip cookies will feel a little lonely. Let’s get baking!
Cooking Time & Prep Time
- Prep Time: 25 minutes
- Chilling Time: 30 minutes (minimum, recommended for best results)
- Cooking Time: 10-12 minutes per batch
- Total Time: Approximately 1 hour 15 minutes (including minimum chilling)
Small tip: Don’t skip the chilling time! It helps the flavors meld and prevents the cookies from spreading too much, giving you perfectly chewy centers and crisp edges.
Ingredients
Makes about 18-20 medium-sized cookies
- 1 cup (226g) unsalted butter
- 2 tablespoons (15g) whole milk powder
- 2 ¼ cups (270g) all-purpose flour
- 1 teaspoon baking soda
- ¾ teaspoon salt (fine sea salt is great here)
- ¾ cup (150g) packed light brown sugar
- ½ cup (100g) granulated sugar
- 1 large egg
- 1 large egg yolk
- 2 teaspoons vanilla extract
- 1 ½ cups (255g) semi-sweet chocolate chips or chopped chocolate bar (a mix of milk and dark is lovely!)
- Flaky sea salt, for sprinkling (optional)
Step-by-Step Instructions
-
Step 1: Brown the Butter
Place the unsalted butter in a light-colored saucepan over medium heat. Cook, stirring occasionally, until the butter melts, then foams, and finally, golden-brown bits appear at the bottom of the pan. This usually takes 5-8 minutes. The aroma will be wonderfully nutty. Immediately pour the browned butter into a heatproof bowl, scraping all the brown bits from the bottom of the pan. Let it cool for about 10-15 minutes.
Small tip: Use a light-colored pan so you can easily see the butter solids browning and prevent burning. Swirl the pan often.
-
Step 2: Toast the Milk Powder
While the butter cools, spread the whole milk powder evenly in a small, dry skillet over medium-low heat. Toast, stirring constantly, for 3-5 minutes until it turns a light golden-brown and smells fragrant and caramelized. Be careful not to burn it, as it can toast quickly. Remove from heat and transfer to a small bowl to cool completely.
Small tip: Keep a close eye on the milk powder; it can go from perfectly toasted to burnt in a matter of seconds.
-
Step 3: Combine Dry Ingredients
In a medium bowl, whisk together the all-purpose flour, baking soda, and salt. Set this aside for now. Whisking ensures all the dry ingredients are evenly distributed, which is key for a consistent cookie texture.
Small tip: Don’t skip sifting your flour if it tends to be lumpy, though a good whisking usually does the trick for cookies.
-
Step 4: Mix Sugars and Butter
In a large mixing bowl, combine the cooled browned butter, light brown sugar, and granulated sugar. Whisk vigorously for about 30 seconds until well combined. The mixture should look cohesive and slightly glossy. This step ensures the sugars start to dissolve.
Small tip: Ensure your browned butter has cooled slightly but is still liquid. If it’s too hot, it can scramble the eggs; if it’s too solid, it won’t mix well.
-
Step 5: Add Eggs and Vanilla
Add the large egg, egg yolk, and vanilla extract to the sugar and butter mixture. Whisk for about 1-2 minutes until the mixture is lightened in color and slightly fluffy. It should resemble a thick, creamy caramel. This aeration is important for the cookie’s texture.
Small tip: Use room temperature eggs if possible; they emulsify better with the butter and sugar.
-
Step 6: Incorporate Dry Ingredients and Milk Powder
Gradually add the dry ingredient mixture to the wet ingredients, mixing on low speed with an electric mixer or by hand with a spatula until just combined. Be careful not to overmix; overmixing can lead to tough cookies. Once the flour is mostly incorporated, fold in the toasted milk powder. Mix until just combined.
Small tip: Stop mixing as soon as you no longer see streaks of dry flour. A few small lumps are fine.
-
Step 7: Fold in Chocolate Chips
Gently fold in the chocolate chips or chopped chocolate using a spatula. Make sure they are evenly distributed throughout the dough. You can use any type of chocolate you prefer – semi-sweet, milk, dark, or a combination!
Small tip: Reserve a few chocolate chips to press onto the tops of the cookie dough balls before baking for a bakery-style look.
-
Step 8: Chill the Dough
Cover the bowl with plastic wrap and refrigerate the dough for at least 30 minutes, or up to 24 hours. Chilling allows the flavors to deepen and prevents the cookies from spreading too much during baking, resulting in a chewier cookie. This step is a game-changer!
Small tip: If chilling for more than a few hours, let the dough sit at room temperature for 10-15 minutes before scooping to make it easier to work with.
-
Step 9: Preheat Oven and Prepare Baking Sheets
When you’re ready to bake, preheat your oven to 375°F (190°C). Line two baking sheets with parchment paper or silicone baking mats. This prevents sticking and ensures even baking.
Small tip: Parchment paper makes for easy cleanup and helps prevent the bottoms of the cookies from browning too quickly.
-
Step 10: Scoop and Bake
Scoop rounded tablespoons (about 1.5-2 ounces) of dough onto the prepared baking sheets, leaving about 2 inches between each cookie. If desired, press a few extra chocolate chips onto the top of each dough ball. Bake one sheet at a time for 10-12 minutes, or until the edges are golden brown and the centers are still slightly soft. If using flaky sea salt, sprinkle it on immediately after removing from the oven.
Small tip: Do not overcrowd your baking sheets. Baking too many cookies at once can lower the oven temperature and lead to uneven baking.
-
Step 11: Cool the Cookies
Let the cookies cool on the baking sheet for 5-10 minutes before transferring them to a wire rack to cool completely. They will continue to set as they cool, becoming perfectly chewy. Enjoy your warm, delightful cookies!
Small tip: Resist the urge to move them too soon! Warm cookies are delicate and can break apart easily.
Tips & Variations
- Gluten-Free Option: Easily make these cookies gluten-free by swapping the all-purpose flour for a 1:1 gluten-free baking flour blend that contains xanthan gum. The texture will be very similar!
- Vegan Option: For a delicious vegan version, use a high-quality plant-based butter (ensure it browns well) and replace the egg and egg yolk with 2 flax eggs (2 tablespoons ground flaxseed mixed with 6 tablespoons water, let sit for 5 minutes). Also, use dairy-free chocolate chips.
- Adding Extra Nutrients: Boost the protein and healthy fats by adding ½ cup of chopped walnuts, pecans, or almonds along with the chocolate chips. You could also stir in 2 tablespoons of chia seeds or ground flaxseed for extra fiber and omega-3s.
- Spicy Kick: For a delightful surprise, add a pinch of cayenne pepper (¼ teaspoon) to the dry ingredients. The subtle heat beautifully complements the rich chocolate and nutty browned butter.
- Flavor Variations: Experiment with different types of chocolate, like chopped milk chocolate, dark chocolate chunks, or even white chocolate. You can also add ½ cup of toffee bits, shredded coconut, or a tablespoon of orange zest for extra flavor dimensions.
Nutritional Information
Approximate values per serving (based on 20 servings):
- Calories: 250 kcal
- Protein: 3g
- Carbohydrates: 30g
- Fat: 14g
Please note: Nutritional values may vary depending on the exact ingredients and brands used. This is an estimate for general guidance.
Health Benefits
While these are indeed a treat, some of the ingredients do offer beneficial properties:
Butter: In moderation, butter provides fat-soluble vitamins like A, E, and K2, which are important for vision, immune function, and bone health. It’s also a source of conjugated linoleic acid (CLA), a fatty acid that some studies suggest has potential health benefits.
Chocolate: Especially if you use a higher percentage of dark chocolate, you’re getting antioxidants called flavonoids. These compounds can help protect your cells from damage, improve blood flow, and may even have mood-boosting effects. Dark chocolate also contains minerals like iron, magnesium, and copper.
Whole Milk Powder: This ingredient is a concentrated source of calcium, which is vital for strong bones and teeth. It also provides protein, essential for muscle repair and growth, and other important vitamins and minerals found in milk.
Eggs: Eggs are a fantastic source of high-quality protein, containing all nine essential amino acids. They also provide vitamins D, B12, and selenium, which support immune function, energy production, and thyroid health.
Serving Suggestions
- Classic Pairing: Serve warm with a tall glass of cold milk, a hot cup of coffee, or a cozy mug of tea.
- Dessert Upgrade: Turn them into an irresistible dessert by serving with a scoop of vanilla bean ice cream and a drizzle of caramel sauce.
- Party Platter: Arrange them on a platter for gatherings, brunches, or potlucks. They are always a crowd-pleaser!
- Meal Prep Idea: Scoop the raw cookie dough onto a parchment-lined baking sheet and freeze until solid. Transfer the frozen dough balls to a freezer-safe bag. You can bake them straight from frozen, adding an extra 2-4 minutes to the baking time, for fresh-baked cookies anytime!
Storage Tips
Baked cookies can be stored in an airtight container at room temperature for up to 3-4 days. For longer storage, you can freeze baked cookies in an airtight container or freezer bag for up to 2-3 months. To reheat, simply pop them in the microwave for 10-15 seconds or warm them in a 300°F (150°C) oven for 5-7


