
Introduction
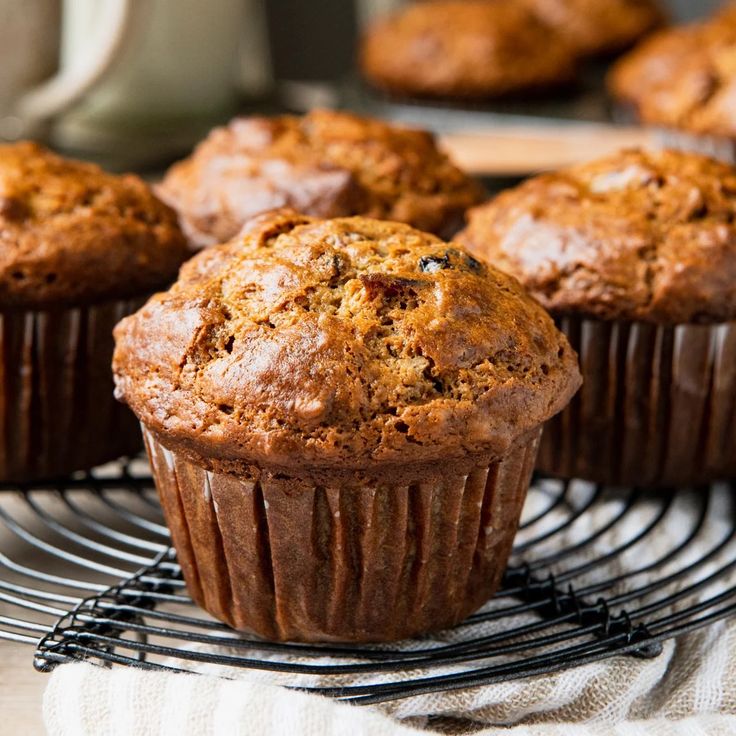
Get ready to discover your new favorite breakfast hero: the humble yet incredibly delicious Bran Muffin! These muffins are a true classic for a reason. They offer a wonderfully moist texture, a satisfying chewiness, and a subtle sweetness that’s just right. Packed with wholesome goodness, they are the perfect way to start your day or enjoy a nourishing snack.
What makes these bran muffins truly special is how simple they are to whip up. You don’t need any fancy equipment or advanced baking skills. With just a few basic pantry staples and a single bowl for mixing, you can have a batch of warm, fragrant muffins ready in no time. It’s an ideal recipe for busy mornings or when you crave something comforting without a lot of fuss.
So, whether you’re a seasoned baker or just starting your culinary journey, I wholeheartedly invite you to try this recipe. You’ll be amazed at how easy it is to create such a wholesome and delicious treat. Let’s get baking and fill your kitchen with the irresistible aroma of freshly baked bran muffins!
Cooking Time & Prep Time
- Prep Time: 15 minutes
- Cooking Time: 18-20 minutes
- Total Time: 33-35 minutes
Small tip: Gather all your ingredients before you start mixing. This “mise en place” makes the whole process smoother and quicker!
Ingredients
This recipe makes 12 delicious bran muffins.
Wet Ingredients
- 1 ½ cups buttermilk (or milk with 1 ½ tablespoons lemon juice/vinegar, let sit 5 mins)
- ½ cup unsalted butter, melted
- ½ cup packed light brown sugar
- 1 large egg, lightly beaten
- 1 teaspoon vanilla extract
Dry Ingredients
- 1 ½ cups wheat bran (untoasted, natural bran)
- 1 cup all-purpose flour
- ½ cup whole wheat flour
- 1 tablespoon baking powder
- ½ teaspoon baking soda
- ½ teaspoon salt
- ¼ teaspoon ground cinnamon (optional, but recommended!)
Optional Add-ins
- ½ cup raisins or dried cranberries
- ¼ cup chopped walnuts or pecans
Step-by-Step Instructions
-
Step 1: Prepare Your Muffin Tin and Oven
Preheat your oven to 400°F (200°C). Line a 12-cup standard muffin tin with paper liners or lightly grease each cup with butter or non-stick spray. This step ensures your muffins won’t stick and makes for easy cleanup.
Small tip: Using paper liners makes removing the muffins a breeze and keeps your muffin tin clean.
-
Step 2: Combine Wet Ingredients
In a large mixing bowl, whisk together the buttermilk, melted butter, brown sugar, beaten egg, and vanilla extract until well combined and smooth. Make sure the butter isn’t too hot, or it might cook the egg.
Small tip: If you don’t have buttermilk, you can easily make your own! Just add 1 ½ tablespoons of lemon juice or white vinegar to regular milk and let it sit for 5 minutes until it slightly curdles.
-
Step 3: Add the Wheat Bran
Stir the wheat bran directly into the wet ingredient mixture. Mix until the bran is fully moistened. Let this mixture sit for about 5 minutes. This allows the bran to absorb some of the liquid, which helps create very moist muffins.
Small tip: Don’t skip the resting time for the bran. It’s key to achieving that perfectly tender and moist texture in your muffins.
-
Step 4: Whisk Dry Ingredients
In a separate medium bowl, whisk together the all-purpose flour, whole wheat flour, baking powder, baking soda, salt, and ground cinnamon (if using). Make sure there are no lumps and the ingredients are evenly distributed.
Small tip: Whisking dry ingredients separately ensures that the leavening agents (baking powder and soda) are evenly spread, giving your muffins a consistent rise.
-
Step 5: Combine Wet and Dry Mixtures
Add the dry ingredient mixture to the wet bran mixture. Stir gently with a spatula or wooden spoon until just combined. Be careful not to overmix; a few lumps are perfectly fine and actually prevent tough muffins.
Small tip: Overmixing develops the gluten in the flour, which can lead to dense, tough muffins. Stop mixing as soon as you no longer see streaks of dry flour.
-
Step 6: Fold in Optional Add-ins
If you’re using raisins, cranberries, or nuts, gently fold them into the batter at this stage. Distribute them evenly throughout the mixture. This adds extra flavor and texture to your muffins.
Small tip: If your dried fruit tends to sink, toss it with a teaspoon of flour before adding it to the batter. This helps it stay suspended.
-
Step 7: Fill Muffin Cups
Divide the batter evenly among the 12 prepared muffin cups. Each cup should be about two-thirds full. Use an ice cream scoop for easy and even portioning.
Small tip: Filling the cups evenly ensures that all your muffins bake at the same rate and come out perfectly golden.
-
Step 8: Bake the Muffins
Bake in the preheated oven for 18-20 minutes, or until a wooden skewer or toothpick inserted into the center of a muffin comes out clean. The tops should be golden brown and spring back when lightly touched.
Small tip: Ovens can vary, so keep an eye on your muffins, especially towards the end of the baking time. Start checking around 17 minutes.
-
Step 9: Cool and Serve
Once baked, remove the muffin tin from the oven. Let the muffins cool in the tin for 5 minutes before transferring them to a wire rack to cool completely. Enjoy them warm or at room temperature!
Small tip: Cooling muffins in the tin for a few minutes helps them firm up and makes them easier to remove without breaking.
Tips & Variations
- Gluten-Free Option: To make these muffins gluten-free, substitute the all-purpose flour and whole wheat flour with an equal amount of your favorite gluten-free all-purpose flour blend. Ensure your wheat bran is certified gluten-free if you have a severe allergy.
- Vegan Option: For a delicious vegan version, use plant-based milk (like almond or soy milk) instead of buttermilk, replace the melted butter with an equal amount of vegetable oil or melted coconut oil, and use a “flax egg” (1 tablespoon ground flaxseed mixed with 3 tablespoons water, let sit 5 minutes) instead of a chicken egg.
- Add More Protein or Vegetables: Boost the nutrition by adding ½ cup of finely grated zucchini or carrots to the batter. You can also stir in 2 tablespoons of unflavored protein powder with the dry ingredients for an extra protein kick.
- Spicy Version: For a delightful spicy twist, increase the cinnamon to ¾ teaspoon and add ½ teaspoon of ground ginger, ¼ teaspoon of ground nutmeg, and a tiny pinch of ground cloves to the dry ingredients. This will give your muffins a warm, comforting spice profile.
- Citrus Zest & Other Fruits: Incorporate the zest of one orange or lemon into the wet ingredients for a bright, fresh flavor. You can also swap out raisins for other dried fruits like chopped apricots, dates, or even fresh blueberries for a burst of fruitiness.
Nutritional Information
Approximate values per serving (based on 12 muffins):
- Calories: 220
- Protein: 5g
- Carbohydrates: 35g
- Fat: 8g
Please note that nutritional values may vary depending on the exact ingredients and brands used.
Health Benefits
Bran muffins are more than just a tasty treat; they offer several wonderful health benefits, mainly thanks to their star ingredient: wheat bran.
Rich in Fiber: Wheat bran is an excellent source of dietary fiber, especially insoluble fiber. This type of fiber is crucial for digestive health. It helps to add bulk to stool, promoting regular bowel movements and preventing constipation. A fiber-rich diet also contributes to a feeling of fullness, which can be helpful for weight management.
Heart Health: The fiber in bran muffins can also play a role in heart health. Soluble fiber, found in smaller amounts in bran and whole grains, helps to lower cholesterol levels. A diet high in fiber is generally associated with a reduced risk of heart disease.
Whole Grain Goodness: By including both wheat bran and whole wheat flour, these muffins provide the benefits of whole grains. Whole grains contain important B vitamins (like niacin, thiamine, and folate), iron, magnesium, and selenium. These nutrients are essential for energy production, red blood cell formation, and overall body function.
Sustained Energy: The combination of fiber and complex carbohydrates in bran muffins means they provide a steady release of energy. This helps to prevent sharp spikes and crashes in blood sugar, keeping you feeling energized and focused for longer periods.
Serving Suggestions
- Enjoy warm with a pat of butter, a drizzle of honey, or a dollop of your favorite jam.
- Serve alongside a cup of coffee or tea for a wholesome breakfast or a delightful afternoon snack.
- Pair with Greek yogurt and fresh berries for a balanced and satisfying meal.
- Crumble over a fruit salad for added texture and fiber.
- These muffins are a fantastic grab-and-go option for busy mornings, perfect on their own.
Storage Tips
Store leftover bran muffins in an airtight container at room temperature for up to 3-4 days. To keep them fresh longer, you can store them in the refrigerator for up to a week. Bran muffins also freeze beautifully! Once completely cooled, place them in a freezer-safe bag or container for up to 3 months. To reheat, simply microwave a frozen muffin for 30-60 seconds, or let it thaw at room temperature and then warm it in a toaster oven for a few minutes until soft and warm.
Conclusion
There you have it – a truly delightful and incredibly easy recipe for wholesome bran muffins! These little gems are the perfect blend of satisfying texture, subtle sweetness, and incredible health benefits. They prove that healthy eating can be absolutely delicious and completely fuss-free.
I genuinely encourage you to give this recipe a try. You’ll love how quickly these come together and how wonderful your kitchen smells while they’re baking. They’re a fantastic addition to any breakfast spread or a much-needed pick-me-up during the day.
Bake a batch today and share the warmth and goodness with your family and friends. They’re sure to become a cherished favorite in your home, bringing a smile to everyone’s face with every wholesome bite!


