
Introduction
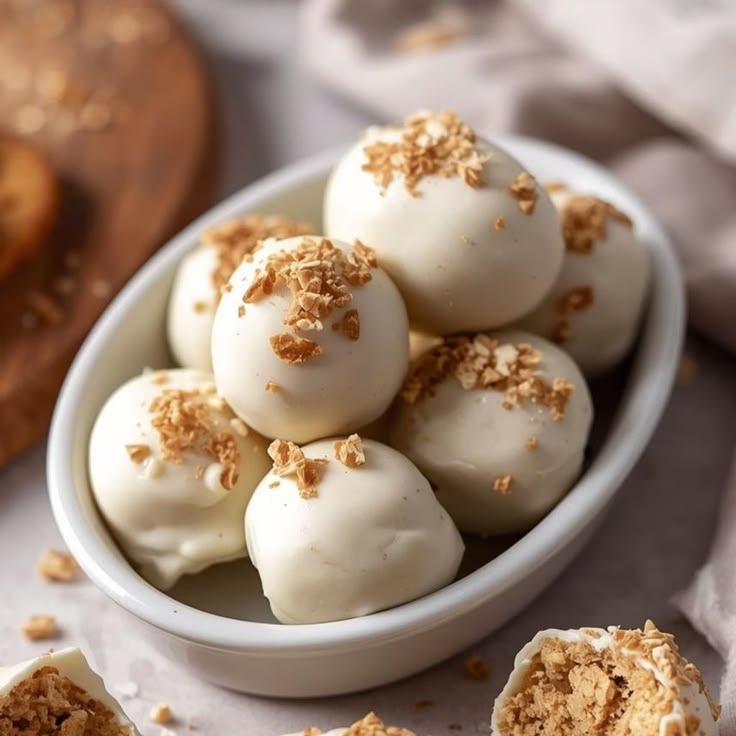
Get ready to discover your new favorite sweet treat! These No Bake Biscoff Cookie Butter Truffles are little bites of pure heaven. Imagine the warm, spiced flavor of Biscoff cookies, transformed into a creamy, decadent truffle, all coated in rich chocolate. They are truly irresistible and burst with flavor in every single bite.
The best part? You don’t even need to turn on your oven! These truffles are incredibly easy to make, coming together with just a few simple ingredients and minimal effort. They are perfect for a quick dessert craving, a last-minute party treat, or a thoughtful homemade gift. They require no baking, which means less mess and more time to enjoy.
So, whether you’re a seasoned baker or just starting your culinary journey, these Biscoff truffles are a fantastic recipe to try. They’re fun to make, even more fun to eat, and guaranteed to put a smile on everyone’s face. Let’s get started and whip up some magic!
Cooking Time & Prep Time
- Prep Time: 20 minutes
- Chilling Time (initial): 30 minutes
- Active Rolling/Coating Time: 20 minutes
- Chilling Time (final): 15 minutes
- Total Time: 1 hour 25 minutes
Small tip: The chilling times are crucial for the truffles to hold their shape perfectly. Don’t rush them!
Ingredients
Makes approximately 24 truffles
- For the Truffle Base:
- 1 cup (240g) Biscoff cookie butter (smooth or crunchy)
- 4 oz (113g) cream cheese, softened
- 1 cup (120g) powdered sugar, sifted
- 1 cup (100g) Biscoff cookies, finely crushed (about 15-18 cookies)
- 1/2 teaspoon vanilla extract
- Pinch of salt
- For the Chocolate Coating:
- 12 oz (340g) semi-sweet chocolate chips or chopped chocolate
- 1 tablespoon coconut oil (optional, helps with smoothness)
- For Garnish (Optional):
- 2 tablespoons Biscoff cookie crumbs
- 1 tablespoon melted Biscoff cookie butter, drizzled
Step-by-Step Instructions
-
Step 1: Prepare the Truffle Base
In a large mixing bowl, combine the softened cream cheese and Biscoff cookie butter. Beat them together with an electric mixer on medium speed until the mixture is smooth and creamy. Make sure there are no lumps of cream cheese left.
Small tip: Ensure your cream cheese is truly softened to room temperature. This will prevent lumps and make mixing much easier.
-
Step 2: Add Dry Ingredients
Gradually add the sifted powdered sugar to the cream cheese and cookie butter mixture. Mix on low speed until fully incorporated. Then, stir in the finely crushed Biscoff cookie crumbs, vanilla extract, and a pinch of salt. Mix until everything is just combined.
Small tip: Sifting the powdered sugar prevents lumps in your truffles. Use a food processor to crush the Biscoff cookies into very fine crumbs for the best texture.
-
Step 3: Chill the Mixture
Cover the bowl with plastic wrap and place it in the refrigerator for at least 30 minutes. This chilling time is essential. It helps the mixture firm up, making it much easier to roll into truffles.
Small tip: If you’re short on time, you can place the bowl in the freezer for about 15-20 minutes, but keep a close eye on it so it doesn’t freeze solid.
-
Step 4: Roll the Truffles
Once the mixture is firm, scoop out small portions, about 1 tablespoon each. Roll them between your palms to form smooth, round balls. Place the rolled truffles on a baking sheet lined with parchment paper.
Small tip: If the mixture becomes too sticky while rolling, pop it back into the fridge for a few minutes. You can lightly dampen your hands with water to prevent sticking.
-
Step 5: Prepare the Chocolate Coating
In a microwave-safe bowl, combine the chocolate chips (or chopped chocolate) and coconut oil (if using). Microwave in 30-second intervals, stirring well after each interval, until the chocolate is completely melted and smooth. Be careful not to overheat the chocolate.
Small tip: You can also melt the chocolate over a double boiler for a more controlled melting process. Ensure no water gets into the chocolate.
-
Step 6: Coat the Truffles
Using a fork or a dipping tool, dip each Biscoff truffle into the melted chocolate. Tap off any excess chocolate gently. Place the coated truffles back onto the parchment-lined baking sheet.
Small tip: Work quickly when dipping. If the chocolate starts to thicken, gently reheat it for a few seconds in the microwave or over the double boiler.
-
Step 7: Garnish and Final Chill
While the chocolate is still wet, sprinkle with extra Biscoff cookie crumbs or drizzle with a bit of melted Biscoff cookie butter for an extra touch. Once all truffles are coated and garnished, return the baking sheet to the refrigerator for at least 15 minutes, or until the chocolate coating is completely set.
Small tip: For a neat drizzle, use a small spoon or a piping bag with a tiny snip off the end to apply the melted cookie butter.
-
Step 8: Serve and Enjoy!
Once the chocolate has set, your delicious No Bake Biscoff Cookie Butter Truffles are ready to be enjoyed! Store them in an airtight container in the refrigerator.
Small tip: These truffles are best enjoyed slightly chilled, but not rock hard from the fridge. Let them sit out for 5-10 minutes before serving for optimal texture.
Tips & Variations
- Gluten-Free Option: To make these truffles gluten-free, simply omit the crushed Biscoff cookies from the truffle base. You can add a tablespoon or two of almond flour or finely ground gluten-free graham crackers for texture, or just rely on the cookie butter for flavor.
- Vegan Option: This recipe can easily be made vegan! Use a plant-based cream cheese alternative (ensure it’s full-fat and firm when chilled) and vegan chocolate chips for the coating. Lotus Biscoff cookie butter is already naturally vegan, making this swap super simple.
- Added Crunch/Protein: For a delightful textural contrast and a slight protein boost, finely chop some toasted pecans, walnuts, or almonds and mix them into the truffle base along with the cookie crumbs. You could also roll the finished truffles in finely chopped nuts instead of cookie crumbs.
- Spicy Kick: If you love a little heat with your sweet, add a tiny pinch (1/8 teaspoon) of cayenne pepper to the melted chocolate coating. It creates a surprisingly delicious and complex flavor profile that will intrigue your taste buds.
- White Chocolate Dream: Instead of semi-sweet chocolate, try coating the truffles in melted white chocolate. You can even swirl a little melted Biscoff cookie butter into the white chocolate for a beautiful marbled effect before dipping.
- Holiday Spice Boost: Enhance the warm spice notes by adding a tiny pinch (1/4 teaspoon) of ground cinnamon or a very small amount of pumpkin pie spice to the truffle base along with the vanilla extract.
Nutritional Information
Approximate values per serving (based on 24 servings):
- Calories: 220 kcal
- Protein: 2g
- Carbohydrates: 25g
- Fat: 13g
Note: Nutritional values may vary depending on exact ingredient brands and portion sizes used.
Health Benefits
While these truffles are a delightful treat, their ingredients offer some interesting components. The Biscoff cookie butter, made from speculoos cookies, provides carbohydrates that serve as a quick source of energy, perfect for a little pick-me-up.
The cream cheese in the recipe contributes some dairy goodness. Dairy products are known for their calcium content, which is essential for strong bones and teeth. Even in a small amount, it adds to your daily intake.
The chocolate coating, especially if you use dark chocolate, can offer some antioxidants. Dark chocolate is rich in compounds like flavonoids, which are known for their potential to help fight free radicals in the body. It’s a sweet bonus!
Furthermore, occasional treats like these truffles can play a role in mental well-being. Enjoying a delicious dessert in moderation can be a great way to satisfy cravings and bring a sense of pleasure and satisfaction, contributing to a balanced lifestyle.
Serving Suggestions
- Serve these truffles alongside a hot cup of coffee, espresso, or a warm mug of spiced tea for a cozy afternoon treat.
- Arrange them beautifully on a dessert platter with fresh berries or a sprinkle of powdered sugar for an elegant party offering.
- Package them in small decorative boxes or bags with a ribbon for thoughtful homemade gifts during the holidays or special occasions.
- Enjoy them as a delightful post-dinner dessert, a sweet ending to any meal without being too heavy.
- They make a fantastic addition to a cookie exchange, standing out among traditional baked goods.
Storage Tips
These No Bake Biscoff Cookie Butter Truffles should be stored in an airtight container in the refrigerator. They will stay fresh and delicious for up to 1-2 weeks. You can also freeze them for longer storage; place them in a single layer on a baking sheet to freeze solid, then transfer to a freezer-safe bag or container for up to 2-3 months. Thaw them in the refrigerator for a few hours or at room temperature for about 15-20 minutes before serving. Reheating is not recommended as they are best enjoyed chilled.
Conclusion
And there you have it – a truly sensational dessert that requires no baking and delivers maximum flavor! These No Bake Biscoff Cookie Butter Truffles are the perfect blend of creamy, crunchy, and spiced sweetness. They are incredibly easy to make, yet impressive enough for any occasion, from casual snacking to elegant entertaining.
So, don’t wait another moment! Gather your ingredients and treat yourself and your loved ones to these delightful truffles. You’ll be amazed at how quickly they disappear. They are a testament to how simple ingredients can create something truly extraordinary.
Whip up a batch today and share the joy! These truffles make wonderful gifts and are sure to be a hit with everyone who tries them. Happy truffle making!


