
Introduction
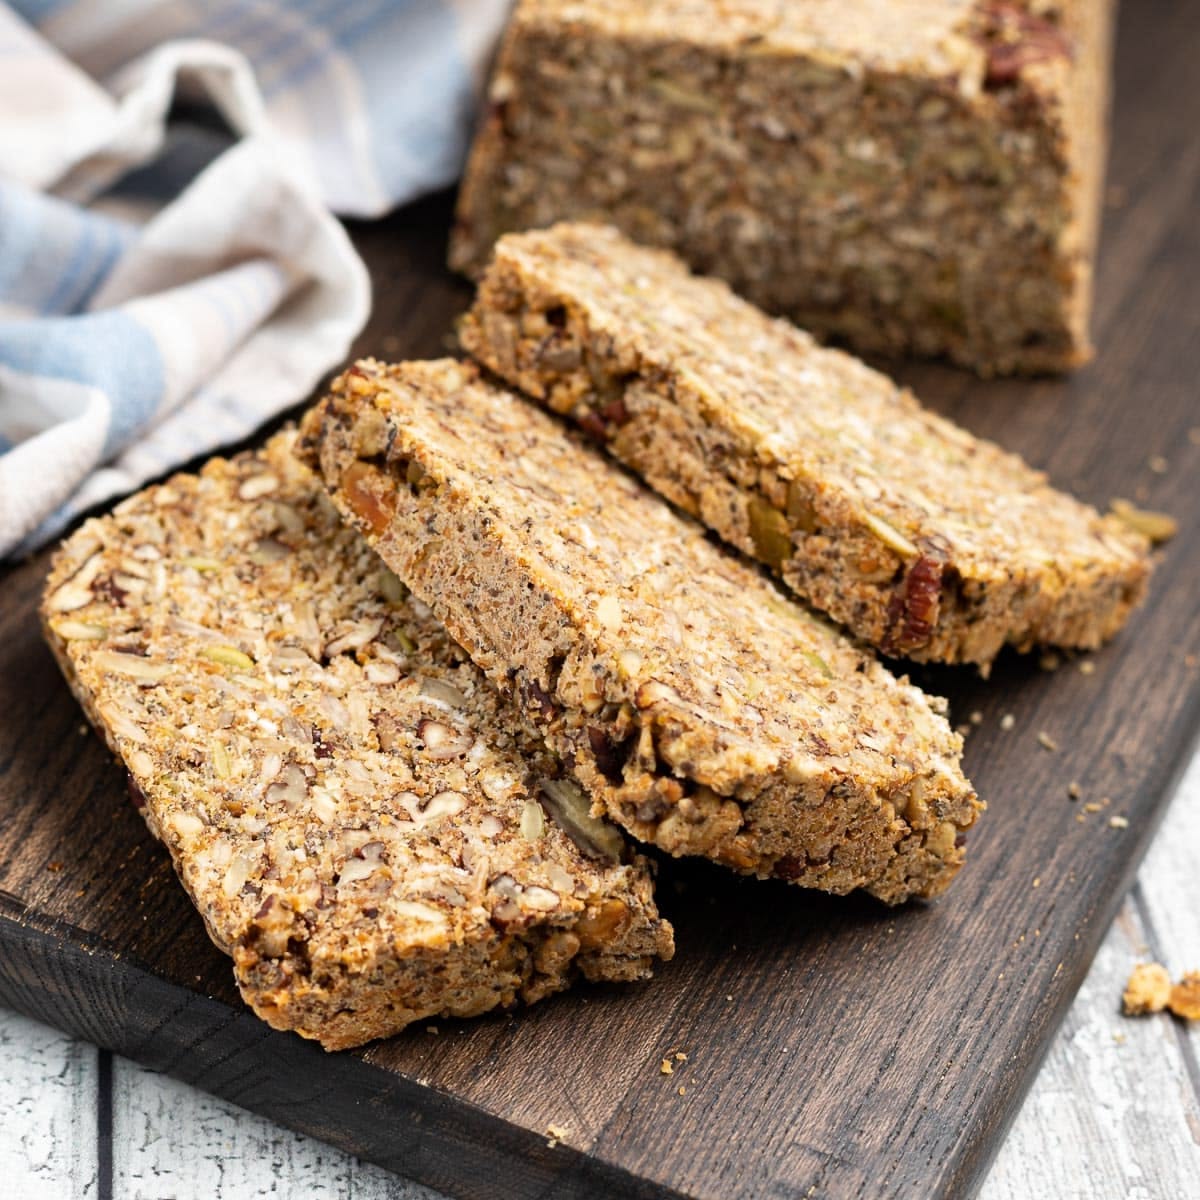
Are you ready to bake a truly amazing loaf of bread? Our Gluten-Free Seeded Bread is a game-changer! It’s wonderfully soft on the inside with a delightful crunch from all the seeds on the outside. This bread is packed with flavor and texture, making it perfect for sandwiches, toast, or just enjoying on its own.
You might think gluten-free bread is tricky, but this recipe makes it simple and straightforward. We’ve designed it to be easy to follow, even if you’re new to baking. With just a few common ingredients and clear steps, you’ll have a beautiful, golden loaf in no time. Forget dense, crumbly gluten-free bread – this one is light, airy, and truly satisfying.
So, why wait? Gather your ingredients and get ready to fill your kitchen with the irresistible aroma of freshly baked bread. This recipe will quickly become a favorite in your home. You’ll be so proud to share this delicious, homemade goodness!
Cooking Time & Prep Time
- Prep Time: 20 minutes
- Rise Time: 60 minutes
- Cooking Time: 50 minutes
- Total Time: 130 minutes
Small tip: Make sure your kitchen is warm during the rise time. A cozy spot helps the dough rise beautifully.
Ingredients
This recipe makes 1 delicious loaf (approximately 12 servings).
- For the Dry Ingredients:
- 2 ½ cups (300g) gluten-free all-purpose flour blend (containing xanthan gum or add ½ tsp separately)
- ½ cup (50g) psyllium husk powder
- ¼ cup (30g) sunflower seeds
- ¼ cup (30g) pumpkin seeds
- 2 tablespoons chia seeds
- 2 tablespoons flaxseeds (whole or ground)
- 1 ½ teaspoons instant yeast
- 1 teaspoon salt
- 1 tablespoon granulated sugar (or honey)
- For the Wet Ingredients:
- 2 cups (480ml) warm water (around 105-115°F / 40-46°C)
- 2 tablespoons olive oil, plus extra for greasing
- 1 tablespoon apple cider vinegar
- For the Topping:
- 1 tablespoon sesame seeds
- 1 tablespoon poppy seeds
- 1 tablespoon extra sunflower seeds
Step-by-Step Instructions
Step 1: Prepare Your Loaf Pan
First, lightly grease a standard 9×5 inch (23×13 cm) loaf pan with olive oil. You can also line it with parchment paper for easier removal. This ensures your beautiful bread won’t stick.
Small tip: If using parchment paper, leave some overhang on the sides to create “handles” for lifting the baked loaf out.
Step 2: Combine Dry Ingredients
In a large mixing bowl, whisk together the gluten-free flour blend, psyllium husk powder, sunflower seeds, pumpkin seeds, chia seeds, flaxseeds, instant yeast, salt, and sugar. Make sure everything is well combined. This distributes all the flavors and rising agents evenly.
Step 3: Mix Wet Ingredients
In a separate medium bowl or a large measuring cup, combine the warm water, olive oil, and apple cider vinegar. Stir gently to mix. The water should be warm, not hot, to activate the yeast without killing it.
Small tip: Use a kitchen thermometer to check the water temperature. It should feel like a warm bath.
Step 4: Combine Wet and Dry Mixtures
Pour the wet ingredients into the dry ingredients. Use a sturdy spoon or a stand mixer with a paddle attachment to mix everything together. Mix until a thick, sticky dough forms and there are no dry spots. This might take 3-5 minutes of mixing.
Small tip: Gluten-free dough is often stickier than traditional dough. Don’t worry, this is normal!
Step 5: Transfer to Loaf Pan
Scrape the dough into your prepared loaf pan. Use a wet spatula or the back of a wet spoon to smooth out the top evenly. This creates a nice, uniform shape for your bread.
Step 6: Add Topping Seeds
Sprinkle the sesame seeds, poppy seeds, and extra sunflower seeds generously over the top of the dough. Gently press them down slightly with your wet hand or spatula. This helps them adhere during baking.
Step 7: First Rise
Cover the loaf pan loosely with a clean kitchen towel or plastic wrap. Place it in a warm, draft-free spot for 60 minutes. The dough should rise noticeably, though it won’t double in size like traditional bread.
Small tip: A slightly warm oven (turned off) or a sunny spot on your counter works great for rising.
Step 8: Preheat Oven
After about 45 minutes of the rise time, preheat your oven to 375°F (190°C). This gives the oven plenty of time to reach the correct temperature. A fully preheated oven is crucial for proper baking.
Step 9: Bake the Bread
Bake the bread in the preheated oven for 50 minutes. The crust should be golden brown and firm to the touch. If it starts to brown too quickly, you can loosely tent it with foil for the last 10-15 minutes.
Small tip: To check for doneness, tap the bottom of the loaf. It should sound hollow. An internal temperature of 200-210°F (93-99°C) is ideal.
Step 10: Cool Completely
Once baked, carefully remove the bread from the oven. Let it cool in the loaf pan for 10-15 minutes, then transfer it to a wire rack to cool completely. This step is very important for the texture of gluten-free bread.
Small tip: Slicing warm gluten-free bread can make it gummy. Patience is key for the best texture!
Tips & Variations
- Gluten-Free Flour Blend: For best results, use a high-quality gluten-free all-purpose flour blend that is designed for baking. Look for blends containing a mix of rice flour, tapioca starch, and potato starch.
- Vegan Option: This recipe is already naturally vegan! All ingredients are plant-based. Enjoy!
- Add More Protein/Fiber: Boost the protein and fiber by adding 2 tablespoons of hemp seeds to the dry ingredients, or stir in ¼ cup of cooked and cooled quinoa to the dough.
- Herbaceous Twist: For an aromatic bread, add 1-2 teaspoons of dried herbs like rosemary, thyme, or oregano to the dry ingredients. They will infuse the bread with lovely flavor.
- Sweet & Savory: For a slightly sweeter bread that pairs well with jam, increase the sugar to 2 tablespoons and add ¼ cup of dried cranberries or raisins to the dough.
Nutritional Information
Approximate values per serving (based on 12 servings):
- Calories: 210 kcal
- Protein: 6g
- Carbohydrates: 35g
- Fat: 6g
Note: Nutritional values may vary depending on specific brands and exact amounts of ingredients used.
Health Benefits
This Gluten-Free Seeded Bread is not just delicious; it’s also packed with wonderful health benefits! Many of the ingredients contribute to a nutritious diet.
The variety of seeds in this bread are a powerhouse of nutrition. Flaxseeds and chia seeds are excellent sources of Omega-3 fatty acids, which are important for heart health and reducing inflammation. They also provide a good amount of dietary fiber, aiding digestion and promoting a feeling of fullness.
Sunflower and pumpkin seeds add even more goodness. They are rich in healthy fats, protein, and various vitamins and minerals. Think Vitamin E, magnesium, zinc, and selenium – all crucial for immune function, bone health, and antioxidant protection.
Psyllium husk powder, a key ingredient for the structure of gluten-free bread, is pure soluble fiber. It’s fantastic for digestive health, helping to regulate blood sugar levels and lower cholesterol. This bread helps you get those essential fibers without even thinking about it!
Choosing a gluten-free option is beneficial for those with celiac disease or gluten sensitivity. It allows them to enjoy delicious bread without the discomfort or health issues associated with gluten. This recipe ensures everyone can enjoy a hearty, satisfying slice.
Serving Suggestions
- Enjoy a slice toasted with avocado and a sprinkle of chili flakes for a quick breakfast.
- Make hearty sandwiches with your favorite fillings, like roasted vegetables and hummus, or turkey and cheese.
- Serve alongside a warm bowl of soup or a fresh green salad for a complete and satisfying meal.
- Cube leftover bread and toast it to make delicious homemade gluten-free croutons for salads.
Storage Tips
Store your Gluten-Free Seeded Bread in an airtight container at room temperature for up to 3-4 days. For longer storage, slice the cooled bread and freeze it. It freezes beautifully for up to 3 months. To reheat, simply pop a slice directly from the freezer into a toaster or warm it gently in the oven until perfectly crisp and warm.
Conclusion
And there you have it – a magnificent loaf of homemade Gluten-Free Seeded Bread! It’s truly a testament to how delicious and wholesome gluten-free baking can be. The hearty texture, nutty flavor, and satisfying crunch of the seeds make every bite a delight. You’ve created something truly special.
Don’t hesitate to give this recipe a try. You’ll be amazed at how easy it is to achieve such fantastic results right in your own kitchen. The aroma alone will make your home feel extra cozy and inviting.
So, slice it up, share it with your loved ones, and savor every moment. This bread is perfect for sharing at breakfast, lunch, or simply as a comforting snack. Happy baking, and enjoy your wonderful homemade creation!


