
Introduction
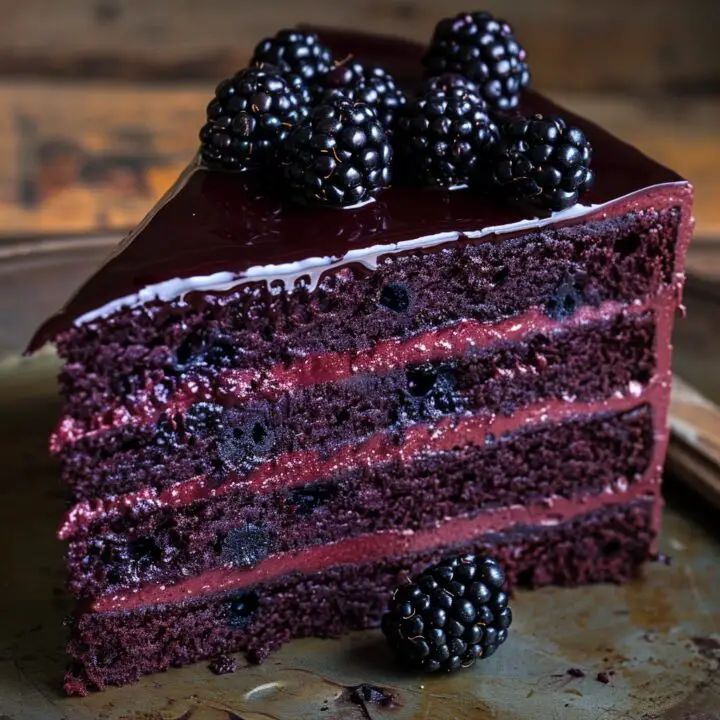
There’s nothing quite like a classic chocolate cake. It’s a timeless dessert that brings joy with every rich, moist bite. This recipe delivers a deeply chocolatey flavor and a wonderfully tender crumb, making it an absolute crowd-pleaser for any occasion.
You might think making a homemade chocolate cake is complicated, but I promise you, it’s not! This recipe uses simple ingredients you likely already have in your pantry. The steps are straightforward and easy to follow, even if you’re new to baking. You’ll be amazed at how quickly you can whip up such a decadent treat.
So, get ready to fill your kitchen with the irresistible aroma of baking chocolate. This cake is perfect for celebrations, a cozy evening in, or simply when you need a sweet pick-me-up. Let’s dive in and create some chocolatey magic together!
Cooking Time & Prep Time
- Prep Time: 25 minutes
- Cooking Time: 30 minutes
- Total Time: 55 minutes
Small tip: Gather all your ingredients and measure them out before you start mixing. This is called “mise en place” and it makes the baking process much smoother and faster!
Ingredients
This recipe makes 12 generous servings.
For the Cake
- 2 cups (250g) all-purpose flour
- 1 ¾ cups (350g) granulated sugar
- ¾ cup (75g) unsweetened cocoa powder
- 1 teaspoon baking soda
- ½ teaspoon baking powder
- 1 teaspoon salt
- 1 cup (240ml) buttermilk, room temperature
- ½ cup (120ml) vegetable oil
- 2 large eggs, room temperature
- 1 teaspoon vanilla extract
- 1 cup (240ml) hot water (or hot brewed coffee for a deeper flavor)
For the Chocolate Frosting
- 1 cup (226g) unsalted butter, softened
- 3 ½ cups (420g) powdered sugar, sifted
- ¾ cup (75g) unsweetened cocoa powder, sifted
- ¼ cup (60ml) whole milk (or heavy cream)
- 1 teaspoon vanilla extract
- Pinch of salt
Step-by-Step Instructions
-
Step 1: Preheat Oven and Prepare Pans
Preheat your oven to 350°F (175°C). Grease and flour two 8-inch round cake pans. You can also line the bottoms with parchment paper for easy removal.
Small tip: Ensuring your pans are well-prepared prevents the cake from sticking and makes for beautiful layers.
-
Step 2: Combine Dry Ingredients
In a large mixing bowl, whisk together the flour, granulated sugar, cocoa powder, baking soda, baking powder, and salt. Make sure there are no lumps and everything is evenly combined.
Small tip: Sifting your dry ingredients, especially cocoa powder, helps prevent lumps in your batter and makes the cake lighter.
-
Step 3: Mix Wet Ingredients (Except Hot Water)
In a separate medium bowl, whisk together the buttermilk, vegetable oil, eggs, and vanilla extract. Ensure these ingredients are at room temperature for a smoother, more emulsified batter.
Small tip: Room temperature ingredients combine better, leading to a more consistent and tender cake texture.
-
Step 4: Combine Wet and Dry Mixtures
Pour the wet ingredients into the dry ingredients. Mix on low speed with an electric mixer, or by hand with a whisk, until just combined. Be careful not to overmix.
Small tip: Overmixing can develop the gluten in the flour too much, leading to a tough, dry cake. Mix until just combined.
-
Step 5: Add Hot Water
Carefully pour the hot water (or coffee) into the batter. Mix on low speed until the batter is smooth and thin. This step is crucial for the cake’s moistness and rich color.
Small tip: The hot liquid helps “bloom” the cocoa powder, intensifying its flavor and color. Don’t skip this!
-
Step 6: Bake the Cakes
Divide the batter evenly between the two prepared cake pans. Bake for 30-35 minutes, or until a wooden skewer inserted into the center comes out clean. The tops should spring back when lightly touched.
Small tip: Avoid opening the oven door too early, especially in the first 20 minutes, as this can cause the cakes to sink.
-
Step 7: Cool the Cakes
Let the cakes cool in their pans on a wire rack for 10-15 minutes. Then, carefully invert them onto the wire rack to cool completely. They must be entirely cool before frosting.
Small tip: Frosting a warm cake will melt the frosting, creating a messy situation. Patience is key here!
-
Step 8: Prepare the Frosting
While the cakes cool, make the frosting. In a large bowl, beat the softened butter with an electric mixer until creamy. Gradually add the sifted powdered sugar and cocoa powder, alternating with the milk, beating until light and fluffy. Stir in the vanilla extract and salt.
Small tip: Sifting the powdered sugar and cocoa powder ensures a smooth, lump-free frosting.
-
Step 9: Assemble and Frost the Cake
Once the cakes are completely cool, place one layer on your serving plate. Spread about a third of the frosting evenly over the top. Place the second cake layer on top and spread the remaining frosting over the top and sides of the cake. Decorate as desired.
Small tip: Use an offset spatula or the back of a spoon for smooth, even frosting application.
Tips & Variations
- Gluten-Free Option: Replace all-purpose flour with a 1:1 gluten-free baking flour blend. Ensure your blend contains xanthan gum, or add ½ teaspoon per cup of flour.
- Vegan/Vegetarian Option: For a vegan version, use unsweetened applesauce (¼ cup per egg) or flax eggs (1 tbsp ground flaxseed + 3 tbsp water per egg) for the eggs. Substitute buttermilk with a dairy-free milk + 1 tbsp vinegar. Use plant-based butter and milk for the frosting.
- Add More Flavor: Incorporate 1/2 cup of mini chocolate chips into the batter for an extra chocolatey punch. A teaspoon of instant espresso powder in the batter will deepen the chocolate flavor without making it taste like coffee.
- Spicy Kick: For a Mexican chocolate cake twist, add ½ teaspoon of ground cinnamon and a pinch of cayenne pepper (¼ teaspoon) to the dry ingredients for a subtle warmth.
- Different Frosting: Instead of classic chocolate buttercream, try a rich chocolate ganache (equal parts hot cream and chopped chocolate poured over the cake) or a tangy cream cheese frosting for a delightful contrast.
Nutritional Information
Approximate values per serving (based on 12 servings):
- Calories: 450 kcal
- Protein: 5g
- Carbohydrates: 65g
- Fat: 20g
Note: Nutritional values may vary depending on specific brands and ingredients used.
Health Benefits
While chocolate cake is certainly a treat, some of its core ingredients offer surprising health benefits when consumed in moderation.
The star ingredient, cocoa powder, is a powerhouse of antioxidants. These compounds, particularly flavonoids, help fight free radicals in the body, which can reduce inflammation and protect cells. Dark cocoa powder is especially rich in these beneficial plant compounds.
Eggs, a fundamental component of this cake, provide high-quality protein, essential for muscle repair and growth. They are also a good source of vitamins D and B12, and choline, which is important for brain health and metabolism.
Milk, used in both the cake and frosting, contributes calcium and vitamin D, crucial for strong bones and teeth. It also offers potassium, which helps maintain healthy blood pressure.
Ultimately, enjoying a delicious homemade treat like chocolate cake can also boost your mental well-being. The joy and satisfaction of baking, and sharing food with loved ones, contribute to a positive mood and reduce stress, making it a healthy indulgence in moderation.
Serving Suggestions
- Serve a slice warm with a scoop of vanilla bean ice cream or a dollop of fresh whipped cream.
- Garnish with fresh raspberries or strawberries for a pop of color and a touch of tartness.
- Enjoy with a hot cup of coffee, tea, or a glass of cold milk for the ultimate comfort experience.
- This cake is perfect as the centerpiece for any birthday celebration, holiday gathering, or just a special weeknight dessert.
Storage Tips
Store leftover chocolate cake in an airtight container at room temperature for up to 3 days, or in the refrigerator for up to 5 days. If refrigerated, allow it to come to room temperature for about 30 minutes before serving for the best texture. You can also freeze individual slices or the whole cake (unfrosted is best, wrapped tightly in plastic wrap and then foil) for up to 2-3 months. Thaw in the refrigerator overnight before serving or frosting.
Conclusion
And there you have it – a truly magnificent homemade chocolate cake! This recipe proves that you don’t need to be a professional baker to create something incredibly delicious and impressive. The rich, deep chocolate flavor and moist texture will make this a recipe you’ll want to revisit again and again.
Baking is a wonderful way to show love and create memories. Don’t hesitate to give this recipe a try. You’ll be so proud of the beautiful and tasty cake you’ve created from scratch.
So go ahead, bake this chocolate cake, share it with your family and friends, and savor every single chocolatey moment. Happy baking!


