
Introduction
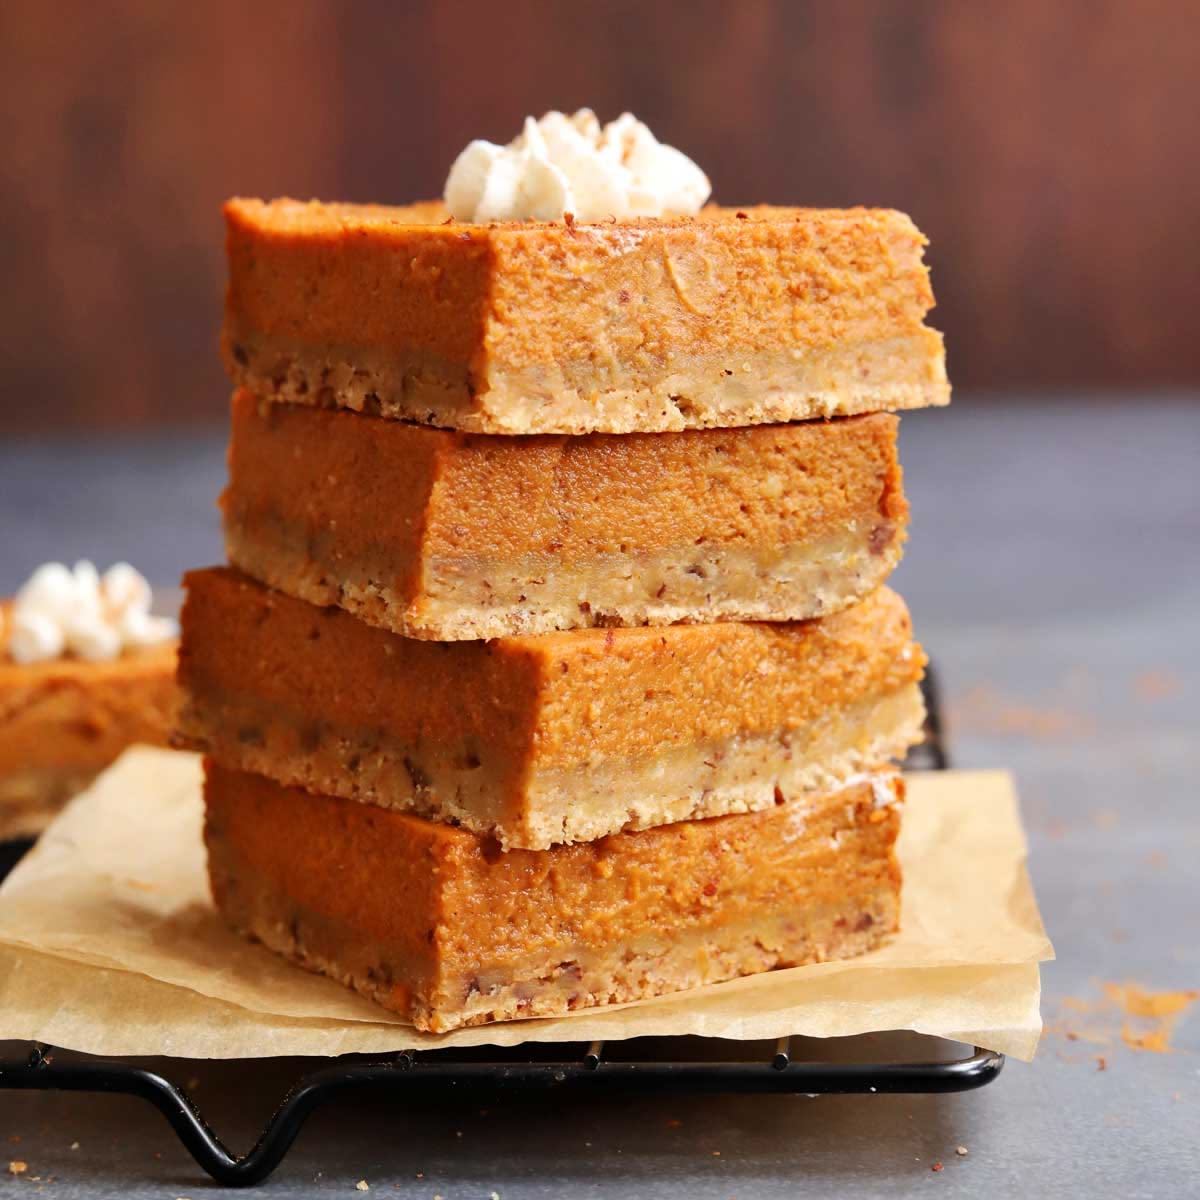
Get ready to fall in love with the most delightful autumn treat: Pumpkin Pie Bars! Imagine all the warm, comforting flavors of classic pumpkin pie, but in an easy-to-serve bar form. These bars feature a buttery, crumbly graham cracker crust topped with a silky-smooth, perfectly spiced pumpkin filling. They are truly a taste of cozy perfection in every bite.
What makes these bars truly special is how incredibly simple they are to whip up. Forget the fuss of traditional pie crusts and intricate baking. Our Pumpkin Pie Bars come together with minimal effort, making them ideal for busy weeknights, holiday gatherings, or whenever a craving for something sweet and seasonal strikes. You’ll be amazed at how quickly you can create such an impressive dessert.
So, if you’re looking for a foolproof recipe that brings joy and deliciousness to your kitchen, you’ve found it! These Pumpkin Pie Bars are guaranteed to become a new favorite. Gather your ingredients, put on your apron, and let’s bake something wonderful together!
Cooking Time & Prep Time
- Prep Time: 20 minutes
- Cooking Time: 50 minutes
- Chilling Time: 2 hours (minimum)
- Total Time: 3 hours 10 minutes (includes chilling)
Small tip: The chilling time is crucial for the bars to set properly, so don’t skip it! You can even make them a day ahead.
Ingredients
This recipe makes 12-16 servings.
For the Graham Cracker Crust:
- 1 ½ cups (about 10-12 full sheets) graham cracker crumbs
- ¼ cup granulated sugar
- ½ cup (1 stick) unsalted butter, melted
For the Pumpkin Filling:
- 1 (15-ounce) can pumpkin puree (not pumpkin pie filling)
- 1 (12-ounce) can evaporated milk
- ¾ cup packed light brown sugar
- 2 large eggs
- 1 teaspoon ground cinnamon
- ½ teaspoon ground ginger
- ¼ teaspoon ground nutmeg
- ⅛ teaspoon ground cloves
- ½ teaspoon salt
- 1 teaspoon vanilla extract
Optional Garnish:
- Whipped cream
- Dusting of cinnamon or nutmeg
Step-by-Step Instructions
-
Step 1: Preheat Oven and Prepare Pan
Preheat your oven to 350°F (175°C). Line a 9×13 inch baking pan with parchment paper, leaving an overhang on the sides. This will make it easy to lift the bars out later.
Small tip: Criss-crossing two pieces of parchment paper works best for easy removal.
-
Step 2: Make the Graham Cracker Crumbs
If you don’t have pre-made crumbs, place graham cracker sheets in a food processor and pulse until fine crumbs form. Alternatively, place them in a zip-top bag and crush with a rolling pin. You want them to be very fine.
Small tip: Finer crumbs make a more cohesive and less crumbly crust.
-
Step 3: Prepare the Crust Mixture
In a medium bowl, combine the graham cracker crumbs and granulated sugar. Pour in the melted butter and stir well with a fork until all the crumbs are moistened and evenly coated. It should resemble wet sand.
Small tip: Ensure every crumb is coated for a sturdy crust.
-
Step 4: Press the Crust into the Pan
Pour the crust mixture into the prepared baking pan. Press it down firmly and evenly across the bottom of the pan. You can use the back of a spoon or the bottom of a flat glass to get a compact, smooth layer.
Small tip: A firm press prevents the crust from falling apart when slicing.
-
Step 5: Bake the Crust
Bake the crust in the preheated oven for 10 minutes. This helps to set the crust and gives it a nice golden color. Remove from the oven and set aside while you prepare the filling.
Small tip: Pre-baking the crust prevents it from becoming soggy once the filling is added.
-
Step 6: Mix the Pumpkin Filling Ingredients
In a large bowl, combine the pumpkin puree, evaporated milk, brown sugar, eggs, cinnamon, ginger, nutmeg, cloves, salt, and vanilla extract. Whisk all the ingredients together until the mixture is completely smooth and well combined. There should be no lumps of brown sugar.
Small tip: Use a large whisk to ensure everything is thoroughly incorporated for a silky filling.
-
Step 7: Pour Filling Over Crust
Carefully pour the pumpkin filling evenly over the warm, pre-baked graham cracker crust in the pan. Gently spread it to the edges if needed. Be careful not to disturb the crust too much.
Small tip: Pour slowly and directly onto the center, letting it spread naturally.
-
Step 8: Bake the Pumpkin Pie Bars
Return the pan to the oven and bake for 40-50 minutes, or until the center of the filling is just set. A knife inserted into the center should come out mostly clean. The edges might be slightly puffed.
Small tip: Avoid over-baking, which can lead to cracks in the filling. The center will firm up as it cools.
-
Step 9: Cool and Chill
Once baked, remove the pan from the oven and let the bars cool completely on a wire rack at room temperature. This will take at least one hour. After cooling, transfer the pan to the refrigerator and chill for a minimum of 2 hours, or preferably overnight, before slicing.
Small tip: Chilling is crucial for clean slices and a perfectly set filling.
-
Step 10: Slice and Serve
Once thoroughly chilled, use the parchment paper overhang to lift the entire slab of bars out of the pan. Place it on a cutting board. Use a sharp knife to cut into 12-16 squares or rectangles. Serve chilled, perhaps with a dollop of whipped cream and a sprinkle of cinnamon.
Small tip: Wipe your knife clean between cuts for the neatest slices.
Tips & Variations
- Gluten-Free Option: Easily make these bars gluten-free by using gluten-free graham crackers for the crust. The filling ingredients are naturally gluten-free.
- Vegan Option: For a delicious vegan version, use a plant-based butter alternative for the crust. For the filling, substitute the eggs with a flax egg (1 tbsp ground flaxseed + 3 tbsp water per egg) and use a plant-based evaporated milk (like coconut or oat evaporated milk).
- Add More Flavor/Texture: Swirl in ½ cup of softened cream cheese into the pumpkin filling for a creamier, cheesecake-like texture. You can also sprinkle chopped pecans or walnuts on top of the filling before baking for added crunch.
- Spicy Version: For a delightful kick, add ¼ teaspoon of cayenne pepper or a pinch of black pepper to the pumpkin filling alongside the other spices. It enhances the warmth without making it overtly spicy.
- Maple Sweetness: Replace half of the brown sugar in the filling with pure maple syrup for a richer, more complex sweetness that pairs wonderfully with pumpkin. Reduce evaporated milk by a tablespoon if adding maple syrup.
Nutritional Information
Approximate values per serving (based on 16 servings):
- Calories: 210 kcal
- Protein: 4g
- Carbohydrates: 30g
- Fat: 9g
Small tip: These values may vary depending on the specific brands and exact amounts of ingredients used.
Health Benefits
Pumpkin Pie Bars, while a treat, do offer some wonderful benefits from their star ingredient, pumpkin!
- Rich in Vitamin A: Pumpkin is an excellent source of beta-carotene, which your body converts into Vitamin A. This vitamin is crucial for healthy vision, immune function, and skin health.
- Good Source of Fiber: Pumpkin contributes dietary fiber, which aids in digestion, helps maintain healthy blood sugar levels, and promotes a feeling of fullness.
- Antioxidant Power: The vibrant orange color of pumpkin comes from powerful antioxidants like beta-carotene, alpha-carotene, and beta-cryptoxanthin. These compounds help protect your cells from damage caused by free radicals.
- Packed with Minerals: Pumpkin contains important minerals such as potassium, which is vital for heart health and maintaining fluid balance, and some iron.
- Beneficial Spices: The spices in the bars, like cinnamon, ginger, and nutmeg, are known for their anti-inflammatory and antioxidant properties, adding an extra layer of goodness.
Serving Suggestions
- Classic Dessert: Serve these bars chilled, topped with a generous dollop of freshly whipped cream or a scoop of vanilla ice cream. A sprinkle of extra cinnamon or a drizzle of caramel sauce elevates them even further.
- Holiday Potluck Perfect: These bars are ideal for holiday gatherings or potlucks. They’re much easier to transport and serve than a whole pie, making cleanup a breeze.
- Coffee Break Treat: Enjoy a square (or two!) with your morning coffee or afternoon tea. The comforting flavors pair beautifully with a warm beverage.
- Meal Prep for Sweet Cravings: Bake a batch on the weekend and portion them out for a delicious, ready-to-go treat throughout the week. They’re perfect for satisfying that sweet tooth in a controlled way.
Storage Tips
Pumpkin Pie Bars should be stored in an airtight container in the refrigerator. They will stay fresh and delicious for up to 3-4 days. For longer storage, you can freeze them! Place individual bars on a baking sheet to freeze solid, then transfer them to a freezer-safe bag or container for up to 2-3 months. Thaw frozen bars in the refrigerator overnight before serving. Reheating is not typically needed or recommended; these bars are best served chilled or at room temperature.
Conclusion
There you have it – a recipe for the most irresistible Pumpkin Pie Bars! They offer all the beloved flavors of autumn in a simple, fuss-free format. With their buttery graham cracker crust and smooth, spiced pumpkin filling, they truly capture the essence of cozy comfort and deliciousness.
Don’t hesitate to try this recipe. It’s incredibly forgiving and delivers fantastic results every time. Whether you’re a seasoned baker or just starting out, these Pumpkin Pie Bars are a perfect project that promises sweet rewards. You’ll love how easy they are to make and how wonderfully they taste.
So go ahead, bake a batch today! Share these delightful Pumpkin Pie Bars with your family and friends, or simply enjoy them all to yourself. They’re sure to bring smiles and warmth to any occasion. Happy baking!


