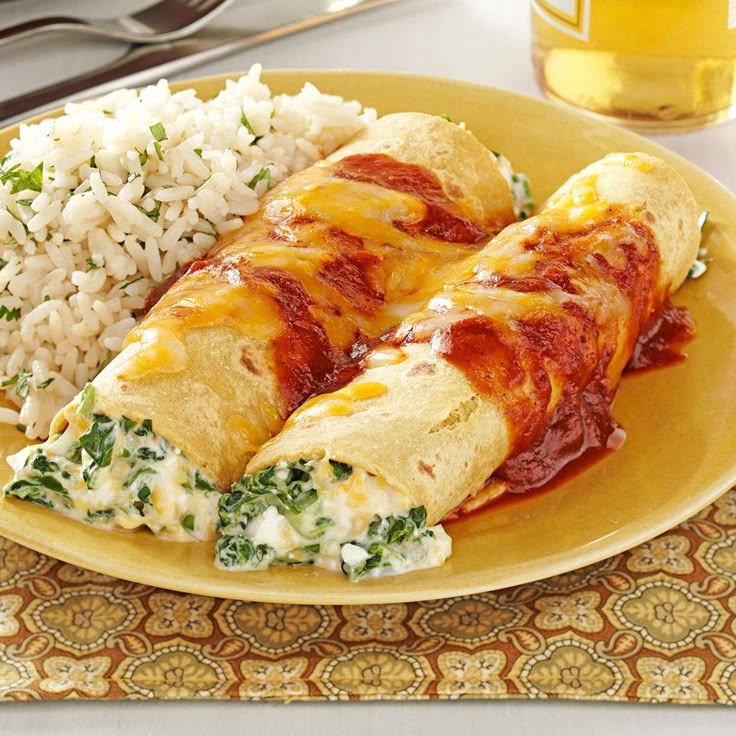
These Spinach Cheese Enchiladas Might Just Be The Best Thing Ive Made All Month

Introduction
Get ready to meet your new favorite weeknight meal! These Spinach Cheese Enchiladas are truly something special. Imagine tender tortillas, generously filled with a creamy, savory blend of fresh spinach and three kinds of cheese, all smothered in a rich enchilada sauce and more melted cheese. It’s comfort food at its absolute finest, packed with flavor that will make your taste buds sing.
What makes this dish even better? It’s surprisingly easy and quick to whip up! We’re talking about simple steps, readily available ingredients, and minimal fuss. Whether you’re a seasoned chef or just starting your cooking journey, you’ll find this recipe incredibly approachable. It’s perfect for those busy evenings when you crave something homemade and hearty but don’t have hours to spend in the kitchen.
So, if you’re looking for a meal that delivers big on taste, is incredibly satisfying, and won’t keep you tied up all evening, then look no further. This recipe is a game-changer. I promise, once you try these Spinach Cheese Enchiladas, they might just become a regular request in your home. Let’s dive in and make some magic!
Cooking Time & Prep Time
- Prep Time: 25 minutes
- Cooking Time: 30 minutes
- Total Time: 55 minutes
Small tip: Reading through the entire recipe before you start will help you get a clear picture of the steps and make the process even smoother!
Ingredients
This recipe makes 6 generous servings.
For the Sauce
- 28 oz (about 3.5 cups) red enchilada sauce (store-bought or homemade)
- 1/2 cup vegetable broth (or chicken broth)
For the Filling
- 1 tbsp olive oil
- 1/2 medium yellow onion, finely chopped
- 2 cloves garlic, minced
- 10 oz fresh spinach, roughly chopped
- 8 oz cream cheese, softened
- 1 cup shredded Monterey Jack cheese
- 1/2 cup shredded sharp cheddar cheese
- 1/2 tsp ground cumin
- 1/4 tsp chili powder
- Salt and freshly ground black pepper to taste
For Assembly
- 12 corn tortillas (6-inch size) or flour tortillas (8-inch size)
- 1 cup shredded Monterey Jack cheese (for topping)
- 1/2 cup shredded sharp cheddar cheese (for topping)
For Garnish (Optional)
- Fresh cilantro, chopped
- Sour cream or Greek yogurt
- Sliced green onions
Step-by-Step Instructions
-
Step 1: Prepare Your Baking Dish and Sauce
Preheat your oven to 375°F (190°C). Lightly grease a 9×13 inch baking dish. In a medium saucepan, combine the enchilada sauce and vegetable broth. Heat over medium-low heat until warm, stirring occasionally. This helps the sauce spread nicely.
Small tip: Warming the sauce makes it easier to work with and ensures even coverage on your enchiladas.
-
Step 2: Sauté Aromatics
In a large skillet, heat the olive oil over medium heat. Add the chopped onion and cook until softened and translucent, about 5-7 minutes. Stir in the minced garlic and cook for another minute until fragrant. Don’t let the garlic burn.
-
Step 3: Cook the Spinach
Add the fresh spinach to the skillet with the onion and garlic. Cook, stirring frequently, until the spinach wilts down completely. This usually takes about 3-5 minutes. Once cooked, remove the skillet from the heat and let it cool slightly.
Small tip: Squeeze out any excess water from the cooked spinach once it’s cool enough to handle. This prevents your enchiladas from becoming watery.
-
Step 4: Create the Creamy Filling
In a large bowl, combine the softened cream cheese, 1 cup Monterey Jack cheese, 1/2 cup cheddar cheese, ground cumin, and chili powder. Add the cooled, squeezed spinach mixture. Mix everything together until well combined and creamy. Season with salt and pepper to taste.
-
Step 5: Prepare the Tortillas
Pour about 1/2 cup of the warm enchilada sauce mixture into a shallow dish. One by one, dip each tortilla into the warm sauce, just enough to soften it slightly. This makes the tortillas pliable and prevents them from cracking when you roll them.
Small tip: Don’t soak the tortillas for too long, or they might become too flimsy and tear easily. A quick dip is all you need.
-
Step 6: Assemble the Enchiladas
Lay a dipped tortilla flat. Spoon about 1/4 to 1/3 cup of the spinach and cheese filling down the center of each tortilla. Roll the tortilla up tightly and place it seam-side down in your prepared baking dish. Repeat with the remaining tortillas and filling, arranging them snugly in the dish.
-
Step 7: Sauce and Cheese Them Up
Pour the remaining enchilada sauce evenly over the rolled enchiladas. Make sure they are all well covered. Sprinkle the remaining 1 cup Monterey Jack cheese and 1/2 cup cheddar cheese generously over the top. This will create a delicious, bubbly, cheesy crust.
-
Step 8: Bake to Golden Perfection
Bake in the preheated oven for 25-30 minutes, or until the sauce is bubbly and the cheese is melted and lightly golden. If you like a crispier top, you can broil for the last 1-2 minutes, but watch it very carefully to prevent burning.
-
Step 9: Garnish and Serve
Remove the enchiladas from the oven and let them rest for 5-10 minutes before serving. This helps the enchiladas set and makes them easier to cut. Garnish with fresh cilantro, green onions, and a dollop of sour cream or Greek yogurt, if desired. Enjoy your amazing meal!
Tips & Variations
- Gluten-Free Option: This recipe is naturally gluten-free if you use corn tortillas. Just double-check your enchilada sauce to ensure it doesn’t contain any hidden gluten.
- Vegan or Vegetarian Option: The recipe is already vegetarian! To make it vegan, use plant-based cream cheese, shredded vegan cheese blends (cheddar and Monterey Jack style), and ensure your enchilada sauce is vegan.
- Add More Vegetables or Protein: Feel free to boost the veggie power! Sautéed mushrooms, diced bell peppers, or corn would be delicious additions to the filling. For extra protein, mix in 1 cup of cooked, shredded chicken, black beans, or pinto beans.
- Spicy Version: For a kick, add a pinch of cayenne pepper or a dash of hot sauce to the filling. You can also use a spicy red enchilada sauce, or finely dice a jalapeño or serrano pepper and sauté it with the onion and garlic.
- Different Cheese Blends: Experiment with your favorite cheeses! Pepper Jack for a bit of spice, Colby Jack for mild creaminess, or a Mexican blend would all work wonderfully in the filling and for topping.
- Make Ahead: Assemble the enchiladas in the baking dish, cover tightly with foil, and refrigerate for up to 24 hours. When ready to bake, add an extra 10-15 minutes to the cooking time to ensure they heat through thoroughly.
Nutritional Information
Approximate values per serving (based on 6 servings):
- Calories: 480 kcal
- Protein: 25g
- Carbohydrates: 40g
- Fat: 26g
Please note: These values are approximate and may vary depending on the specific brands and exact amounts of ingredients used.
Health Benefits
These Spinach Cheese Enchiladas aren’t just delicious; they also pack a nutritional punch thanks to their wonderful ingredients!
Spinach Power: Spinach is a true superfood. It’s an excellent source of Vitamin K, which is crucial for bone health and blood clotting. It also provides a significant amount of Vitamin A, important for vision and immune function, and Vitamin C, a powerful antioxidant. Plus, it’s rich in iron, vital for energy, and magnesium, which supports muscle and nerve function.
Dairy Goodness: The cheese in this dish contributes calcium, which is essential for strong bones and teeth. It also provides high-quality protein, important for muscle repair and growth, and B vitamins, which play a role in energy metabolism. Opting for full-fat dairy provides fat-soluble vitamins like A, D, E, and K.
Garlic and Onion Benefits: These foundational aromatics do more than just add amazing flavor. Garlic is well-known for its immune-boosting properties and contains compounds that may help reduce blood pressure and cholesterol. Onions are rich in antioxidants and prebiotics, which support gut health.
By combining these wholesome ingredients, you get a meal that’s not only incredibly satisfying but also contributes to your overall well-being. It’s a fantastic way to enjoy your vegetables!
Serving Suggestions
- Classic Sides: Serve these enchiladas with a side of fluffy Mexican rice and a simple green salad with a zesty vinaigrette for a complete meal.
- Bean Boost: A bowl of warm refried beans or seasoned black beans makes an excellent accompaniment, adding extra protein and fiber.
- Fresh & Light: For a lighter meal, pair them with a fresh corn and black bean salsa or a vibrant tomato and avocado salad.
- Main Dish Marvel: These enchiladas are hearty enough to be the star of your dinner plate, no need for additional main courses!
Storage Tips
Leftover Spinach Cheese Enchiladas can be stored in an airtight container in the refrigerator for up to 3-4 days. They also freeze beautifully! For best results, allow them to cool completely, then wrap individual servings or the entire dish tightly in plastic wrap and then foil. They can be frozen for up to 2-3 months. To reheat, thaw overnight in the fridge if frozen, then warm in a preheated oven at 350°F (175°C) until heated through, about 20-30 minutes for individual portions, or 30-45 minutes for a full dish (covered with foil to prevent drying out). You can also microwave individual portions until hot.
Conclusion
There you have it – a recipe for Spinach Cheese Enchiladas that truly lives up to its name. It’s creamy, it’s cheesy, it’s packed with fresh flavors, and it delivers that ultimate comfort food hug we all crave. This dish proves that delicious, homemade meals don’t have to be complicated or take hours to prepare.
I truly hope you give this recipe a try. It’s incredibly satisfying and will quickly become a favorite in your kitchen. Imagine the smiles around your dinner table when you serve up these beauties!
So, gather your ingredients, follow these simple steps, and prepare to impress yourself and everyone you share them with. Happy cooking, and enjoy every single delicious bite!


