
Introduction
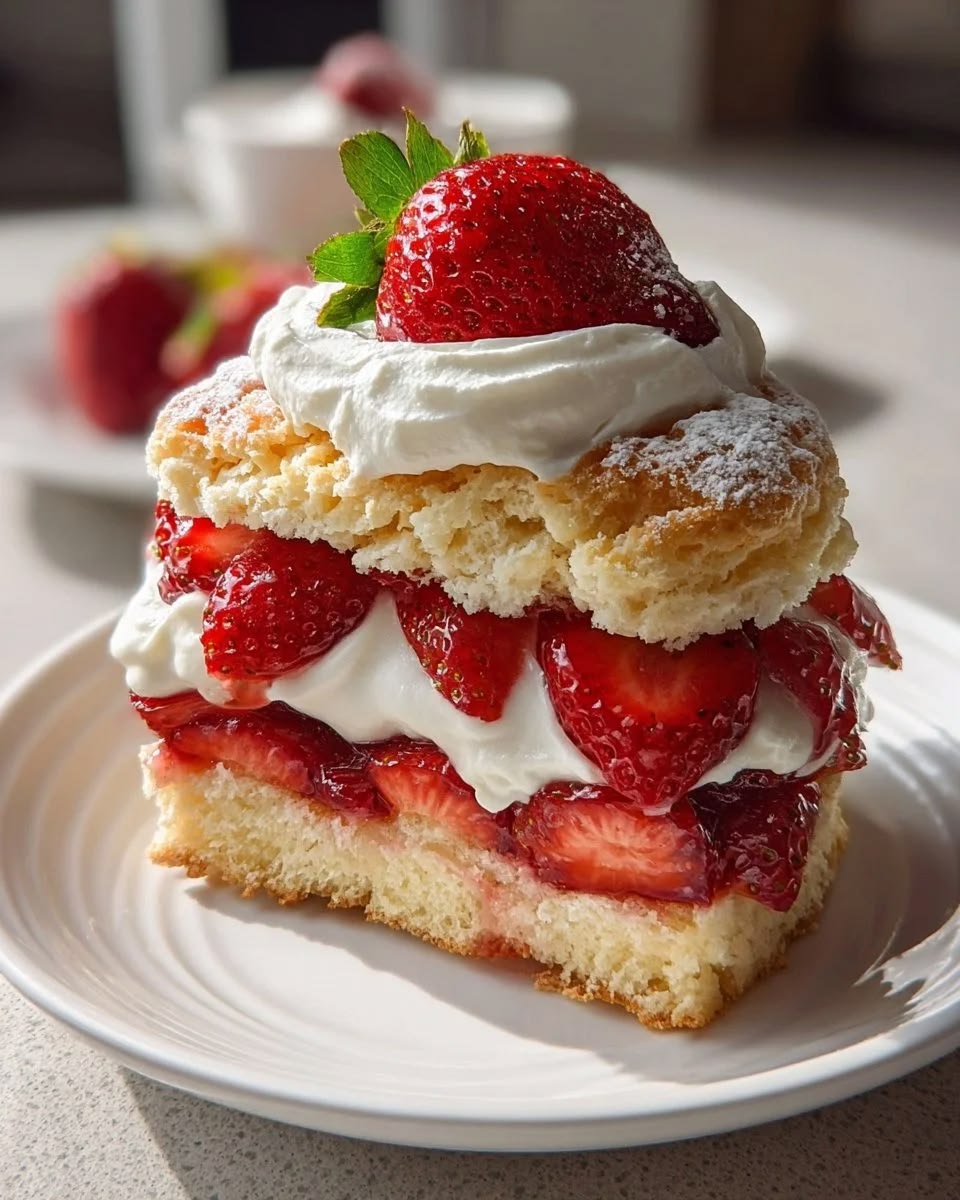
There are few desserts as truly delightful and classic as Strawberry Shortcake. Imagine tender, buttery biscuits, bursting with fresh, sweet strawberries, and topped with a cloud of homemade whipped cream. It’s a symphony of textures and flavors that simply sings of spring and summer, a perfect treat for any occasion.
What makes this dish so special is its incredible freshness and the contrast between the slightly crisp, yet soft shortcake and the juicy fruit. But here’s the best part: it looks fancy, but it’s surprisingly easy and quick to make. You don’t need any special skills or equipment to whip up this dessert. It’s truly a beginner-friendly recipe that delivers big on taste.
So, get ready to impress your family and friends, or simply treat yourself to something truly wonderful. This recipe will guide you through every simple step to create your very own perfect Strawberry Shortcake. You’re going to love it!
Cooking Time & Prep Time
- Prep Time: 25 minutes
- Cooking Time: 15 minutes
- Total Time: 40 minutes
Small tip: You can prepare the strawberries and whip the cream while the shortcakes are baking to save time and ensure everything is fresh.
Ingredients
This recipe makes 8 servings.
For the Shortcakes
- 2 cups (240g) all-purpose flour, plus more for dusting
- 1/4 cup (50g) granulated sugar, plus 1 tablespoon for sprinkling
- 1 tablespoon baking powder
- 1/2 teaspoon salt
- 1/2 cup (113g) unsalted butter, very cold and cut into small cubes
- 3/4 cup (180ml) cold heavy cream, plus more for brushing
- 1 large egg (for egg wash, optional, can use cream instead)
For the Strawberries
- 4 cups (about 1.5 lbs or 680g) fresh strawberries, hulled and sliced
- 1/4 cup (50g) granulated sugar (adjust to your taste and strawberry sweetness)
- 1 teaspoon fresh lemon juice (optional, brightens flavor)
For the Whipped Cream
- 1 1/2 cups (360ml) cold heavy cream
- 1/4 cup (30g) powdered sugar (confectioners’ sugar)
- 1 teaspoon vanilla extract
Step-by-Step Instructions
-
Step 1: Prepare Your Workspace and Oven
Preheat your oven to 425°F (220°C). Line a baking sheet with parchment paper. This will prevent sticking and make cleanup super easy. Get all your ingredients ready and measured out.
Small tip: Having all your ingredients prepped before you start mixing is called “mise en place” and makes baking much smoother.
-
Step 2: Mix Dry Ingredients for Shortcakes
In a large bowl, whisk together the flour, 1/4 cup granulated sugar, baking powder, and salt. Make sure everything is well combined. This ensures an even rise and flavor in your shortcakes.
-
Step 3: Cut in the Cold Butter
Add the very cold, cubed butter to the dry ingredients. Using your fingertips, a pastry blender, or two knives, cut the butter into the flour mixture until it resembles coarse crumbs with some pea-sized pieces of butter remaining. This creates pockets of steam for flaky shortcakes.
Small tip: Work quickly when cutting in the butter to keep it as cold as possible. Warm butter can lead to tough shortcakes.
-
Step 4: Add Cold Heavy Cream
Pour in 3/4 cup of cold heavy cream. Stir with a fork until the dough just comes together. Be careful not to overmix, as this can develop the gluten too much and make your shortcakes tough.
Small tip: The dough will be shaggy and a little sticky, but that’s perfectly normal.
-
Step 5: Form and Cut the Shortcakes
Lightly flour a clean surface. Turn the dough out onto the floured surface and gently knead it a few times, just until it forms a cohesive ball. Pat the dough into a 3/4-inch thick circle or rectangle. Use a 2.5 to 3-inch round cutter (or a knife to cut squares) to cut out 8 shortcakes. Gather any scraps and gently re-pat to cut more shortcakes.
Small tip: Dip your cutter in flour before each cut to prevent sticking and ensure clean edges.
-
Step 6: Bake the Shortcakes
Place the cut shortcakes onto the prepared baking sheet, leaving a little space between each. If desired, lightly brush the tops with a little heavy cream or an egg wash (1 egg whisked with 1 tablespoon water) for a golden finish. Sprinkle the remaining 1 tablespoon of granulated sugar over the tops. Bake for 12-15 minutes, or until golden brown and cooked through.
Small tip: The shortcakes are done when they are golden and sound hollow when tapped on the bottom.
-
Step 7: Prepare the Strawberries
While the shortcakes are baking, combine the sliced strawberries with 1/4 cup granulated sugar and optional lemon juice in a medium bowl. Gently toss them together. Let them sit for at least 10 minutes to macerate; this draws out their juices and creates a lovely syrup.
Small tip: Taste your strawberries first. If they are very sweet, you might need less sugar. If they are tart, you might want a little more.
-
Step 8: Make the Whipped Cream
In a large, chilled bowl (a metal bowl works best), combine the 1 1/2 cups cold heavy cream, powdered sugar, and vanilla extract. Using an electric mixer on medium-high speed, beat until soft peaks form. Be careful not to overbeat, or you’ll end up with butter!
Small tip: Chilling your bowl and beaters in the freezer for 10-15 minutes before whipping cream helps it whip up faster and fluffier.
-
Step 9: Assemble Your Strawberry Shortcakes
Once the shortcakes are out of the oven, let them cool on a wire rack for a few minutes until they are warm, not hot. Carefully slice each shortcake horizontally in half. Place the bottom half on a plate, spoon a generous amount of macerated strawberries over it, top with a dollop of whipped cream, and then place the top half of the shortcake. Add another spoonful of strawberries and a final dollop of whipped cream on top. Serve immediately and enjoy!
Small tip: For an extra touch, garnish with a whole strawberry or a mint leaf.
Tips & Variations
- Gluten-Free Option: Simply swap the all-purpose flour for a 1:1 gluten-free baking flour blend. Ensure your blend contains xanthan gum or add 1/2 teaspoon per cup of flour for best results.
- Vegan/Vegetarian Option: For a vegan version, use a plant-based baking blend for the shortcakes, vegan butter, and a plant-based milk or cream. For the whipped cream, use full-fat canned coconut cream (chilled overnight, scoop out the thick cream only) or a store-bought vegan whipped topping.
- Add More Fruit or Protein: Feel free to mix in other berries like blueberries or raspberries with your strawberries for a mixed berry shortcake. For a little protein boost, sprinkle a few chopped almonds or pistachios over the whipped cream.
- A Zesty Twist: For a subtle spicy kick, add a tiny pinch of freshly ground black pepper to your macerating strawberries. It surprisingly enhances their sweetness! Or, grate some lemon or orange zest into the shortcake dough or the whipped cream for a bright, citrusy flavor.
- Herbal Infusion: Try infusing your whipped cream with fresh mint or basil. Gently bruise a few leaves and let them sit in the cold cream for an hour before whipping, then strain them out. This adds a wonderfully aromatic note.
Nutritional Information
Approximate values per serving (based on 8 servings):
- Calories: 390 kcal
- Protein: 5g
- Carbohydrates: 45g
- Fat: 22g
Please note that nutritional values may vary depending on specific ingredients and brands used.
Health Benefits
Strawberry shortcake, while a delicious treat, also packs some surprising health benefits, especially from its star ingredient: strawberries!
Strawberries are a powerhouse of nutrition. They are incredibly rich in Vitamin C, an essential antioxidant that supports your immune system and promotes healthy skin. Just one serving can provide more than your daily recommended intake!
Beyond Vitamin C, these vibrant red berries contain powerful antioxidants called anthocyanins, which give them their beautiful color. These compounds help fight inflammation and protect your cells from damage, contributing to overall health.
Strawberries are also a good source of fiber. Fiber is crucial for digestive health, helping to keep things moving smoothly and contributing to a feeling of fullness. This can be beneficial for managing blood sugar levels too.
While the shortcake and cream add richness, the fresh fruit brings essential vitamins, minerals, and plant compounds to this delightful dessert. It’s a sweet way to enjoy some goodness!
Serving Suggestions
- Classic Dessert: Serve warm, freshly assembled shortcakes as a delightful after-dinner treat. They are perfect on their own!
- Brunch Delight: Offer smaller shortcakes as part of a decadent brunch spread, perhaps alongside a fruit salad or quiche.
- Potluck Favorite: Bring the shortcake biscuits, macerated strawberries, and whipped cream separately to a gathering. Guests can assemble their own, ensuring freshness and fun!
- Coffee or Tea Companion: Enjoy a simple shortcake with a cup of hot coffee or iced tea for an afternoon pick-me-up.
Storage Tips
Strawberry shortcake is best enjoyed fresh. However, you can store the individual components separately. Unassembled shortcake biscuits can be stored in an airtight container at room temperature for up to 2 days. Macerated strawberries should be stored in an airtight container in the refrigerator for up to 2 days. Whipped cream should be stored in an airtight container in the refrigerator for up to 1 day. Do not store assembled shortcakes as they will become soggy. Shortcake biscuits can be frozen for up to 1 month; thaw at room temperature before serving. Reheat biscuits gently in a toaster oven or microwave for a few seconds if desired.
Conclusion
There you have it – your very own guide to creating the most incredible Strawberry Shortcake! It’s such a comforting and elegant dessert, yet incredibly straightforward to prepare. The combination of the tender, buttery shortcake, the sweet, juicy strawberries, and the light, fluffy whipped cream is truly irresistible.
Don’t be shy about trying this recipe. It’s a wonderful way to enjoy the simple pleasures of baking and the incredible flavors of fresh, seasonal ingredients. You’ll be amazed at how quickly you can create something so delicious and beautiful.
So, gather your ingredients, follow these easy steps, and get ready to share this delightful treat with your loved ones. It’s perfect for celebrations, casual get-togethers, or simply as a special treat for yourself. Happy baking!


