
Introduction
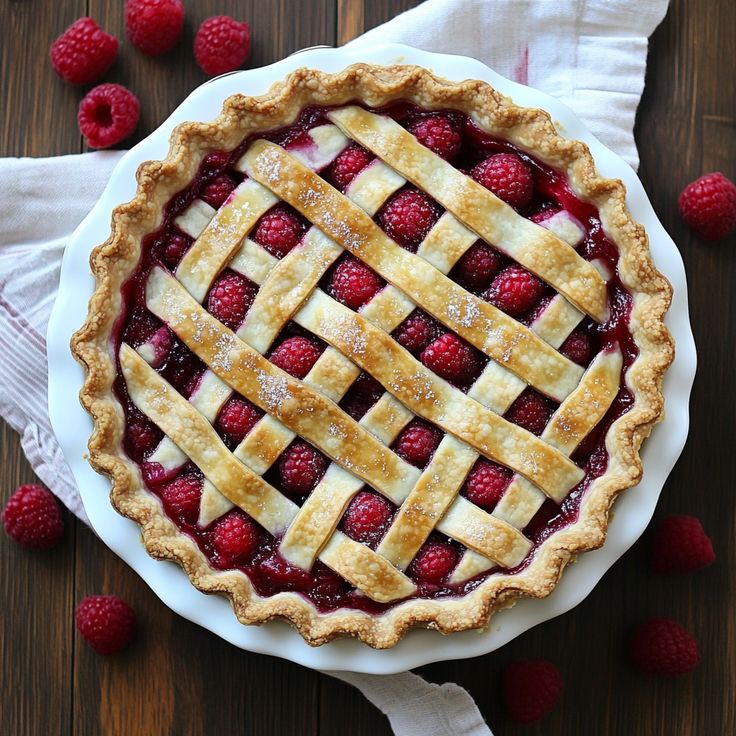
There’s nothing quite like a homemade Raspberry Pie. It’s a true celebration of summer, bursting with bright, sweet-tart flavor. Imagine golden, flaky crust giving way to a warm, juicy filling of tender raspberries. This pie is a delightful treat that brings a smile to everyone’s face, perfect for any occasion.
You might think making pie from scratch is a big undertaking, but I promise you, this recipe is surprisingly simple. With a few key ingredients and easy-to-follow steps, you’ll have a gorgeous, delicious pie cooling on your counter in no time. We’re keeping things straightforward so even beginner bakers can achieve a stunning result.
So, get ready to fill your kitchen with the most wonderful aroma. This Raspberry Pie is not just a dessert; it’s an experience. Let’s dive in and create some delicious memories together. You’re going to love how easy and rewarding this recipe is!
Cooking Time & Prep Time
Prep Time: 35 minutes
Cooking Time: 50 minutes
Total Time: 85 minutes
Small tip: To save a little time, you can prepare your pie crust dough the day before and keep it chilled in the refrigerator. This makes assembly even quicker!
Ingredients
This recipe makes 8 generous servings.
For the Pie Crust (or use 2 store-bought pie crusts)
- 2 ½ cups all-purpose flour, plus more for dusting
- 1 teaspoon salt
- 1 cup (2 sticks) unsalted butter, very cold and cut into ½-inch cubes
- ½ cup ice water, plus more if needed
For the Raspberry Filling
- 6 cups fresh or frozen raspberries (do not thaw if using frozen)
- ¾ cup granulated sugar (adjust to taste, depending on raspberry sweetness)
- ¼ cup cornstarch (or ¼ cup all-purpose flour for a slightly less clear filling)
- 1 tablespoon fresh lemon juice
- ½ teaspoon almond extract (optional, but highly recommended!)
- ¼ teaspoon salt
- 2 tablespoons unsalted butter, cut into small pieces
For the Egg Wash & Topping
- 1 large egg, lightly beaten
- 1 tablespoon milk or water
- 1 tablespoon turbinado sugar (for sprinkling, optional)
Step-by-Step Instructions
-
Step 1: Prepare the Pie Crust
If making your own crust, combine flour and salt in a large bowl. Add the cold butter cubes and cut them into the flour using a pastry blender or your fingertips until the mixture resembles coarse crumbs with some pea-sized butter pieces. Gradually add ice water, one tablespoon at a time, mixing until the dough just comes together. Be careful not to overmix.
Small tip: Overworking the dough makes it tough. Mix just until it forms a ball. Divide the dough in half, flatten each half into a disc, wrap in plastic, and chill for at least 30 minutes in the refrigerator. This resting period helps the gluten relax, making the dough easier to roll.
-
Step 2: Preheat Oven and Roll Out Crusts
Preheat your oven to 400°F (200°C). On a lightly floured surface, roll out one disc of chilled pie dough (or one store-bought crust) into a 12-inch circle. Carefully transfer it to a 9-inch pie plate. Trim the edges, leaving about a ½-inch overhang. Place the pie plate with the bottom crust in the refrigerator while you prepare the filling.
Small tip: For easy transfer, roll the dough around your rolling pin and unroll it over the pie plate.
-
Step 3: Prepare the Raspberry Filling
In a large bowl, gently combine the raspberries, granulated sugar, cornstarch (or flour), lemon juice, almond extract (if using), and salt. Toss everything together carefully so you don’t crush the berries too much. The cornstarch will help thicken the filling as it bakes.
Small tip: If using frozen raspberries, do not thaw them beforehand. They will release their juices as they bake, and the cornstarch will handle the thickening.
-
Step 4: Assemble the Pie
Pour the raspberry filling into the chilled pie crust. Distribute the small pieces of butter evenly over the top of the filling. This butter will melt and add richness to the pie.
Small tip: The butter dots help prevent the filling from bubbling over too much and add a lovely buttery flavor.
-
Step 5: Add the Top Crust
Roll out the second disc of pie dough (or the second store-bought crust) into another 12-inch circle. Place it over the filling. Trim the top crust, leaving about a ½-inch overhang. Crimp the edges of both crusts together to seal the pie. You can do this with a fork or by pinching the dough with your fingers.
Small tip: For a beautiful finish, use a sharp knife to cut several slits or a decorative pattern on the top crust. These vents allow steam to escape during baking, preventing the crust from getting soggy.
-
Step 6: Egg Wash and Bake
In a small bowl, whisk together the beaten egg and milk (or water) to create an egg wash. Brush this mixture lightly over the top crust. If desired, sprinkle the turbinado sugar over the egg wash for a beautiful, sparkling finish and extra crunch. Place the pie on a baking sheet to catch any potential drips.
Bake at 400°F (200°C) for 15 minutes. Then, reduce the oven temperature to 375°F (190°C) and continue baking for another 35-45 minutes, or until the crust is golden brown and the filling is bubbly. If the crust starts to brown too quickly, loosely cover the edges with aluminum foil.
Small tip: Look for the filling to be actively bubbling in the center through the vents. This means the cornstarch has activated and the pie is cooked through.
-
Step 7: Cool Completely
Once baked, carefully remove the pie from the oven and place it on a wire rack to cool completely. This is a very important step! The pie needs to cool for at least 3-4 hours, or even longer, for the filling to set properly. Slicing too early will result in a runny pie.
Small tip: Patience is key here! A properly cooled pie will have a firm, delicious filling that holds its shape when sliced.
Tips & Variations
- Gluten-Free Option: Easily make this pie gluten-free by using your favorite gluten-free pie crust recipe or a good quality store-bought gluten-free pie crust. The filling ingredients are naturally gluten-free.
- Vegan Option: For a delicious vegan raspberry pie, use a vegan pie crust (many store-bought options are available, or make your own with vegetable shortening or vegan butter). Substitute the unsalted butter in the filling with vegan butter. For the egg wash, brush the crust with plant-based milk (like almond or soy milk) mixed with a little maple syrup or sugar for a golden shine.
- Add More Fruit & Fiber: While not a “vegetable” in the traditional sense for a pie, you can add chopped rhubarb (a vegetable!) to the filling for a lovely tart counterpoint. A 50/50 mix of raspberries and rhubarb is fantastic. For more fiber, consider making your crust with a portion of whole wheat flour, or adding a sprinkle of rolled oats to the filling (they’ll absorb some moisture and add texture).
- Spicy Twist: For a subtle warmth, add a tiny pinch (about ⅛ teaspoon) of freshly ground black pepper or ground ginger to the raspberry filling. These spices won’t make it “spicy” hot, but they will enhance the fruit’s natural sweetness and add a sophisticated depth of flavor.
- Mixed Berry Delight: Don’t limit yourself to just raspberries! Feel free to use a combination of raspberries, blueberries, blackberries, and sliced strawberries for a vibrant mixed berry pie. Adjust sugar slightly based on the sweetness of your chosen berries.
Nutritional Information
Approximate values per serving (based on 8 servings):
- Calories: 410 kcal
- Protein: 4g
- Carbohydrates: 55g
- Fat: 20g
Please note: These values are approximate and may vary depending on the specific brands and exact amounts of ingredients used. Homemade crusts and the type of sugar can also influence the final nutritional content.
Health Benefits
This Raspberry Pie isn’t just a treat for your taste buds; it also packs some surprising health benefits, thanks to its star ingredient!
Raspberries are little powerhouses of nutrition. They are incredibly rich in antioxidants, which are compounds that help protect your body’s cells from damage caused by free radicals. This can contribute to overall health and may reduce the risk of chronic diseases.
These vibrant berries are also an excellent source of dietary fiber. Fiber is crucial for digestive health, helping to keep things moving smoothly and promoting a feeling of fullness. A single serving of raspberries can provide a significant portion of your daily fiber needs.
Furthermore, raspberries are packed with essential vitamins and minerals. They are particularly high in Vitamin C, which is vital for immune function and skin health, and Manganese, a mineral important for bone health and metabolism. Enjoying a slice of this pie means you’re getting a delicious dose of these beneficial nutrients.
While pie is a dessert, incorporating fruits like raspberries means you’re still getting natural goodness. The natural sweetness of the berries, combined with their beneficial compounds, makes this a more wholesome indulgence than many other sweet treats.
Serving Suggestions
- Classic A La Mode: Serve a warm slice of Raspberry Pie with a scoop of vanilla bean ice cream. The cold, creamy ice cream perfectly complements the warm, tart pie.
- Whipped Cream Dream: A generous dollop of freshly whipped cream is another fantastic accompaniment, adding a light, airy texture and richness.
- Simple & Perfect: Sometimes, the pie is perfect all on its own. Enjoy it plain, perhaps with a cup of hot tea or coffee for a cozy treat.
- Dessert Delight: This Raspberry Pie is designed to be a show-stopping dessert. It’s too sweet to be a main dish, but it’s the perfect sweet ending to any meal, from a casual family dinner to a special holiday gathering.
Storage Tips
Leftover Raspberry Pie can be stored at room temperature for up to 2 days, or in the refrigerator for up to 3-4 days. Make sure it’s covered loosely with plastic wrap or aluminum foil to prevent it from drying out. For longer storage, you can freeze individual slices or the whole pie (after it has cooled completely) for up to 3 months. Wrap it tightly in plastic wrap, then in aluminum foil. To reheat, thaw frozen pie in the refrigerator overnight, then warm slices in a preheated oven at 300°F (150°C) for 15-20 minutes, or until warmed through. You can also microwave individual slices for a quick warm-up, but the crust won’t be as crisp.
Conclusion
And there you have it – a truly magnificent Raspberry Pie, made right in your own kitchen! This recipe proves that creating a stunning,


